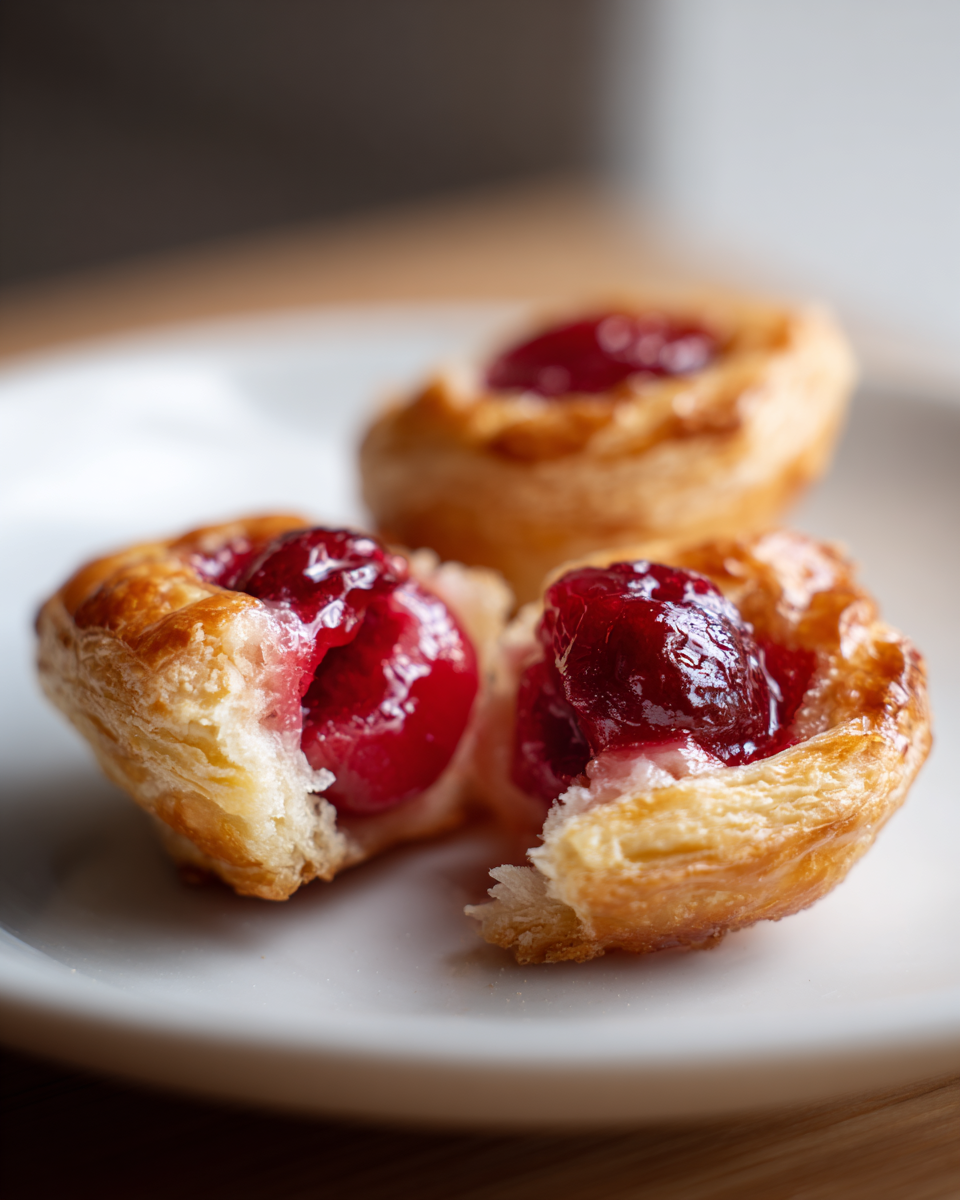
Let me tell you about the moment I fell head over heels for mini cherry pie bites. It was my niece’s birthday party, and I needed a dessert that would disappear fast (because kids) but still impress the adults. These adorable little pies saved the day! They’re everything you love about cherry pie – that sweet-tart filling, the flaky crust – but in perfect bite-sized packages. No plates needed, no messy slices, just pure cherry pie happiness you can pop straight into your mouth.

Table of Contents
Table of Contents
Why You’ll Love These Mini Cherry Pie Bites
What makes them truly magical? You can whip up a batch in about 30 minutes with simple ingredients you probably already have. My first attempt was a bit messy (flour everywhere!), but even lopsided, they were devoured instantly. Now they’re my go-to for last-minute potlucks, holiday parties, or just when I need a little sweet treat without committing to a whole pie.
Let me count the ways these adorable little treats will steal your heart (and probably disappear from your dessert table faster than you can say “seconds please!”). First off, mini cherry pie bites are:
- Quick as a wink – From mixing bowl to mouth in under 45 minutes
- Party perfect – No plates or forks needed, just grab-and-go deliciousness
- Totally customizable – Swap cherry filling for apple or blueberry if you’re feeling wild
- Beginner-friendly – Even my flour-covered first attempt turned out edible (and delicious!)
- Portable happiness – Toss ’em in lunchboxes or picnic baskets without a crumb of worry
Honestly, the hardest part about these mini cherry pie bites? Not eating them all yourself before your guests arrive!
Ingredients for Mini Cherry Pie Bites
Grab these simple ingredients and let’s make some magic happen! I’ve split everything into two parts – the buttery crust that makes these mini cherry pie bites irresistible, and that gorgeous ruby-red filling that’ll have everyone coming back for thirds.
For the Dough:
- 1 cup all-purpose flour (sifted) – Sifting makes the crust extra light and flaky
- 1/2 tsp salt – Just enough to balance the sweetness
- 1/3 cup cold butter (cubed, 1/2-inch pieces) – Straight from the fridge is best!
- 3-4 tbsp ice water – Start with 3 and add more if needed
For the Filling:
- 1 cup cherry pie filling – The star of our show!
- 1 tbsp sugar (optional) – I add this if my cherries are extra tart
Ingredient Notes & Substitutions
Let me share all my little secrets about these ingredients – because trust me, I’ve made every possible mistake so you don’t have to!
That cold butter is non-negotiable for me – it’s what creates those perfect flaky layers when the steam from melting butter puffs up the dough. But if you’re dairy-free, coconut oil works surprisingly well (just freeze it first!).
For gluten-free friends, I’ve had great success with 1-to-1 gluten-free flour – the texture comes out slightly more delicate, but still delicious. And about that pie filling? While homemade is amazing (I’ll share my quick stovetop version another day), no shame in using canned – just drain off some of the extra syrup if it looks too runny.
Oh, and that optional sugar? I always taste my filling first – sometimes those canned cherries can be plenty sweet already. But if I’m using fresh cherries that I’ve cooked down myself? You bet I’m adding that extra tablespoon!

How to Make Mini Cherry Pie Bites
Alright, let’s get these delightful mini cherry pie bites into your oven (and eventually, your mouth)! I promise it’s easier than you think, especially once you get the hang of working with the dough. Just follow these steps, and you’ll be the hero of your next gathering in no time.
- Preheat that oven! Crank it up to 375°F (190°C) – trust me, a properly hot oven makes all the difference for that perfect golden crust.
- Mix your dry ingredients – Whisk together the flour and salt in a medium bowl. I like to do this right on my counter sometimes – makes me feel like a real pastry chef!
- Cut in the butter – Here’s where the magic starts. Use a pastry cutter (or two forks if you’re like me and can never find yours when needed) to work that cold butter into the flour until it looks like coarse crumbs with some pea-sized butter bits remaining.
- Add the water – Start with 3 tablespoons of ice water, sprinkling it over the mixture while gently tossing with a fork. The dough should just hold together when pinched – add more water a teaspoon at a time if needed.
- Roll it out – Lightly flour your surface and rolling pin (I learned the hard way this step isn’t optional!), then roll the dough to about 1/8-inch thickness.
- Cut your circles – A 2-inch round cutter works perfectly, but a small glass works in a pinch! Re-roll the scraps until you’ve got about 24 circles.
- Press into the pan – Gently fit each circle into the cups of a mini muffin tin. No need to grease – the butter in the dough handles that!
- Fill ’em up! Spoon about 1 teaspoon of cherry filling into each cup – don’t overfill or you’ll have sticky situations (literally).
- Bake to perfection – 15-18 minutes does the trick. You’ll know they’re ready when your kitchen smells heavenly and the edges turn golden brown.
- Cool before serving – I know it’s tempting, but give them 5 minutes to set in the pan before transferring to a rack. Hot cherry filling burns are no joke!
Shaping and Baking Tips
Here’s where I share all my hard-earned wisdom to make sure your mini cherry pie bites turn out picture-perfect every time!
First, keep that work surface floured – but not too much! A light dusting prevents sticking, but too much flour makes the dough tough. If the dough gets sticky while you’re working, pop it in the fridge for 10 minutes – cold dough is much easier to handle.
When pressing the dough into the muffin tin, don’t stress about making it perfectly even. I like to use my fingers to gently press the dough up the sides just a bit – this creates little “walls” that hold the filling beautifully.
The baking visual cues are your best friends. At around 12 minutes, start peeking – you’re looking for that golden color creeping up the edges. If some spots are browning faster than others, just rotate the pan. And that little bubble of cherry goodness in the center? That’s totally normal and part of the charm!
Pro tip: Let them cool in the pan for a few minutes before removing – they firm up just enough to pop out cleanly with a small spoon or butter knife. If one or two stick? No worries, those are the chef’s treats!
Print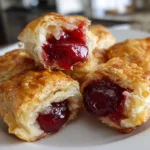
30-Minute Mini Cherry Pie Bites That Steal Hearts Fast
- Prep Time: 15 minutes
- Cook Time: 18 minutes
- Total Time: 33 minutes
- Yield: 24 mini pies 1x
- Category: Dessert
- Method: Baking
- Cuisine: American
- Diet: Vegetarian
Description
Easy-to-make mini cherry pie bites perfect for any occasion.
Ingredients
- 1 cup all-purpose flour
- 1/2 tsp salt
- 1/3 cup cold butter, cubed
- 3–4 tbsp ice water
- 1 cup cherry pie filling
- 1 tbsp sugar (optional)
Instructions
- Preheat oven to 375°F (190°C).
- Mix flour and salt in a bowl.
- Cut in butter until mixture resembles coarse crumbs.
- Add water, 1 tbsp at a time, until dough forms.
- Roll out dough and cut into small circles.
- Press circles into mini muffin tin.
- Fill each with 1 tsp cherry pie filling.
- Bake for 15-18 minutes until golden.
- Cool before serving.
Notes
- Use store-bought pie dough for a quicker option.
- Dust your work surface with flour to prevent sticking.
- Chill the dough for 30 minutes for easier handling.
Nutrition
- Serving Size: 1 mini pie
- Calories: 80
- Sugar: 6g
- Sodium: 60mg
- Fat: 4g
- Saturated Fat: 2.5g
- Unsaturated Fat: 1g
- Trans Fat: 0g
- Carbohydrates: 10g
- Fiber: 0g
- Protein: 1g
- Cholesterol: 10mg
Equipment You’ll Need
Gathering your tools before starting is my secret to stress-free baking! Here’s what you’ll need to make those perfect mini cherry pie bites – and trust me, most of these are probably already in your kitchen.
Essential Tools:
- Mini muffin tin – The star of the show! Standard size (24-cup) works best for these little pies
- Rolling pin – My grandmother’s wooden one is my favorite, but any will do
- 2-inch round cutter – Or get creative with a small glass or cookie cutter
Nice-to-Have Extras:
- Pastry cutter – Though two forks work just fine for cutting in butter
- Pastry brush – For that optional egg wash shine (I use my fingers sometimes!)
- Small offset spatula – Makes removing the pies a breeze
Confession time – I’ve made these without proper tools more times than I can count. No rolling pin? A wine bottle works in a pinch. Missing a cutter? The rim of a narrow glass does the trick. The beauty of these mini cherry pie bites is they’re forgiving – as long as you’ve got something to roll and cut with, you’re golden!
Storing and Serving Mini Cherry Pie Bites
Now that you’ve baked up these irresistible mini cherry pie bites, let’s talk about keeping them fresh and making them shine when serving! I’ve learned a few tricks through trial and error (mostly error at first) that’ll keep your treats tasting just-baked.
Storing: These little guys stay happily fresh in an airtight container at room temperature for about 2 days. If you need them to last longer (though in my house they never do), pop them in the fridge for up to 5 days. The crust might soften slightly, but 10 seconds in the microwave brings back that fresh-from-the-oven magic.
Freezing: Here’s my secret for always having dessert ready – freeze unbaked mini pies on a baking sheet, then transfer to a freezer bag once solid. When the craving hits, bake straight from frozen, adding just 2-3 extra minutes. It’s like having a personal pastry chef on demand!
Serving Ideas: Oh, the possibilities! My favorite ways to serve these mini cherry pie bites:
- Dust with powdered sugar right before serving – it’s like edible snow on a cherry mountain!
- Serve warm with a scoop of vanilla ice cream – the contrast is heavenly
- Drizzle with melted chocolate for a fancy touch (kids especially love this)
- Pair with whipped cream and fresh mint for a photo-worthy dessert spread
Pro tip: If serving at a party, line them up on a pretty platter with small forks or toothpicks. Watch how fast they disappear – I always make double batches because these mini cherry pie bites have a way of vanishing into happy mouths

Mini Cherry Pie Bites FAQs
I’ve gotten so many questions about these adorable little pies over the years – here are the answers to everything you might be wondering before diving in!
What’s the best dough to use?
Hands down, my favorite is the simple butter crust in this recipe – it’s flaky, tender, and comes together in minutes. But if you’re in a rush, store-bought pie dough works fine too! Just roll it slightly thinner before cutting.
How long do they take to bake?
At 375°F, these mini cherry pie bites need about 15-18 minutes to reach golden perfection. Ovens vary though, so start checking at 12 minutes – you’ll know they’re done when the edges turn that gorgeous golden brown color.
How do I prevent soggy bottoms?
Two tricks I swear by: 1) Don’t overfill with cherry filling (stick to 1 tsp per cup), and 2) Make sure your oven is fully preheated before baking. That initial blast of heat helps set the crust before the filling can make it soggy.
Do I need to refrigerate them?
Only if you’re keeping them longer than 2 days! At room temp in an airtight container, they stay perfect. The sugar in the filling acts as a natural preservative. If refrigerated, just warm them slightly before serving to bring back that fresh-baked texture.
Can I make them ahead?
Absolutely! The unbaked mini pies freeze beautifully for up to 3 months (my freezer always has a stash!). You can also refrigerate assembled-but-unbaked pies overnight – just add 1-2 minutes to the baking time.
Nutritional Information
Okay, let’s be real – we’re not eating mini cherry pie bites for their health benefits! But if you’re curious (or need to justify eating three… or five), here’s the scoop on what’s in these little delights. Remember, these values are estimates per mini pie – actual nutrition varies based on your specific ingredients.
- Calories: About 80 per bite-sized beauty
- Sugar: 6g (mostly from that luscious cherry filling)
- Fat: 4g (thank you, butter – worth every gram!)
- Saturated Fat: 2.5g
- Sodium: 60mg
- Carbohydrates: 10g
- Protein: 1g (hey, every bit counts!)
Now, here’s my philosophy – when something brings this much joy in such a perfectly portioned package, the numbers don’t matter quite as much. But if you’re watching certain nutrients, you can easily tweak the recipe – swap in sugar-free pie filling or use a butter alternative. Personally? I say enjoy every flaky, cherry-filled bite!
Final Thoughts
Well, there you have it – my absolute favorite way to make mini cherry pie bites that disappear faster than you can say “seconds please!” I still remember that first messy batch I made for my niece’s party, and now these little pies have become my signature treat for every occasion. There’s just something magical about bite-sized desserts that make people smile.
Trust me, once you try this recipe, you’ll understand why I’m so obsessed. They’re easier than you think, endlessly adaptable, and guaranteed to impress. Whether you’re baking for a crowd or just treating yourself (no judgment here!), these mini cherry pie bites deliver big flavor in the most adorable package.
I’d love to see your creations! Tag me on social media if you make these – nothing makes me happier than seeing your kitchen adventures with this recipe. And hey, if you come up with any brilliant twists (I’m looking at you, chocolate-drizzled version), share those too! Happy baking, friends – may your crusts be flaky and your cherry filling plentiful! You can follow along with more of my baking adventures on Facebook