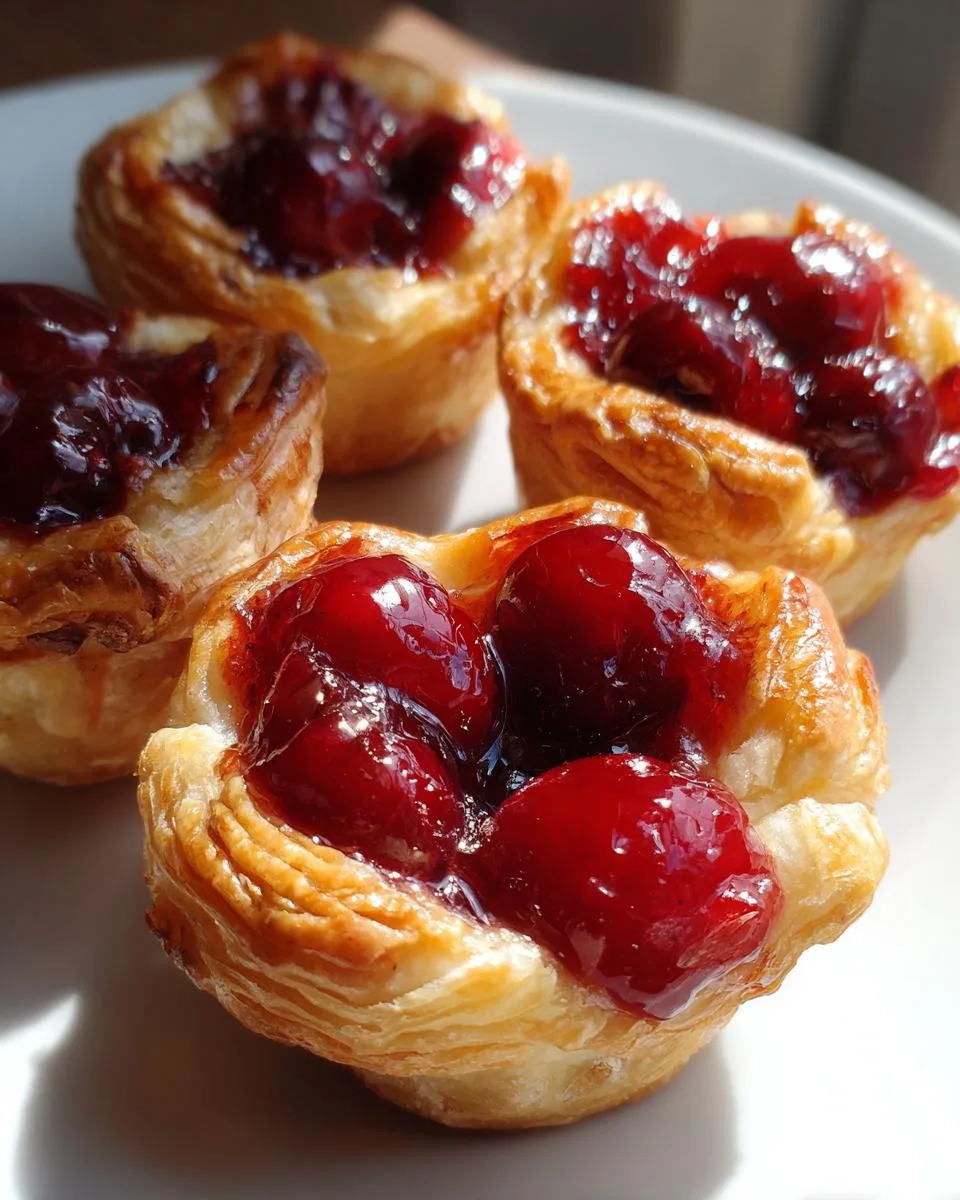
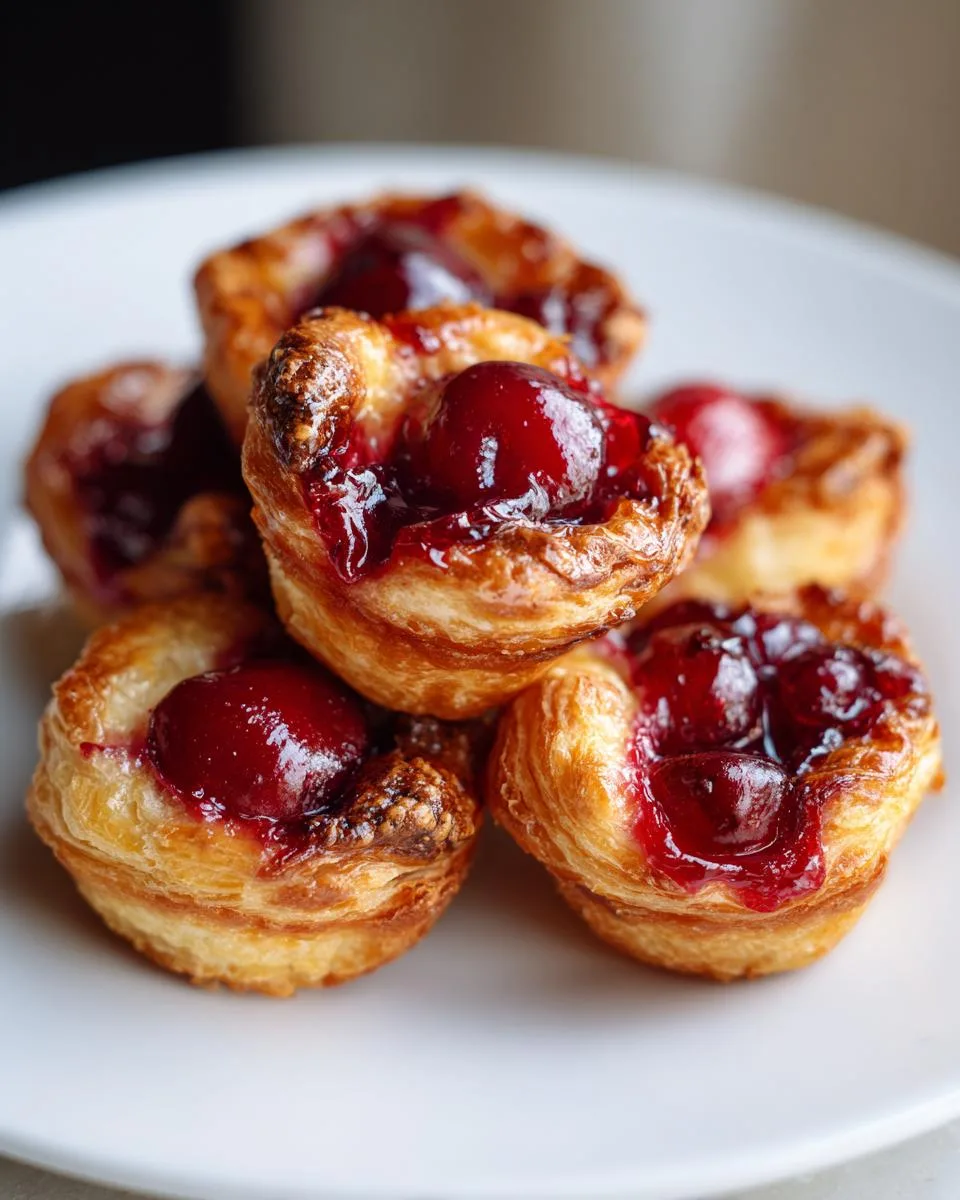
Oh, cherry pie bites – where do I even begin? These little pockets of joy have saved me more times than I can count. Picture this: It’s 5pm, your in-laws text they’re dropping by in an hour, and you’ve got zero dessert prepared. Panic sets in until you remember this magical recipe! That’s exactly what happened to me last Thanksgiving, and let me tell you, these cherry pie bites became the unexpected star of the evening.
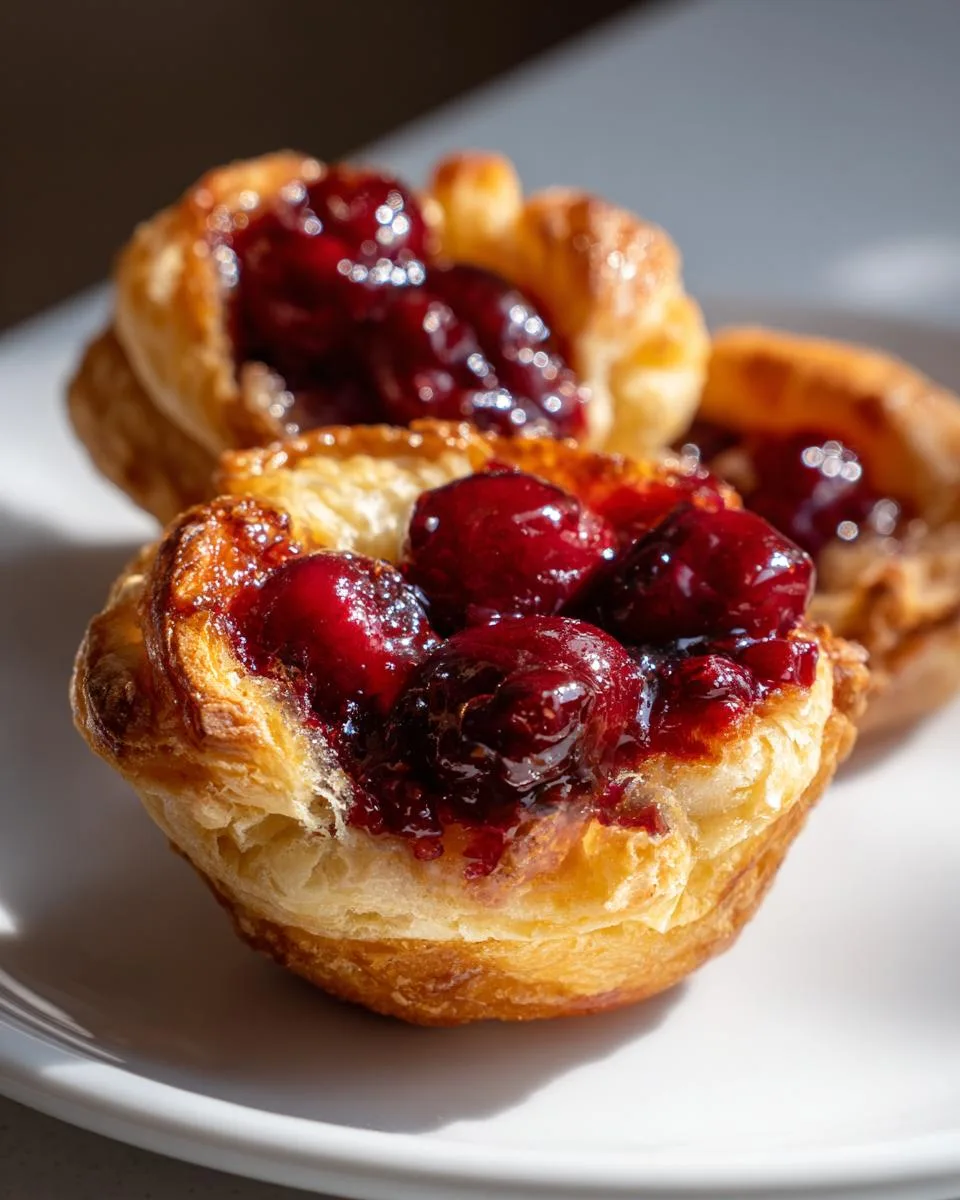
Table of Contents
Table of Contents
Why You’ll Love These Cherry Pie Bites
What I absolutely adore about these mini treats is how they capture all the cozy, nostalgic flavors of classic cherry pie without any of the fuss. No rolling out crusts, no worrying about soggy bottoms – just buttery, flaky goodness hugging sweet cherry filling in perfect bite-sized portions. They’re the ultimate shortcut dessert that looks fancy but takes barely any effort. Plus, they bake up golden brown while smelling like your grandma’s kitchen on a Sunday afternoon.
Whether you need a last-minute potluck contribution, a sweet treat for book club, or just something to satisfy your midnight pie cravings (no judgment here!), these cherry pie bites deliver every single time. And the best part? They’re so simple even my 10-year-old niece can make them!
Trust me, once you try these little gems, they’ll become your go-to dessert for every occasion. Here’s why:
- Quick as a wink – From bowl to table in under 40 minutes (perfect for those “oops, I forgot to make dessert” moments)
- Easier than pie – No fancy crimping or lattice work, just press-and-fill simplicity
- Party superstars – Their bite-size perfection means no plates or forks needed – just pop and enjoy!
- Buttery magic – That flaky crust-to-filling ratio will make you swoon
- Kid-approved – Little hands love helping make (and eat) these mini treats
- Endlessly adaptable – Swap fillings seasonally for year-round enjoyment
Honestly, I can’t think of a single reason not to fall head-over-heels for these cherry pie bites! If you are looking for more quick dessert ideas, check out our full collection of recipes.
Ingredients for Cherry Pie Bites
Here’s the beautiful thing about these cherry pie bites – you only need five simple ingredients to create magic! But listen up, because I’ve learned (the hard way) that quality and prep matter here. Let me walk you through exactly what you’ll need:
- 1 cup all-purpose flour – Pack it in there, no loosey-goosey scooping! That perfect texture starts with proper measuring.
- 1/2 cup butter – This is non-negotiable: it must be chilled and diced into tiny cubes before you start. Cold butter = flaky layers. Warm butter = sad, dense bites.
- 3 tbsp cold water – Ice water is even better if you’re feeling fancy. We’re talking refrigerator-cold here, people – tepid water will ruin everything.
- 1 cup cherry pie filling – I won’t judge if you grab the store-bought can (I usually do!), but make sure it’s the good stuff without corn syrup if you can find it.
- 1 tbsp granulated sugar – Just a sprinkle to balance the tartness. Use coarse sugar if you want that delightful crunch on top!
Now, I know what you’re thinking – “Can I substitute X for Y?” Listen, I’m all for kitchen improvisation, but this is one recipe where the ingredients really do matter. That chilled butter and cold water make all the difference in achieving that dreamy, flaky texture we’re after. Stick with me here, and I promise you’ll be rewarded with perfect little bites every time!
How to Make Cherry Pie Bites
Alright, let’s get to the fun part – turning those simple ingredients into irresistible cherry pie bites! I’ve made these dozens of times, and I’ve learned all the little tricks to get them perfect every single time. Follow these steps, and you’ll be popping warm, flaky bites into your mouth before you know it!
Step 1: Prepare the Dough
First things first – preheat that oven to 375°F (190°C). While it’s heating up, let’s make magic happen with the dough. Grab your chilled butter cubes and flour – I like to use my hands for this part because I can feel when the texture is just right. Work the butter into the flour until it looks like coarse crumbs with some pea-sized butter pieces still visible. This is what gives us those beautiful flaky layers!
Now, here’s where patience pays off: add the cold water one tablespoon at a time, mixing gently with a fork after each addition. Stop as soon as the dough comes together – we’re aiming for just moist enough to hold its shape when pressed, not sticky. Overworking the dough makes it tough, and we want tender, melt-in-your-mouth bites!
Step 2: Assemble the Cherry Pie Bites
Time to get hands-on again! Pinch off small pieces of dough (about the size of a walnut) and roll them into balls. Press each ball into the cups of a mini muffin tin – I use my thumb to create a little well in the center. Pro tip: if the dough sticks to your fingers, dip them in flour first!
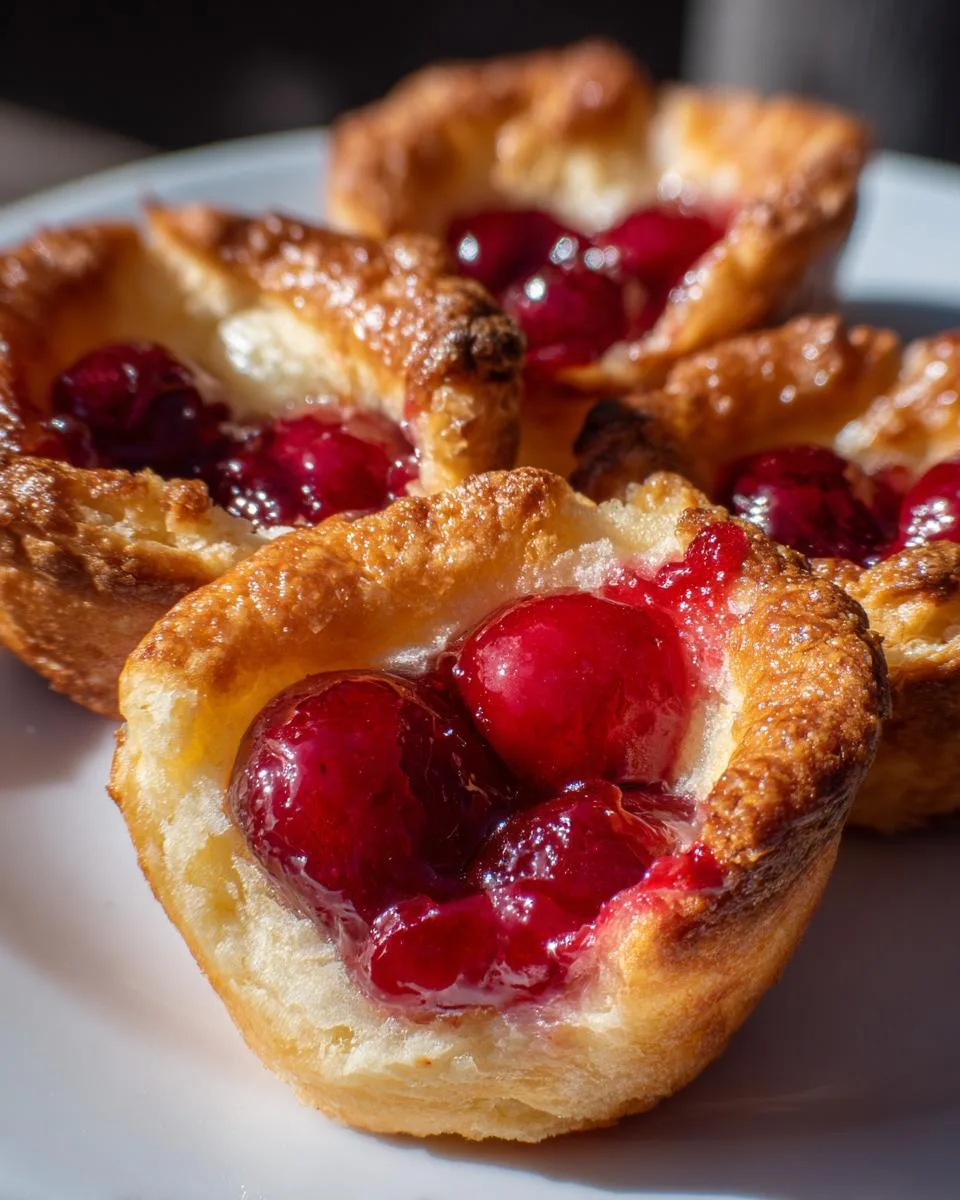
Now for the star of the show – the cherry filling! Spoon about a teaspoon into each cup, but here’s my golden rule: don’t overfill! The filling expands as it bakes, and you don’t want sticky cherry lava all over your muffin tin (learned that the messy way). Leave just a tiny bit of space at the top.
Step 3: Bake and Cool
Pop those beauties into your preheated oven and set a timer for 15 minutes. At this point, start peeking through the oven window – you’re looking for golden edges and bubbly filling. They might need up to 20 minutes total, but every oven is different.
Here’s the hardest part – resist the urge to eat them immediately! Let them cool in the pan for 5 minutes, then transfer to a wire rack. They need about 10 more minutes to set properly. I know, the smell is torture, but trust me, waiting means they won’t fall apart when you bite into them!
Print
Irresistible Cherry Pie Bites Recipe in 40 Minutes Flat
- Prep Time: 15 minutes
- Cook Time: 20 minutes
- Total Time: 35 minutes
- Yield: 12 bites 1x
- Category: Dessert
- Method: Baking
- Cuisine: American
- Diet: Vegetarian
Description
Easy-to-make cherry pie bites that are perfect for any occasion.
Ingredients
- 1 cup all-purpose flour
- 1/2 cup butter, chilled and diced
- 3 tbsp cold water
- 1 cup cherry pie filling
- 1 tbsp sugar
Instructions
- Preheat oven to 375°F (190°C).
- Mix flour and butter until crumbly.
- Add cold water, one tablespoon at a time, until dough forms.
- Roll dough into small balls and press into mini muffin tins.
- Fill each cup with cherry pie filling.
- Bake for 15-20 minutes until golden.
- Let cool before serving.
Notes
- Use store-bought pie filling for convenience.
- Dust with powdered sugar for extra sweetness.
- Serve warm with vanilla ice cream.
Nutrition
- Serving Size: 1 bite
- Calories: 120
- Sugar: 8g
- Sodium: 85mg
- Fat: 6g
- Saturated Fat: 3.5g
- Unsaturated Fat: 2g
- Trans Fat: 0g
- Carbohydrates: 15g
- Fiber: 0.5g
- Protein: 1g
- Cholesterol: 15mg
Tips for Perfect Cherry Pie Bites
After making these cherry pie bites more times than I can count (and yes, burning a batch or two along the way), I’ve nailed down all the little tricks that make them foolproof. Here’s what I’ve learned:
- Butter temperature is everything – I keep mine in the fridge until the very last second. If your kitchen’s warm, pop the diced butter back in the fridge for 10 minutes before using.
- Handle with care – Mix the dough just until it comes together. Overworking it activates the gluten and makes tough bites instead of tender, flaky ones.
- Powdered sugar magic – Wait until they’re completely cooled, then dust lightly. It adds sweetness and makes them look bakery-worthy!
- Mini muffin tin hack – If you don’t have one, roll the dough slightly thicker and make free-form tartlets on a baking sheet.
- The poke test – If the filling bubbles wildly, poke one with a toothpick – the crust should be golden, not doughy.
Remember – the first batch is always the test run! Even if they’re not perfect, they’ll still taste amazing. If you enjoy baking simple, comforting desserts, you might also love our Pumpkin Snickerdoodle Blondies.

Storing and Reheating Cherry Pie Bites
Here’s the good news – these cherry pie bites keep beautifully! Just let them cool completely, then store in an airtight container. At room temperature, they’ll stay fresh for about 2 days (if they last that long!). For longer storage, pop them in the fridge where they’ll keep for up to 5 days.
Want to bring back that fresh-from-the-oven magic? Skip the microwave – it makes them soggy. Instead, reheat in a 350°F (175°C) oven for 5-7 minutes to crisp them up again. They might even taste better the second day!
Cherry Pie Bites Variations
One of my favorite things about this recipe is how easily you can mix it up! While classic cherry will always have my heart, sometimes I love playing with different fillings. Here are some delicious twists I’ve tried:
- Apple cinnamon – Swap in apple pie filling and add 1/2 tsp cinnamon to the dough for cozy fall vibes
- Blueberry bliss – Use blueberry pie filling and top with lemon zest for a bright, summery version
- Mixed berry – Raspberry or blackberry filling makes gorgeous jewel-toned bites
- Nutty delight – Sprinkle chopped pecans or walnuts on top before baking for crunch
- Chocolate cherry – Add mini chocolate chips to the dough for a decadent twist
The possibilities are endless – let your pantry inspire you! For more seasonal inspiration, check out our Apple Pumpkin Muffins.
Serving Suggestions for Cherry Pie Bites
Oh, let me tell you about all the delicious ways to serve these cherry pie bites! My absolute favorite is warm with a scoop of vanilla ice cream melting over the top – it’s like mini cherry pies à la mode! For brunch, I’ll dollop them with whipped cream and fresh cherries for a pretty presentation.
They’re perfect for potlucks (just arrange on a cute platter) or as a sweet ending to dinner parties. Sometimes I’ll even pack them in lunchboxes for a special treat. Honestly, they disappear so fast I rarely have leftovers to worry about!
Cherry Pie Bites Nutrition
Now, let’s talk numbers – but remember, these cherry pie bites are meant to be enjoyed, not stressed over! Based on my kitchen scale and calculator (yes, I actually measured everything out), here’s the general nutrition per bite:
- Calories: About 120 kcal – perfect for satisfying that sweet tooth without going overboard
- Fat: 6g (mostly from that glorious butter that makes the crust so flaky)
- Carbs: 15g – hey, it’s dessert after all!
- Sugar: 8g (mostly from the cherry filling)
Important note: These values can vary depending on your exact ingredients – especially the pie filling brand you use. Some have more syrup than others, which affects the sugar content. And if you go wild with the powdered sugar dusting (no judgment!), that’ll add a bit more sweetness.
At the end of the day, these are treats meant to be savored in moderation. I usually find one or two satisfies my craving perfectly – though I won’t tell if you sneak a third! If you want to see how we make other family favorites, follow us on Facebook.
FAQs About Cherry Pie Bites
I get asked these questions all the time about my cherry pie bites – here are the answers straight from my kitchen!
Can I use homemade pie filling?
Absolutely! Just make sure to drain any excess liquid first – too much juice makes the crust soggy. I like to spoon the filling into a strainer and let it sit for 10 minutes before using.
Can I freeze them?
You bet! These freeze beautifully for up to 1 month. Let them cool completely, then freeze in a single layer before transferring to an airtight container. Thaw at room temperature or pop them in a 350°F oven for 5 minutes to refresh.
How do I prevent sogginess?
The golden rule? Cool them completely before storing! I know it’s tempting to pack them up warm, but that trapped steam turns the crust soft. Let them sit on a wire rack until room temperature – about 30 minutes.
Can I use muffin liners?
I don’t recommend it – those cute paper cups prevent the crust from getting properly crisp and golden. If you’re worried about sticking, just give your muffin tin a quick spray with cooking spray before pressing in the dough.
Rate This Recipe If You Loved It!
There you have it – my all-time favorite cherry pie bites recipe that’s saved me from countless dessert emergencies! Now I want to hear from you. Did these little beauties become your new go-to treat? Did your family go crazy for them like mine does? Leave a rating below to let me know how they turned out!
And hey, if you put your own spin on them (maybe with that chocolate chip variation I mentioned?), I’d love to hear about it in the comments. Nothing makes me happier than knowing my recipes are bringing joy to other kitchens. Happy baking, friends – may your cherry pie bites always be flaky and your filling never bubble over!