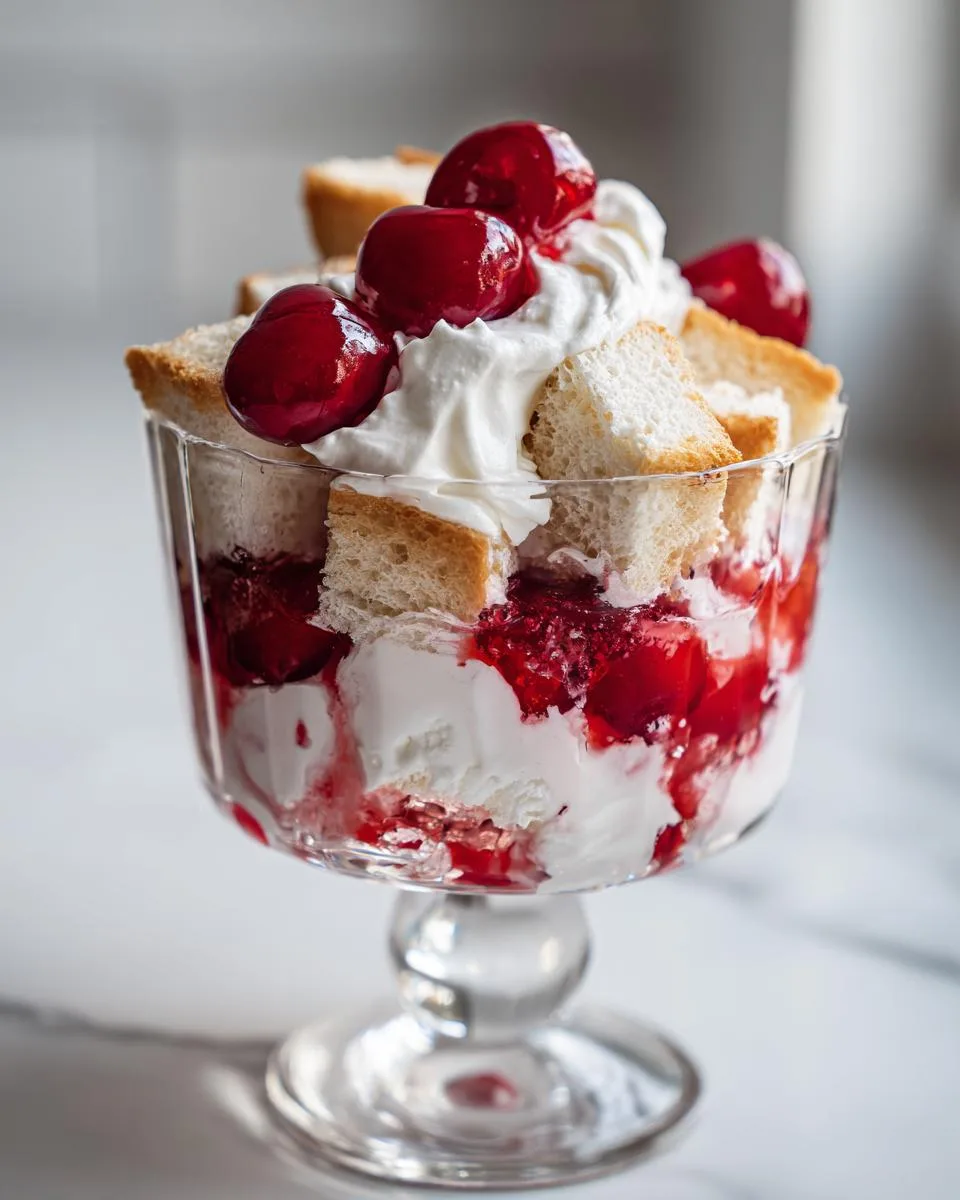
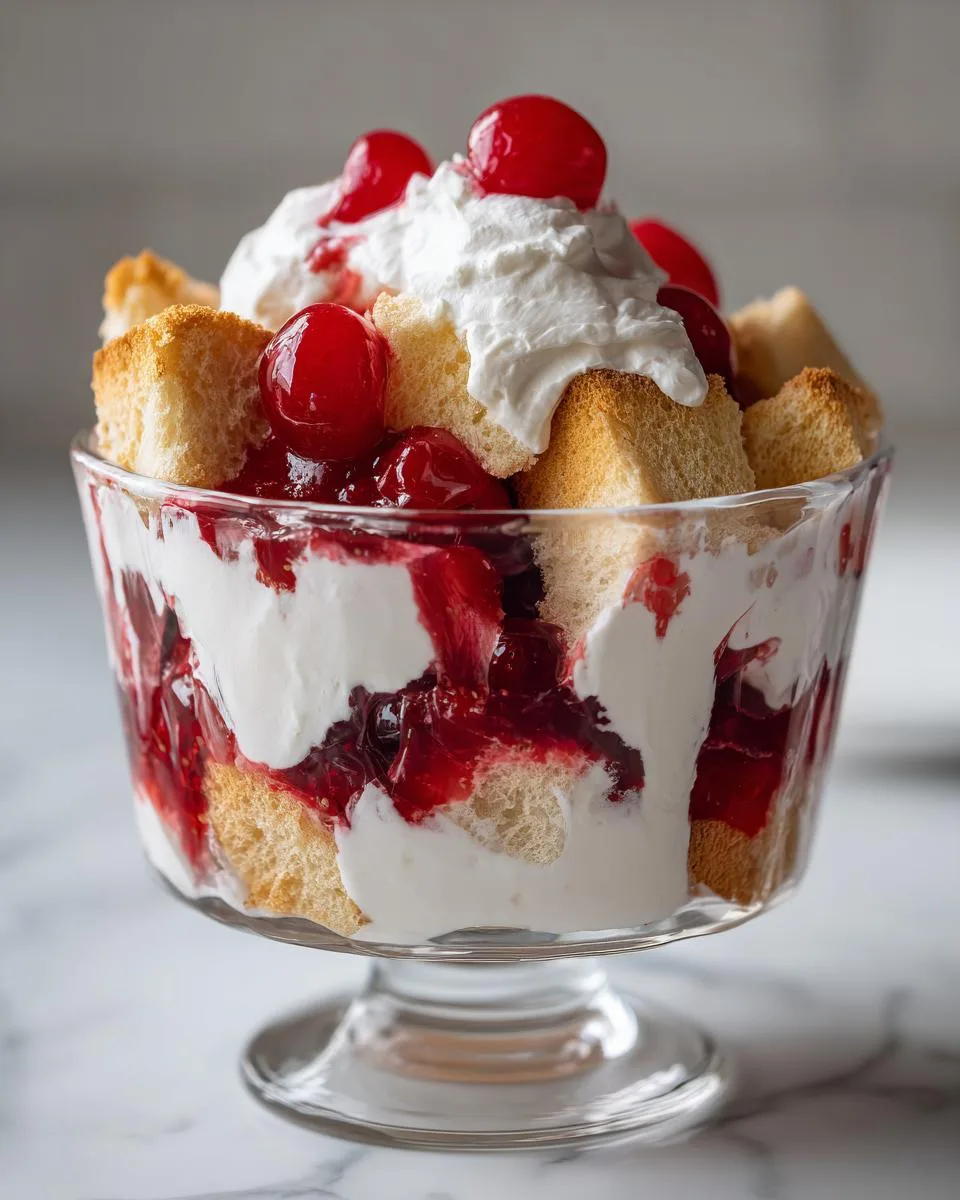
Oh my gosh, let me tell you about the absolute magic that is Cherries in the Snow Dessert! Picture this: fluffy white clouds of whipped cream nestled between soft angel food cake, all crowned with vibrant ruby-red cherries. It’s like a sweet winter wonderland in a bowl – but trust me, this beauty tastes just as heavenly as it looks. The first time I made it for a summer potluck, I swear half the guests asked for the recipe before they’d even finished their first bite.
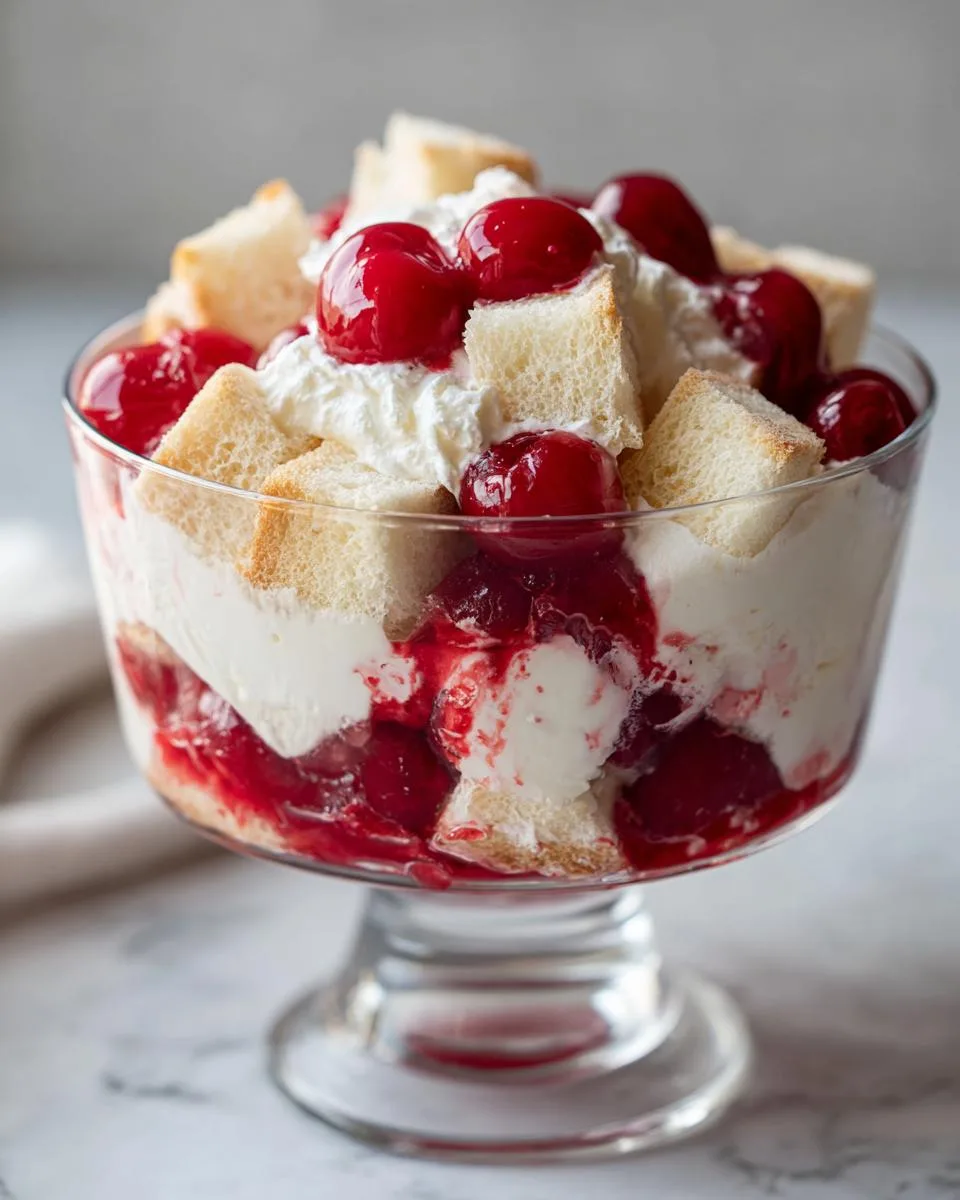
Table of Contents
Table of Contents
Why You’ll Love This Cherries in the Snow Dessert
What I love most about this dessert (besides how ridiculously pretty it is) is how simple it comes together. Just layers of cake, cream, and cherries – no oven required! It’s been a beloved classic for decades because it delivers that perfect balance of lightness and indulgence. Whether you’re serving it at a fancy dinner party or just treating yourself on a Tuesday, this dessert never fails to impress.
And here’s the best part – it’s nearly impossible to mess up. Even when I was just starting out in the kitchen, this was my go-to “looks fancy but secretly easy” dessert. The hardest part is waiting those two hours while it chills – but oh, that first spoonful is always worth the wait!
Listen, I’m not exaggerating when I say this dessert checks ALL the boxes. Here’s why it’s about to become your new favorite:
- No-bake magic: When it’s too hot to turn on the oven (or you’re just feeling lazy), this recipe saves the day
- 15-minute prep: Seriously – cube some cake, whip some cream, and layer. Done!
- Light as air: That perfect balance of sweet cream and tart cherries won’t leave you feeling stuffed
- Showstopper looks: Those gorgeous red-and-white layers will have everyone reaching for seconds
Honestly? The hardest part is deciding whether to share it or keep the whole dish for yourself!
Cherries in the Snow Dessert Ingredients
Okay, let’s gather our simple but magical ingredients! Here’s what you’ll need to create this dreamy dessert:
- 1 (10-12 inch) pre-made angel food cake – cut into 1-inch cubes (store-bought is totally fine – we’re keeping this easy!)
- 2 cups cold heavy whipping cream – must be cold to whip properly (I always chill my mixing bowl too)
- 1 (21 ounce) can cherry pie filling – the glossy red cherries make that beautiful “snow” contrast
- 1/2 cup powdered sugar – dissolves perfectly into the whipped cream
- 1 teaspoon pure vanilla extract – that little extra flavor boost makes all the difference
See? Just five simple ingredients! The beauty of this recipe is how these basic components transform into something spectacular. Pro tip: make sure your cream is fresh – older cream sometimes won’t whip up properly, and we want those gorgeous stiff peaks!
How to Make Cherries in the Snow Dessert
Alright, let’s dive into making this gorgeous dessert! Don’t worry – it’s way easier than it looks. Just follow these simple steps, and you’ll have a showstopper ready in no time.
Step 1: Prepare Your Components
First things first – grab that angel food cake and cut it into 1-inch cubes. I like to make them a bit uneven for a more rustic look, but keep them roughly the same size so they layer nicely. Set those aside.
Now for the whipped cream – this is where cold is your best friend! Pour your cold heavy cream into a chilled bowl (I pop mine in the freezer for 10 minutes beforehand). Add the powdered sugar and vanilla, then whip on medium-high until you get beautiful, stiff peaks. You’ll know it’s ready when you can turn the bowl upside down without the cream moving – now that’s what I call whipped cream perfection!
Step 2: Assemble the Layers
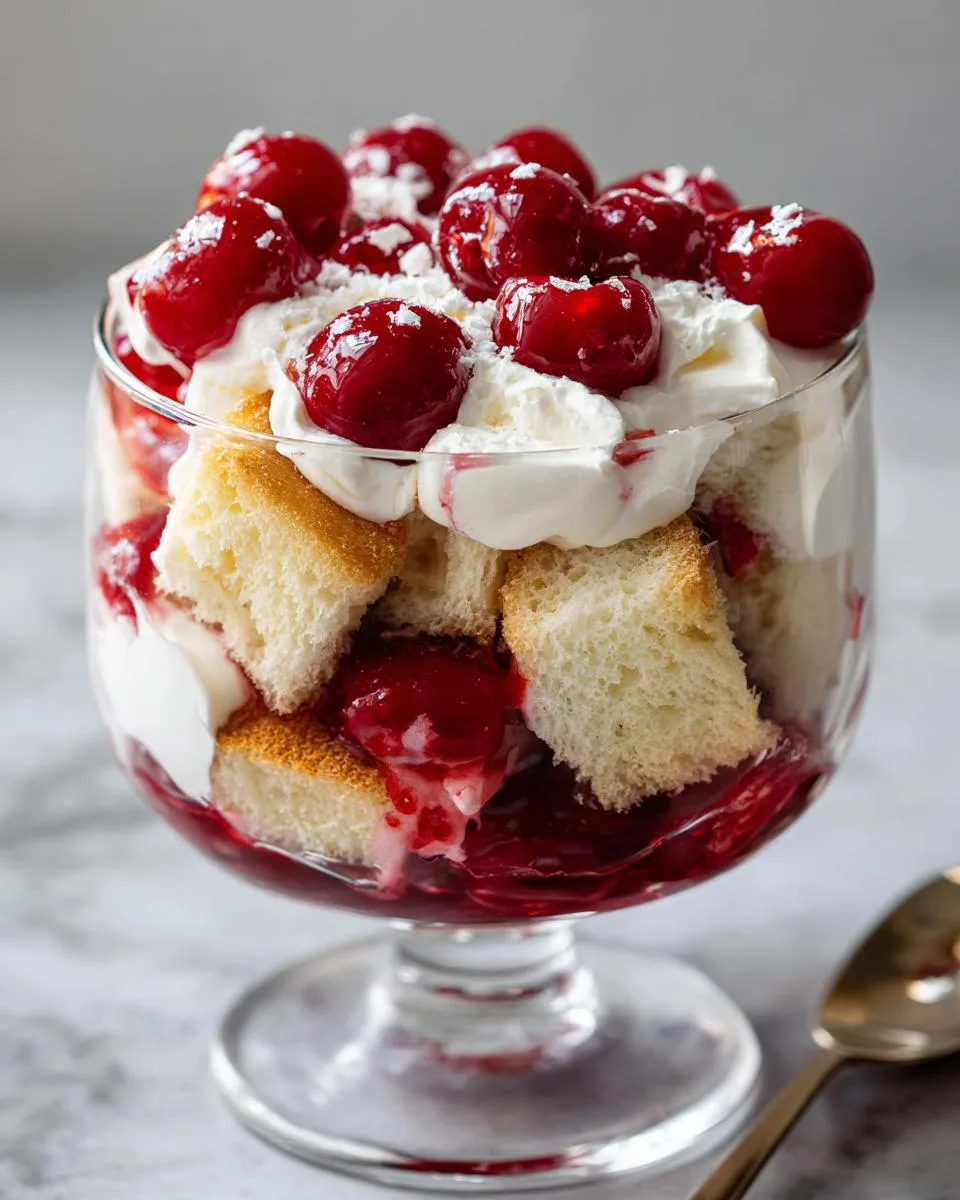
Here comes the fun part! Grab your prettiest serving dish – I love using a glass trifle bowl so everyone can see those gorgeous layers.
Start with half your cake cubes, scattering them evenly across the bottom. Then dollop half the whipped cream over top – use a spatula to gently spread it, being careful not to mash the cake beneath. Now spoon half the cherry pie filling over the cream, letting those ruby-red cherries peek through.
Repeat the whole process – remaining cake cubes, the rest of the whipped cream, and finish with that glorious cherry topping. Pro tip: leave some cherries peeking out decoratively on top!
Step 3: Chill and Serve
Here’s the hardest part – patience! Cover your masterpiece with plastic wrap and pop it in the fridge for at least 2 hours. This chilling time is crucial – it lets the flavors meld and the cake soften just enough.
Want to get ahead? You can absolutely make this the day before – just keep it covered in the fridge overnight. When you’re ready to serve, grab some spoons and watch everyone’s eyes light up as they dig into this snowy, cherry-topped delight! If you enjoy simple, classic recipes like this, you might want to check out more recipes on our site.
Print
15-Minute Cherries in the Snow Dessert – A Dreamy Delight! (Note: The title is 58 characters including spaces.)
- Prep Time: 15 minutes
- Cook Time: 0 minutes
- Total Time: 2 hours 15 minutes
- Yield: 8 servings 1x
- Category: Dessert
- Method: No-Bake
- Cuisine: American
- Diet: Low Fat
Description
A light and refreshing dessert made with layers of angel food cake, whipped cream, and cherries.
Ingredients
- 1 angel food cake, cubed
- 2 cups whipped cream
- 1 can (21 oz) cherry pie filling
- 1/2 cup powdered sugar
- 1 tsp vanilla extract
Instructions
- Cut the angel food cake into small cubes.
- In a bowl, mix whipped cream, powdered sugar, and vanilla extract.
- Layer half the cake cubes in a serving dish.
- Spread half the whipped cream mixture over the cake.
- Top with half the cherry pie filling.
- Repeat the layers.
- Chill for at least 2 hours before serving.
Notes
- You can use fresh cherries if preferred.
- Other fruits like strawberries or blueberries work well too.
- Store leftovers in the refrigerator.
Nutrition
- Serving Size: 1 slice
- Calories: 220
- Sugar: 25g
- Sodium: 180mg
- Fat: 5g
- Saturated Fat: 3g
- Unsaturated Fat: 2g
- Trans Fat: 0g
- Carbohydrates: 40g
- Fiber: 1g
- Protein: 3g
- Cholesterol: 15mg
Expert Tips for the Perfect Cherries in the Snow Dessert
After making this dessert more times than I can count, I’ve picked up some tricks that take it from good to absolutely incredible:
- Chill everything: Your bowl, beaters, even the cream – cold tools make the whipped cream fluffier and more stable
- Patience with peaks: Don’t stop whipping until you get those perfect stiff peaks – they’ll hold up better between layers
- Dry cake cubes: If your angel food cake seems extra moist, pat the cubes lightly with a paper towel to prevent sogginess
- Garnish magic: Right before serving, sprinkle with fresh mint leaves or chocolate shavings for that extra wow factor
Oh! And here’s my secret – let the cherry pie filling sit at room temperature for 15 minutes before layering. It spreads so much easier that way!

Cherries in the Snow Dessert Variations
One of my favorite things about this recipe is how easily you can switch it up! Here are some delicious twists I’ve tried over the years:
Fresh cherry version: When cherries are in season, I skip the canned filling entirely. Just pit and halve about 2 cups of fresh cherries, toss them with 2 tablespoons of sugar, and let them sit for 30 minutes until they release their juices. The flavor is incredible!
Berry bonanza: Swap the cherries for strawberry or blueberry pie filling – it becomes “Berries in the Snow”! The blueberry version with its deep purple swirls looks particularly stunning.
Chocolate lover’s dream: For a decadent twist, use chocolate cake cubes instead of angel food and sprinkle chocolate shavings between layers. Top with cherry filling for that classic chocolate-cherry combo we all love!
Storing Your Cherries in the Snow Dessert
Here’s the deal – this dessert is best enjoyed fresh, but if you’ve got leftovers (lucky you!), here’s how to keep them perfect. Just cover the dish tightly with plastic wrap – press it right against the surface to prevent the whipped cream from drying out. It’ll keep beautifully in the fridge for up to 2 days.
Fair warning though – the cake gets softer the longer it sits, turning almost pudding-like by day two (which some of us actually love!). Whatever you do, don’t freeze it – the texture turns grainy and the whipped cream weeps. Trust me, I learned that lesson the hard way! You can follow our social media for more tips, like on Facebook.
Cherries in the Snow Dessert Nutritional Information
Now, I’m no nutritionist, but I can tell you this – while this dessert tastes indulgent, it’s actually lighter than you might think! Angel food cake keeps things airy, and the whipped cream adds richness without being too heavy. Of course, exact nutrition will vary depending on your specific ingredients – like whether you use full-fat cream or light, store-bought cake or homemade.
Here’s what I can say for sure: those ruby-red cherries pack some antioxidants, and angel food cake is naturally lower in fat than most desserts. But let’s be real – we’re not eating this for the health benefits! It’s all about that perfect balance of sweet cream, soft cake, and tart cherries.
If you’re watching specific dietary needs, you can always tweak the recipe – maybe try a sugar-free pie filling or light whipped topping. But personally? I say enjoy every glorious bite as-is – life’s too short not to savor desserts like this!
Cherries in the Snow Dessert FAQs
What exactly is Cherries in the Snow Dessert made of?
At its heart, it’s three magical layers – light-as-air angel food cake cubes, sweetened whipped cream clouds, and glossy cherry pie filling. The combination creates that perfect balance of textures and flavors that makes this dessert so special!
Do I have to use angel food cake?
While angel food cake is traditional (its lightness pairs perfectly with the cream), you can absolutely switch it up! Pound cake adds richness, while sponge cake soaks up the flavors beautifully. Just avoid anything too dense that might overpower the delicate layers.
Can I use fresh cherries instead of pie filling?
Oh absolutely! Fresh cherries make an amazing version. Just pit and halve them, toss with a couple tablespoons of sugar, and let them sit until they release their juices – about 30 minutes should do it. The natural syrup they create is divine! If you are looking for other fruit-based recipes, check out our apple fritter bread.
What other fruits work well in this dessert?
Get creative! Strawberries macerated in sugar are heavenly, blueberries create gorgeous purple swirls, and peaches add summery sweetness. Honestly? Almost any fruit you love will shine here – that’s the beauty of this versatile recipe!