There’s nothing like the smell of warm, homemade buttermilk hunting breakfast biscuits wafting through the house on a lazy weekend morning. I still remember how my grandma would pull a fresh batch from her ancient cast iron skillet, the tops golden brown and begging for a pat of butter. Her secret? That tangy buttermilk working its magic with cold butter to create layers upon layers of flaky goodness.
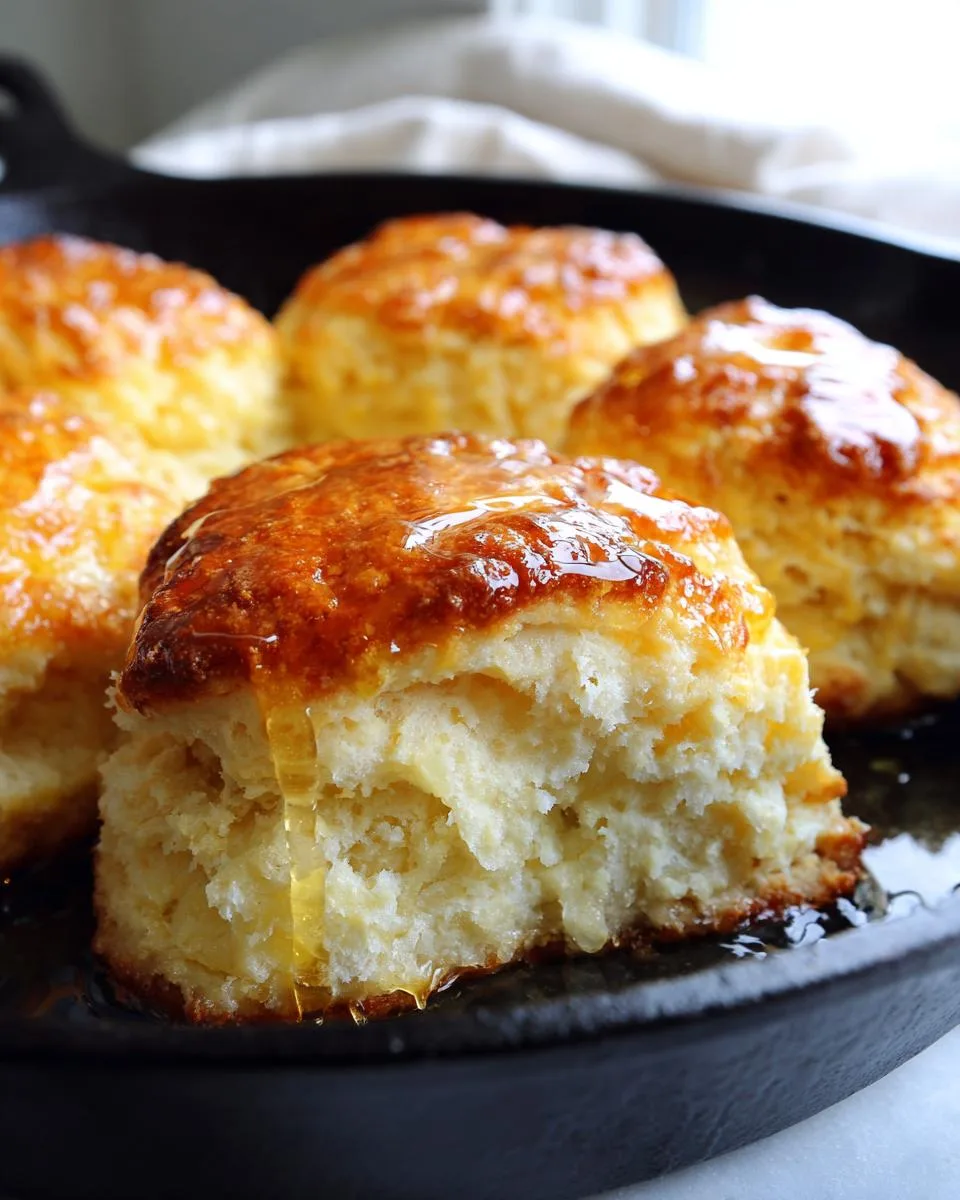
Table of Contents
Table of Contents
Why You’ll Love These Buttermilk Biscuits
These aren’t just any biscuits – they’re little clouds of breakfast joy! Here’s why they’ll become your new favorite:
- Fluffy perfection – That magical combo of cold butter and buttermilk creates layers you can practically see
- Ready in a flash – From bowl to table in 35 minutes (perfect for surprise houseguests!)
- Breakfast MVP – Equally happy with gravy, jam, or just a pat of butter
- Freezer-friendly – Make a double batch and thank yourself later
- Grandma-approved – Passes the “would my Southern grandmother nod in approval?” test
One bite and you’ll understand why I make these at least twice a week – they’re that good! If you love quick breakfast ideas, check out more breakfast recipes here.
These buttermilk breakfast biscuits come together in just 35 minutes with simple pantry staples. No fancy techniques here – just honest-to-goodness, melt-in-your-mouth biscuits that rise up tall and proud every single time. Whether you’re serving them with sausage gravy, strawberry jam, or just a drizzle of honey, they’ll disappear faster than you can say “seconds please!”
Ingredients for Buttermilk Breakfast Biscuits
Gathering the right ingredients makes all the difference with biscuits! Here’s what you’ll need for that perfect flaky texture:
- 2 and 1/2 cups (313g) all-purpose flour – spooned & leveled (trust me, this matters!)
- 1 Tablespoon baking powder – fresh is best
- 1/2 teaspoon baking soda – helps with that gorgeous rise
- 1 teaspoon salt – balances all the flavors
- 1/2 cup (8 Tbsp; 113g) unsalted butter – cubed and ice cold (I freeze mine for 15 minutes first)
- 1 cup + 2 Tablespoons (270ml/g) cold buttermilk, divided – the tangier the better
- 2 teaspoons (14g) honey – just a hint of sweetness
Optional Honey Butter Topping:
- 2 Tablespoons (28g) butter, melted
- 1 Tablespoon (21g) honey
See? Nothing complicated – just good, honest ingredients that work together beautifully. Now let’s get baking!

How to Make Buttermilk Breakfast Biscuits
Alright, let’s get to the fun part! Making biscuits is like a little kitchen dance – you’ve got to move with purpose but stay light on your feet. Don’t worry if your first batch isn’t perfect. Mine sure weren’t! But follow these steps, and you’ll have golden, flaky biscuits that’ll make your grandma proud. I still remember how my grandma would pull a fresh batch from her ancient cast iron skillet, the tops golden brown and begging for a pat of butter.
Preparing the Dough
First things first – preheat that oven to 425°F (218°C). Hot oven equals tall biscuits, that’s biscuit law in my kitchen.
Now grab your biggest bowl and whisk together the flour, baking powder, baking soda, and salt until they’re best friends. Here’s where the magic starts – toss in those ice-cold butter cubes and start cutting them in. I use a pastry cutter (grandma’s old metal one, naturally), but two knives or quick pulses in a food processor work too. You’re looking for pea-sized crumbs with some larger butter flecks – those melt into flaky layers later!
Make a well in the center and pour in most of the buttermilk (save 2 tablespoons for later) and drizzle that honey right on top. Gently fold everything together with a spatula until it just barely comes together. It’ll look shaggy and uneven – that’s perfect! Overmixing here is the enemy of fluffy biscuits.
Shaping and Cutting the Biscuits
Dump your dough onto a heavily floured surface (seriously, don’t be shy with the flour). Now comes my favorite part – the folds! Pat the dough into a rough rectangle about 3/4-inch thick. Fold one side to the center, then the other side over it like you’re tucking in a blanket. Give it a quarter turn and repeat this folding twice more. This creates those beautiful flaky layers.
For the final pat-down, keep that 3/4-inch thickness – any thinner and your biscuits won’t rise properly. Now grab your biscuit cutter (a glass works in a pinch) and cut straight down without twisting! Twisting seals the edges and prevents rising. Press any scraps together gently for bonus biscuits – rustic is charming!
Baking and Finishing Touches
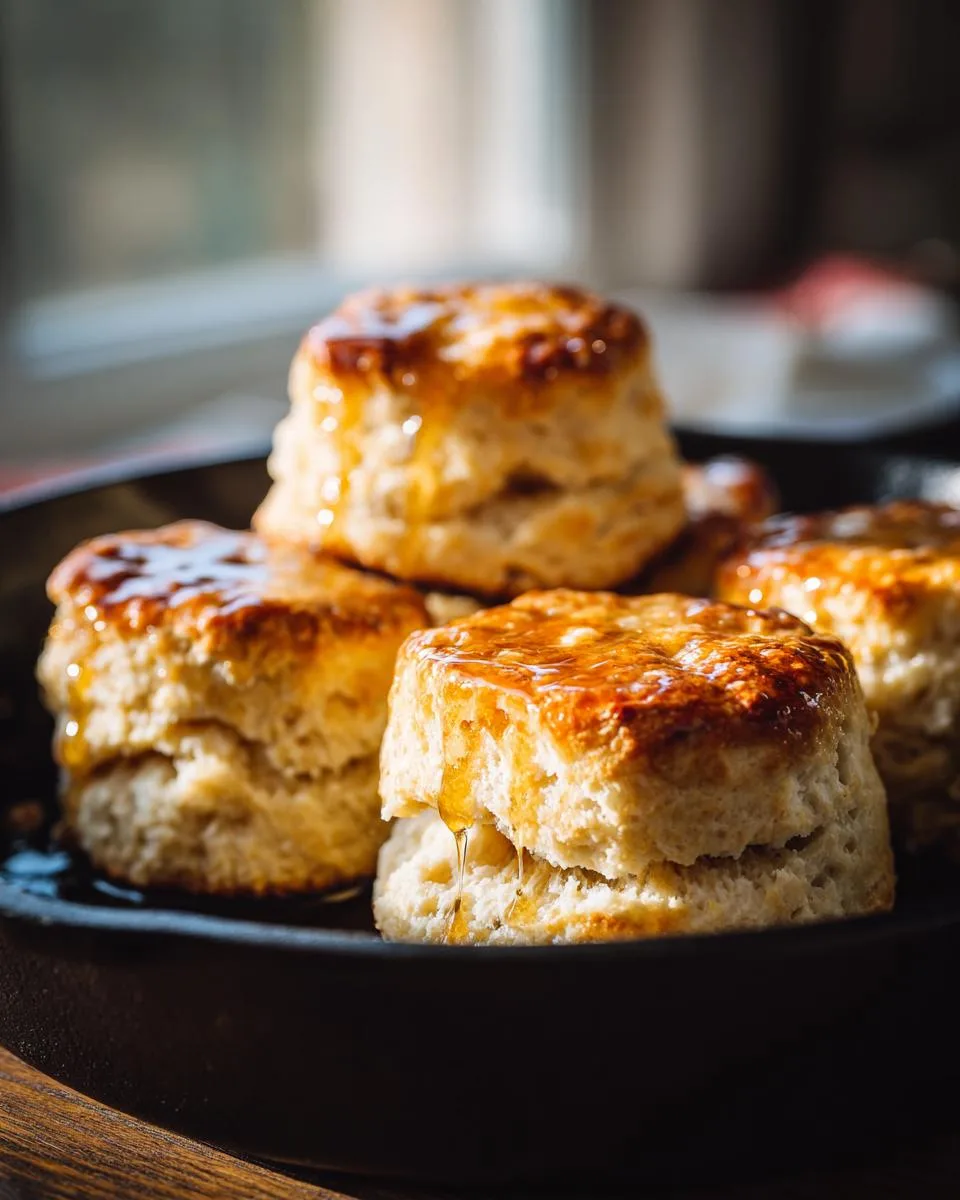
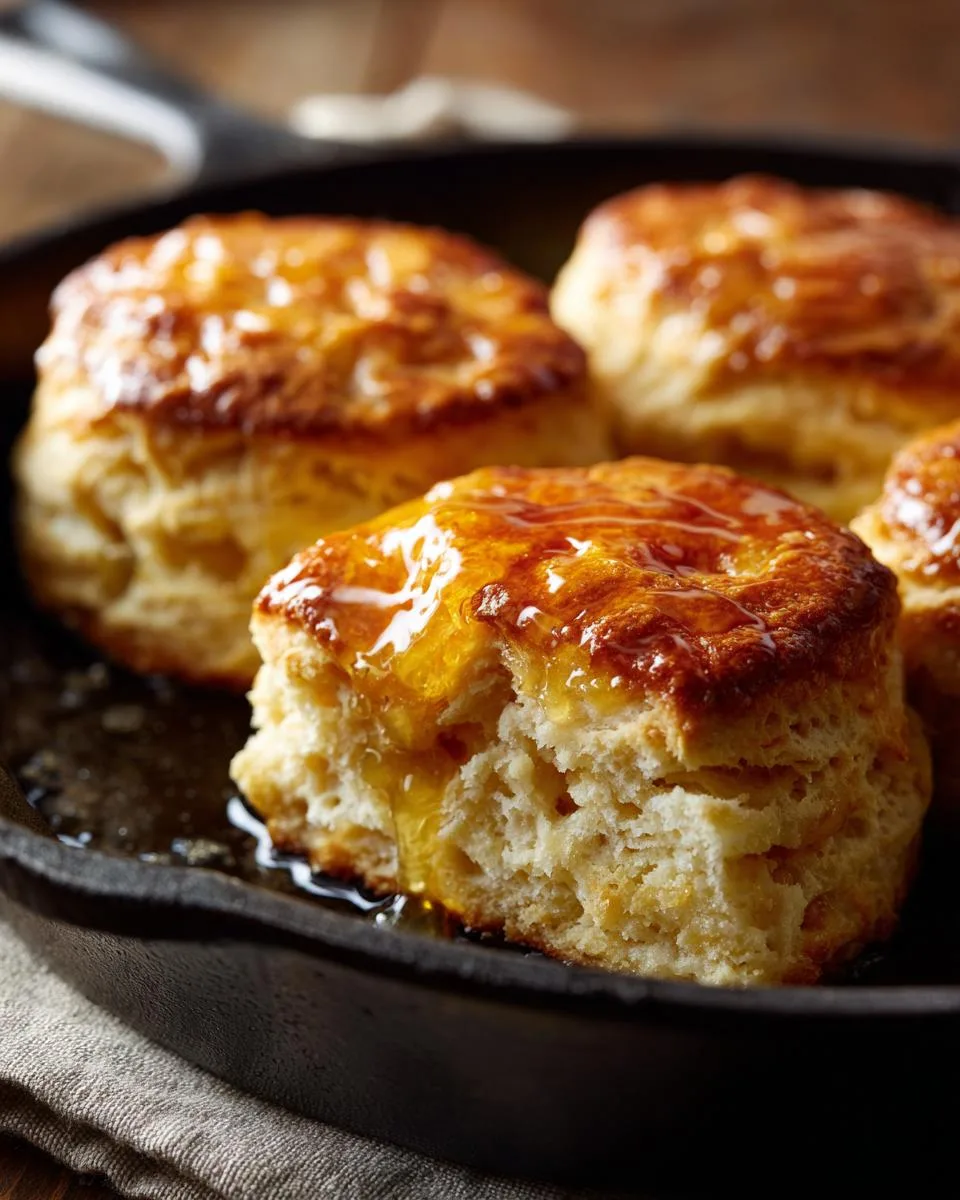
Arrange your biscuits in a cast iron skillet or baking sheet with sides touching – they’ll help each other climb higher in the oven. Brush those beauties with your reserved buttermilk for extra golden tops.
Bake for 18-20 minutes until they’re puffed and golden brown like a perfect summer tan. The second they come out, you can brush them with the honey butter mixture if you’re feeling fancy (I always am). That sweet glaze seeps into the nooks and crannies – pure breakfast heaven!
Now try to wait at least 5 minutes before devouring them. I never manage to wait that long, but hey – hot biscuit burns build character!
Print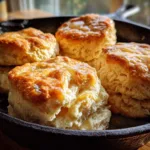
Buttermilk Breakfast Biscuits: Flaky 35-Minute Bliss
- Prep Time: 15 minutes
- Cook Time: 20 minutes
- Total Time: 35 minutes
- Yield: 8–11 biscuits 1x
- Category: Breakfast
- Method: Baking
- Cuisine: American
- Diet: Vegetarian
Description
Fluffy, tender buttermilk biscuits perfect for breakfast or brunch.
Ingredients
- 2 and 1/2 cups (313g) all-purpose flour (spooned & leveled), plus more as needed for hands and work surface
- 1 Tablespoon baking powder
- 1/2 teaspoon baking soda
- 1 teaspoon salt
- 1/2 cup (8 Tbsp; 113g) unsalted butter, cubed and very cold
- 1 cup + 2 Tablespoons (270ml/g) cold buttermilk, divided
- 2 teaspoons (14g) honey
- Optional Topping:
- 2 Tablespoons (28g) butter, melted
- 1 Tablespoon (21g) honey
Instructions
- Preheat oven to 425°F (218°C).
- Make the biscuits: Place the flour, baking powder, baking soda, and salt in a large bowl or in a large food processor. Whisk or pulse until combined.
- Add the cubed butter and cut into the dry ingredients with a pastry cutter or by pulsing several times in the processor. Cut/pulse until coarse crumbs form.
- If you used a food processor, pour the mixture into a large bowl. Make a well in the center. Pour 1 cup (240ml/g) buttermilk into the well and drizzle honey on top. Using a large spoon or spatula, fold until it begins to come together. Do not overwork the dough. The dough will be shaggy and crumbly with some wet spots.
- Pour the dough and any dough crumbles onto a floured work surface and gently bring together with generously floured hands. The dough will become sticky as you bring it together. Have extra flour nearby and use it often to flour your hands and work surface as needed in this step.
- Using floured hands, flatten into a 3/4-inch-thick rectangle as best you can. Fold one side into the center, then the other side on top. Turn the dough 90 degrees, so it’s now horizontal.
- Gently flatten into a 3/4-inch-thick rectangle again. Repeat the folding again. Turn the dough horizontally one more time.
- Gently flatten into a 3/4-inch-thick rectangle. Repeat the folding one last time. Flatten into the final 3/4-inch-thick rectangle.
- Cut into 2.5- or 3-inch circles with a biscuit cutter. Re-roll scraps until all the dough is used. You should have about 8–11 biscuits.
- Arrange in a 10-inch cast iron skillet or close together on a parchment paper-lined baking sheet. Make sure the biscuits are touching>>.
- Brush the tops with remaining buttermilk. Bake for 18–20 minutes or until tops are golden brown.
- Remove from the oven. If adding the optional topping, whisk the melted butter and honey together. Using a pastry brush, brush the warm biscuits with honey butter topping. Serve-ma warm.
Notes
- Do not twist the biscuit cutter when pressing down into the dough because this seals off the edges of the biscuit which prevents them from fully rising.
- Cover leftovers tightly and store at room temperature or in the refrigerator for up to 5 days.
Nutrition
- Serving Size: 1 biscuit
- Calories: 220
- Sugar: 4g
- Sodium: 320mg
- Fat: 11g
- Saturated Fat: 7g
- Unsaturated Fat: 3g
- Trans Fat: 0g
- Carbohydrates: 26g
- Fiber: 1g
- Protein: 4g
- Cholesterol: 30mg
Expert Tips for Perfect Buttermilk Breakfast Biscuits
Listen, I’ve ruined enough batches of biscuits to know exactly what NOT to do! Here are my hard-earned secrets for biscuit perfection:
Keep everything cold – I mean it! Chill your bowl, freeze your butter for 15 minutes, and even pop the flour in the fridge if your kitchen’s warm. Cold ingredients = flaky layers. Warm dough = hockey pucks.
Don’t overmix – When combining wet and dry ingredients, stop the second it comes together. Those scraggly bits? They’ll bake up just fine.
Hot oven is non-negotiable – If your oven runs cool, bump it to 450°F. That initial blast of heat makes them rise like champions.
No twisting! When cutting biscuits, press straight down. Twisting seals the edges and they won’t rise properly. My first batch looked like sad little cookies because I didn’t listen to this rule.
Buttermilk swap? In a pinch, mix 1 cup milk with 1 Tbsp lemon juice or vinegar. Let it sit 5 minutes before using. Not quite the same, but it’ll do!
Storing and Reheating Buttermilk Breakfast Biscuits
Fresh biscuits are heaven, but leftovers can be just as good if you treat ’em right! Let cooled biscuits come to room temperature, then tuck them in an airtight container. They’ll stay perfect at room temp for 2 days – any longer and they’ll need to chill in the fridge for up to 5 days.
To bring back that fresh-from-the-oven magic, wrap biscuits in foil and warm at 350°F for about 10 minutes. For a quick fix, 15 seconds in the microwave works (though they lose some crispness). Pro tip: Slice and toast day-old biscuits – the caramelized edges are incredible with jam!
Buttermilk Breakfast Biscuits FAQs
I’ve gotten so many questions about these biscuits over the years! Here are the ones that pop up most often with my tried-and-true answers:
How can I tell when my biscuits are done baking?
You’re looking for gorgeous golden-brown tops – but the real test is the sides. Gently lift a biscuit and check that the bottoms are lightly browned too. They should feel firm but spring back slightly when pressed. If they sound hollow when tapped lightly, that’s biscuit perfection!
Why didn’t my biscuits rise properly?
Oh honey, I’ve been there! Usually it’s one of three things: expired baking powder (test it by mixing 1 tsp with hot water – it should bubble!), overworked dough (makes tough biscuits), or twisting the cutter (seals those edges shut). Also – check your oven temp with a thermometer. A cold oven is a biscuit’s worst enemy!
Can I freeze unbaked biscuit dough?
Absolutely! Shape and cut your biscuits, then freeze them on a tray before transferring to a bag. When you’re ready, bake straight from frozen – just add 2-3 extra minutes. They won’t rise quite as high, but they’ll still taste amazing at 3am when a biscuit craving hits (not that I’d know anything about that…)
What’s the secret to flaky layers?
Cold butter and those folds! The cold butter creates steam pockets while baking, and each fold multiplies the layers. My grandma used to say “Handle the dough like it’s a newborn kitten” – gentle but purposeful. Also – resist the urge to pat the dough too thin before cutting!
Nutritional Information
Just so you know what you’re biting into, here’s the nutritional breakdown per biscuit (based on 8 servings). These are estimates – your exact numbers might dance around a bit depending on ingredients:
- 220 calories
- 11g fat (7g saturated)
- 26g carbs
- 1g fiber
- 4g protein
Now go enjoy that buttery goodness – calories from homemade biscuits don’t count, right? (Okay fine, they totally do, but they’re worth every bite!) If you’re looking for other easy dinner ideas, check out our Texas Tamale Pie.
Share Your Biscuit Success
I’d love to hear how your biscuits turned out! Drop me a comment with your favorite way to eat them – I’m always looking for new ideas (extra honey butter, anyone?). Happy baking! For more great recipes, browse our full recipe index.


