There’s something magical about the first bite of this huckleberry lemon breakfast loaf—the way the bright, tangy lemon dances with those sweet-tart huckleberries, all wrapped up in a cake so tender it practically melts in your mouth. I’ll never forget the summer I first baked this loaf for my best friend’s brunch. We sat on her sunlit porch, steaming mugs of coffee in hand, tearing into thick slices still warm from the oven. It was love at first crumb.
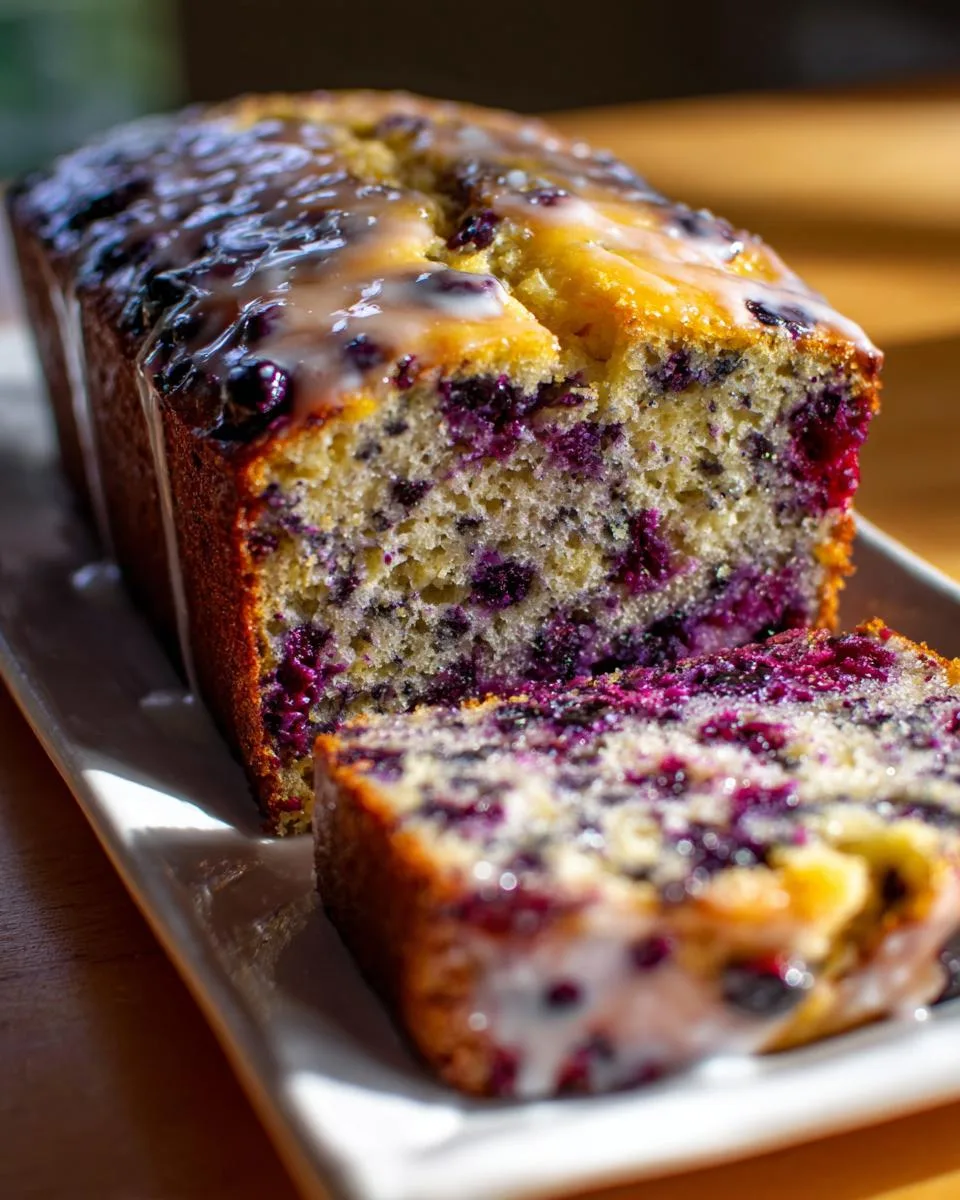
Table of Contents
Table of Contents
Why You’ll Love This Huckleberry Lemon Breakfast Loaf
This isn’t just any quick bread—it’s a morning hug in loaf form. The secret? A generous amount of cream cheese in the batter keeps it luxuriously moist, while the lemon zest and juice give it that irresistible zing. And those huckleberries? They burst in every bite like little pockets of joy. Whether you’re serving it at a fancy brunch or sneaking a slice straight from the pan (no judgment here!), this loaf is guaranteed to make any day feel special. Trust me—once that lemon glaze soaks into the warm cake, you’ll be hooked.
This isn’t just another breakfast bread—it’s the one you’ll crave with your morning coffee and sneak slices of all day long. Here’s why:
- That perfect moist-yet-light texture—thanks to cream cheese in the batter (my grandma’s secret trick!) that keeps every bite tender for days
- The tangy-sweet magic of fresh lemon zest playing off those juicy huckleberries—it’s like sunshine and summer berries in every slice
- So simple to make—just one bowl and basic ingredients you probably already have (frozen berries work beautifully too!)
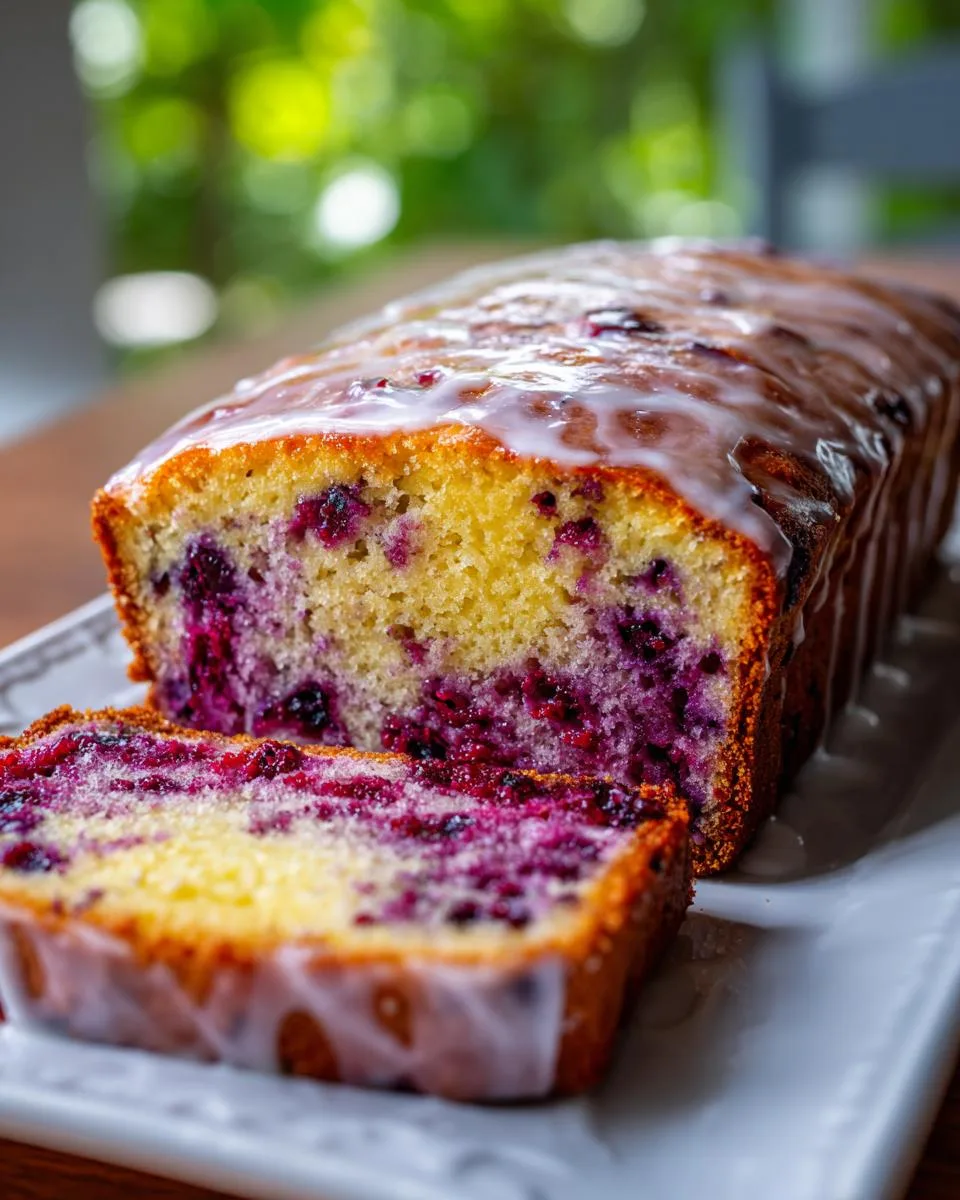
- That glossy lemon glaze—it soaks in just enough to make the top crackle slightly when you cut it (heaven!)
- Versatile as can be—equally at home on a brunch table or wrapped in parchment for picnic adventures
Ingredients for Huckleberry Lemon Breakfast Loaf
Gathering the right ingredients makes all the difference with this loaf – trust me, I learned the hard way after a sad, dense version early in my baking days! Here’s what you’ll need (and why each one matters):
- 8 tablespoons (113 g) unsalted butter, at room temperature – plus extra for greasing the pan. Cold butter just won’t cream properly, so take it out at least an hour ahead. I leave mine on the counter overnight if baking first thing in the morning!
- 6 tablespoons (85 g) cream cheese, at room temperature – Not the whipped kind! This is our secret weapon for that velvety texture. Full-fat works best.
- 1 ¼ cups granulated sugar – I know it seems like a lot, but the tart huckleberries and lemon need this balance. For a less sweet version, you can drop to 1 cup.
- Finely grated zest of 2 lemons – Use a microplane if you have one – those yellow flecks make every bite sing. And please, only organic lemons if you’re zesting!
- 3 large eggs, at room temperature – Cold eggs can make your batter separate. To quickly warm them, I sometimes place them in warm (not hot!) water for 5 minutes.
- 1 teaspoon vanilla extract – The good stuff makes a difference here. My favorite trick? Split a vanilla bean in your sugar jar for bonus flavor.
- 1 ½ cups all-purpose flour – Spoon and level it – no packing! Too much flour is the #1 reason for dry quick breads.
- ½ teaspoon baking powder – Just enough lift without making the loaf crumbly.
- ½ teaspoon fine sea salt – Brings out all the flavors. Table salt works in a pinch, but use slightly less.
- 1 ½ cups fresh or frozen huckleberries (or wild blueberries) – If using frozen, don’t thaw them first – they’ll bleed less into the batter. I like to toss them in a tablespoon of the flour mixture first to prevent sinking.
- ½ cup powdered sugar (sifted if clumpy) – For that gorgeous crackly glaze. Sometimes I add an extra tablespoon if I want it thicker.
- Juice of ½ a lemon – Fresh squeezed only! Bottled lemon juice just doesn’t have the same bright flavor.
See? Nothing too fancy – just quality ingredients treated right. Now let’s make some magic!

How to Make Huckleberry Lemon Breakfast Loaf
Ready to create that perfect loaf? Follow these steps—I’ve made this so many times, I could do it in my sleep now (but I’ll walk you through each step with all my hard-won tips):
Preparing the Batter
- Preheat the oven to 325°F – An oven thermometer is my secret weapon for accuracy. Ovens lie—this one’s 25°F cooler than it claims! Line an 8×4 or 9×5-inch loaf pan with parchment paper and lightly grease. The first time I skipped this? The loaf stuck in the pan like glue.
- Beat butter, cream cheese, sugar, and zest 3-4 minutes – Watch for pale and fluffy. My hand mixer’s perfect for this—stand mixers can overmix if not careful. Scrape the bowl halfway for even mixing—I learned the hard way!
- Add eggs one at a time, mixing well after each – Room temp eggs incorporate better. To quickly warm them, I place cold eggs in warm (not hot!) water for 5 minutes—cold eggs can make the batter separate.
- Sift in flour, baking powder, and salt – Sifting makes the crumb tender. I learned the hard way—packed flour makes the #1 reason for dense breads.
- Fold in vanilla – The good stuff makes a difference. My trick? Split a vanilla bean in your sugar jar for bonus flavor—just scrape the seeds.
- Fold in huckleberries – Gently is key to prevent smashing. I learned the hard way—overmixing makes berries disappear into the batter.
- Pour batter into the pan and smooth the top – A wet offset spatula works best—the first time I used a spoon, it dragged the batter.
Baking and Glazing
- Bake for 75-90 minutes – Oven thermometers are my secret weapon. Ovens vary—this one runs 25°F cooler than it claims! The first time I didn’t check, the tester came out with wet batter.
- Cool 10-15 minutes in the pan – This sets the structure. The first time I didn’t wait, the cake fell apart.
- Transfer to a wire rack – Cooling completely prevents the glaze from melting into the cake.
- Whisk powdered sugar and lemon juice – For that gorgeous crackle. Sometimes I add an extra tablespoon if I want it thicker.
- Brush over the warm cake – A pastry brush works best—the first time I used a spoon, the glaze pooled.
- Let the cake cool completely – The glaze sets completely when cooled. The first time I didn’t wait, the glaze melted into the cake.
There you have it—every step, every trick, and every “the first time I learned the hard way” so you don’t have to. Now let’s get that loaf in the oven and that glaze glistening!
Print
“Moist Huckleberry Lemon Breakfast Loaf You’ll Crave Daily”
- Prep Time: 15 minutes
- Cook Time: 75-90 minutes
- Total Time: 90-105 minutes
- Yield: 1 loaf (8-10 servings) 1x
- Category: Breakfast
- Method: Baking
- Cuisine: American
- Diet: Vegetarian
Description
A moist and tangy huckleberry lemon breakfast loaf with a sweet lemon glaze. Perfect for brunch or a quick morning treat.
Ingredients
- 8 tablespoons (113 g) unsalted butter, at room temperature, plus a bit for the pan
- 6 tablespoons (85 g) cream cheese, at room temperature
- 1 ¼ cups granulated sugar
- Finely grated zest of 2 lemons
- 3 large eggs, at room temperature
- 1 teaspoon vanilla extract
- 1 ½ cups all-purpose flour
- ½ teaspoon baking powder
- ½ teaspoon fine sea salt
- 1 ½ cups fresh or frozen huckleberries (or wild blueberries; if frozen, don’t defrost first)
- ½ cup powdered sugar (sifted if clumpy)
- Juice of ½ a lemon, or enough to make a thin glaze
Instructions
- Preheat the oven to 325ºF. Line an 8×4 or 9×5-inch loaf pan with parchment paper and lightly grease.
- Beat butter, cream cheese, sugar, and lemon zest until light and fluffy, about 3-4 minutes.
- Add eggs one at a time, mixing well after each addition. Stir in vanilla.
- Sift in flour, baking powder, and salt. Mix until just combined, then fold gently to ensure even mixing.
- Fold in huckleberries, then pour batter into the pan and smooth the top.
- Bake for 75-90 minutes, or until a tester comes out clean.
- Cool for 10-15 minutes, then transfer to a wire rack.
- Whisk powdered sugar and lemon juice to make a glaze. Brush over the warm cake.
- Let the cake cool completely before serving. Store wrapped at room temperature or in the fridge for up to a week.
Notes
- Use room temperature ingredients for even mixing.
- If using frozen berries, do not thaw before adding to the batter.
- For a stronger lemon flavor, add extra zest or a bit of lemon extract.
Nutrition
- Serving Size: 1 slice
- Calories: 280
- Sugar: 25g
- Sodium: 120mg
- Fat: 12g
- Saturated Fat: 7g
- Unsaturated Fat: 4g
- Trans Fat: 0g
- Carbohydrates: 40g
- Fiber: 1g
- Protein: 4g
- Cholesterol: 85mg
Tips for the Perfect Huckleberry Lemon Breakfast Loaf
After burning through more huckleberries than I’d like to admit (and a few sad, dense loaves), here are my hard-earned secrets for bakery-worthy results every time:
- Stop mixing when you see the last flour streaks – Overworking the batter activates gluten, making the loaf tough instead of tender. I count to 10 while folding and no more!
- Want more lemon zing? Add an extra teaspoon of zest or swap half the vanilla for lemon extract. My taste testers go wild for this version!
- Parchment paper is non-negotiable – That first time I skipped it? Let’s just say I served “huckleberry lemon crumbles” instead of slices. Now I always leave parchment overhang for easy lifting.
- Toss frozen berries in flour – This little trick prevents them from bleeding everywhere and sinking to the bottom. I use about a tablespoon from the measured flour.
- Check early, then often – Ovens vary wildly. Start testing at 70 minutes – when the top springs back and a skewer comes out with just a few moist crumbs, it’s done.
Huckleberry Lemon Breakfast Loaf Variations
Don’t have huckleberries? No problem! Wild blueberries make a fabulous swap—just keep that same 1 ½ cups measurement. Feeling adventurous? Try folding in a tablespoon of poppy seeds for crunch, or swap half the vanilla for almond extract. My cousin swears by adding a handful of shredded coconut for tropical vibes. The beauty? This loaf welcomes all kinds of twists!
Huckleberry Lemon Breakfast Loaf FAQs
After years of baking (and eating!) this loaf, I’ve answered every question under the sun. Here are the ones that pop up most often – with all my tried-and-true answers:
Can I use frozen huckleberries instead of fresh?
Absolutely! In fact, frozen berries are my secret weapon year-round. Just toss them straight from the freezer into your batter (no thawing!) to prevent a purple mess. Bonus: frozen berries actually hold their shape better during baking. Wild blueberries work beautifully too if huckleberries are hard to find.
How long does this lemon loaf stay fresh?
This beauty keeps like a dream! At room temperature, wrapped tightly in foil or plastic, it stays moist for 3 days. For longer storage (up to a week), pop it in the fridge – though I doubt it’ll last that long! You can also freeze slices wrapped in parchment for up to 3 months. Just thaw overnight and refresh with a quick zap in the microwave.
Why did my berries all sink to the bottom?
Ah, the classic berry sink! Two tricks prevent this: 1) Toss your berries (fresh or frozen) in a spoonful of the measured flour before folding them in – the light coating helps them “float.” 2) Pour half the batter first, scatter some berries, then top with remaining batter. Works like magic!
Can I make this without cream cheese?
While the cream cheese gives that signature velvety texture, in a pinch you can use all butter (increase to 10 tablespoons total). The loaf will be slightly denser but still delicious. For dairy-free, try coconut cream cheese – just reduce any added sugar since it’s often sweeter.
My glaze soaked right in – what went wrong?
Been there! The cake needs to be just warm (not hot) when glazing. If it disappears, don’t panic – it’s still adding flavor throughout. For that perfect crackly top, let the loaf cool 15 minutes before glazing, and make your glaze thicker by adding more powdered sugar a tablespoon at a time until it ribbons off your whisk.
Nutritional Information
Now, I’m no nutritionist (just a very enthusiastic baker), but here’s what you should know about this huckleberry lemon loaf. Like all homemade treats, the exact nutrition can vary based on your specific ingredients and how thick you slice it! That fancy organic butter you splurged on? Different from the store brand. Those plump huckleberries you foraged yourself? Probably packing more antioxidants than my freezer-bought ones.
The beauty is in the balance—you’re getting real ingredients like fresh fruit, proper butter, and honest-to-goodness eggs. No weird preservatives or mystery oils here! While I don’t count every calorie (life’s too short), I can tell you this loaf gives you that perfect morning energy boost without the sugar crash. That lemon zest? Pure vitamin C goodness. Those huckleberries? Little antioxidant powerhouses.
Just remember—nutrition facts are estimates at best. Your mileage may vary based on berry size, how much glaze you lick off the spoon (we’ve all been there), and whether you use that extra tablespoon of sugar I sometimes sneak in when no one’s looking. Bake it, enjoy it, share it—that’s the real nutrition that matters.

Share Your Huckleberry Lemon Breakfast Loaf
Nothing makes me happier than seeing your creations! Snap a photo of that golden, glazed loaf and tag me—I’ll be the one cheering you on from my kitchen. Or leave a review below telling me how your family devoured it. Happy baking, friends! For More recipes Follow me on Facebook