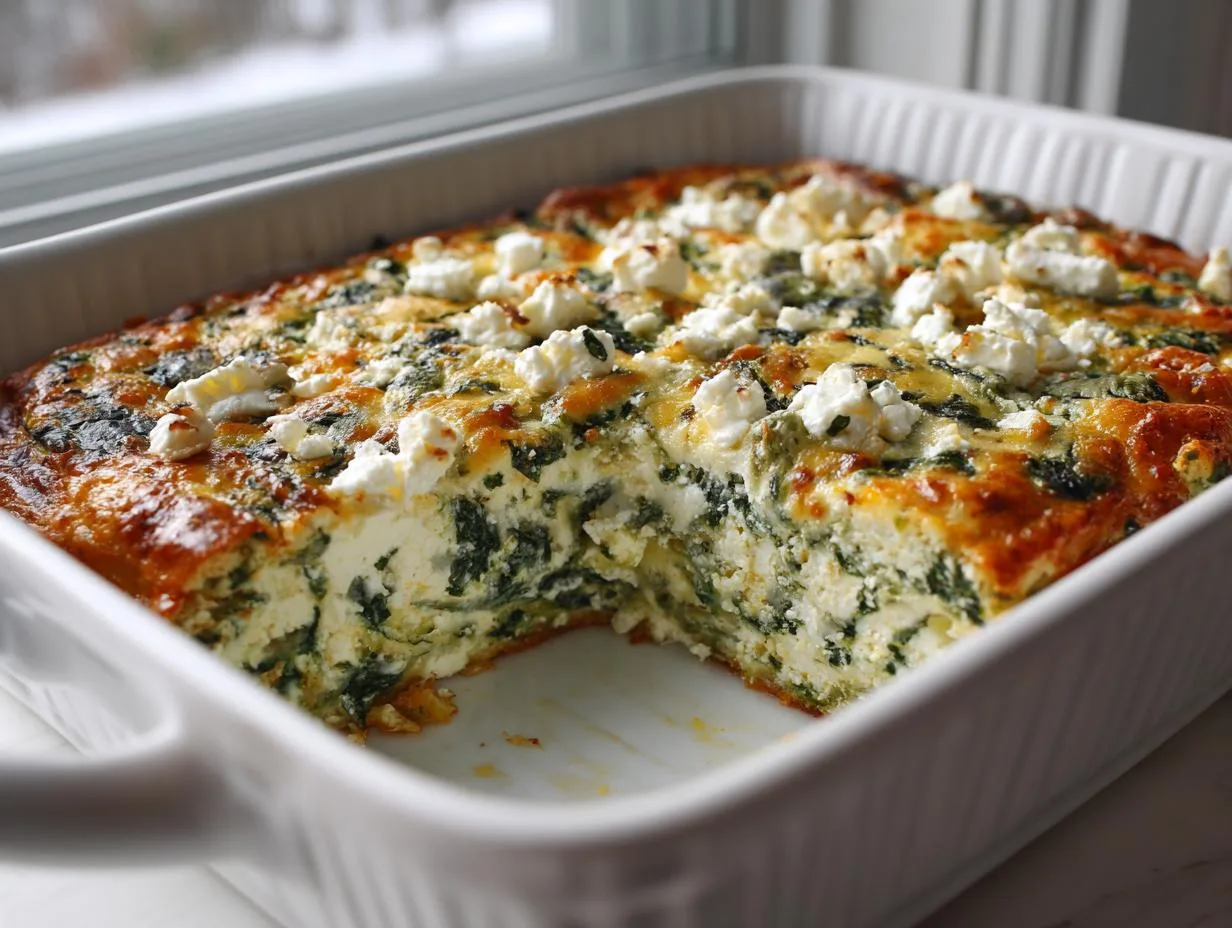
Nothing makes my heart happier than waking up to a house filled with the smell of baked eggs, cheese, and asparagus. That’s exactly what happens when I make my go-to overnight cheesy asparagus strata—a dish that feels fancy but couldn’t be easier to pull off. Picture this: layers of buttery English muffins, crisp-tender asparagus, salty ham, and melty cheese all soaked in a rich custard, then baked until golden. The magic? You assemble it the night before, letting the flavors mingle while you sleep. By morning, all that’s left is popping it in the oven and pouring coffee. It’s my secret weapon for stress-free brunches (or those mornings when I’d rather hit snooze than cook).

Table of Contents
Table of Contents
Why You’ll Love This Overnight Cheesy Asparagus Strata
Trust me, once you try this strata, it’ll become your new best friend for lazy mornings and impromptu brunches. Here’s why:
- Effortless elegance: Assemble it at night, bake it in the morning—no fuss, no last-minute scrambling.
- Crave-worthy textures: Creamy custard, crispy muffin edges, and that perfect bite of asparagus make every forkful exciting.
- Crowd-pleaser magic: It’s hearty enough for meat lovers but fancy enough to impress (hello, Easter brunch!).
- Flexible ingredients: Swap in what you’ve got—bacon for ham, spinach for asparagus—it’s forgiving and always delicious.
Seriously, it’s like a cozy breakfast hug in casserole form.
Ingredients for Overnight Cheesy Asparagus Strata
Gather these simple ingredients—most are probably already in your fridge or pantry! The beauty of this recipe is how ordinary ingredients transform into something extraordinary overnight. Just make sure everything is prepped and measured before you start layering. (Trust me, it saves so much time when you’re assembling this at 10 PM!)
- 1 pound fresh asparagus – trimmed and cut into 1-inch pieces (look for bright green, firm stalks—no floppy ends!)
- 4 English muffins – split and toasted (day-old works even better if you have them)
- 2 cups shredded Colby-Monterey Jack cheese – divided (that melty blend is *chef’s kiss*)
- 1 cup cubed fully cooked ham – about ½-inch cubes (or raid your deli drawer for leftovers)
- ½ cup chopped sweet red pepper – for that pop of color and crunch
- 8 large eggs – room temperature blends smoother
- 2 cups 2% milk – whole milk works too for extra richness
- 1 teaspoon salt – brings all the flavors together
- 1 teaspoon ground mustard – the secret flavor booster
- ¼ teaspoon pepper – freshly ground if you can
See? Nothing fussy here. Just good, honest ingredients that cozy up together in the fridge overnight. I always double-check my cheese and eggs—those are the MVPs that make this strata so luscious!
Equipment You’ll Need
Don’t worry—you won’t need any fancy gadgets for this recipe! Just pull out these basic kitchen tools (most of which you probably already own). Here’s what I grab from my cabinets every time I make this strata:
- 13×9-inch baking dish – The perfect size for all those delicious layers. Glass or ceramic works best for even baking.
- Large saucepan – For blanching the asparagus (though you could skip this and roast it if you’re feeling lazy).
- Whisk – My trusty wire whisk never fails for blending that silky egg custard.
- Mixing bowl – Medium to large size for combining the eggs and milk.
- Cutting board & sharp knife – For prepping the asparagus, ham, and peppers.
- Measuring cups and spoons – Because eyeballing measurements never works out for me!
- Tongs or slotted spoon – For fishing those asparagus spears out of the ice bath.
- Paper towels – Essential for drying the blanched asparagus (wet veggies = soggy strata).
That’s it! No stand mixer, no food processor—just good old-fashioned tools. I always joke that the most important “equipment” is actually your fridge and oven. Now let’s get layering!

How to Make Overnight Cheesy Asparagus Strata
Step 1: Prep the Asparagus
First things first—let’s get those asparagus spears ready for their starring role! Fill a large saucepan with about 8 cups of water and bring it to a rolling boil. While you’re waiting, prepare an ice bath (just a big bowl of ice water) for shocking the asparagus later. When the water’s boiling, gently drop in your prepped asparagus pieces and set your timer for exactly 2-3 minutes. You want them crisp-tender—not mushy! The second the timer dings, use tongs to transfer them straight into the ice bath. This stops the cooking and locks in that gorgeous green color. After about 2 minutes, drain them well and pat dry with paper towels. (This step is crucial—wet asparagus makes for a soggy strata, and nobody wants that!)
Step 2: Layer the Strata
Now comes the fun part—building those beautiful layers! Grab your greased 13×9-inch baking dish and arrange 6 English muffin halves in the bottom, cut side up. You’ll probably have some gaps—just trim the remaining muffin halves to fit those spaces (I like tearing them into rustic pieces for extra texture). Sprinkle 1 cup of that glorious shredded cheese evenly over the muffins. Next comes the asparagus—spread it out so every bite gets some green goodness. Scatter the ham cubes and chopped red pepper over the top. Take a step back and admire your work—those colorful layers already look amazing!
Step 3: Mix the Egg Custard
Time to make the magic happen—that rich, velvety custard that binds everything together! Crack your eggs into a large bowl (I always do this on the counter to avoid shell disasters). Add the milk, salt, ground mustard, and pepper. Now, whisk like you mean it! You want this completely smooth—no streaks of egg white remaining. I usually whisk for about 45 seconds until it’s perfectly blended and slightly frothy. Slowly pour this golden mixture over your layered ingredients, making sure to cover everything evenly. The custard will seep down into all those nooks and crannies as it chills overnight.
Step 4: Chill and Bake
Here’s where the “overnight” magic happens! Cover your strata tightly with plastic wrap (press it right against the surface to prevent drying) and tuck it into the fridge. Let it soak up all that custardy goodness for at least 8 hours—I often do 12 for extra flavor. When you’re ready to bake, preheat your oven to 375°F and take the strata out to rest on the counter while the oven heats (about 15 minutes). Remove the plastic, sprinkle the remaining cheese on top, and bake uncovered for 40-45 minutes. You’ll know it’s done when the top is golden, the edges are bubbling, and a knife inserted in the center comes out clean. Let it stand for 5 glorious minutes before slicing—this helps the layers set perfectly.
Print
Dreamy Overnight Cheesy Asparagus Strata in 8 Hours
- Prep Time: 20 minutes
- Cook Time: 45 minutes
- Total Time: 9 hours 5 minutes
- Yield: 8 servings 1x
- Category: Breakfast
- Method: Baking
- Cuisine: American
- Diet: Low Lactose
Description
A delicious overnight cheesy asparagus strata perfect for breakfast or brunch.
Ingredients
- 1 pound fresh asparagus, trimmed and cut into 1-inch pieces
- 4 English muffins, split and toasted
- 2 cups shredded Colby-Monterey Jack cheese, divided
- 1 cup cubed fully cooked ham
- 1/2 cup chopped sweet red pepper
- 8 large eggs
- 2 cups 2% milk
- 1 teaspoon salt
- 1 teaspoon ground mustard
- 1/4 teaspoon pepper
Instructions
- In a large saucepan, bring 8 cups water to a boil. Add asparagus; cook, uncovered, 2-3 minutes or just until crisp-tender. Drain and immediately drop into ice water. Drain and pat dry.
- Arrange 6 English muffin halves in a greased 13×9-in. baking dish, cut side up. Trim remaining muffin halves to fill spaces. Layer with 1 cup cheese, asparagus, ham and red pepper.
- In a large bowl, whisk eggs, milk, salt, mustard and pepper. Pour over top. Refrigerate, covered, overnight.
- Preheat oven to 375°. Remove strata from refrigerator while oven heats. Sprinkle with remaining 1 cup cheese. Bake, uncovered, 40-45 minutes or until a knife inserted in the center comes out clean. Let stand 5 minutes before cutting.
Notes
- Strata is a layered casserole dish, often made with bread, eggs, and cheese.
- You can substitute ham with cooked bacon or sausage.
- Make sure the strata is fully set before serving.
Nutrition
- Serving Size: 1 slice
- Calories: 320
- Sugar: 5g
- Sodium: 780mg
- Fat: 16g
- Saturated Fat: 7g
- Unsaturated Fat: 7g
- Trans Fat: 0g
- Carbohydrates: 22g
- Fiber: 2g
- Protein: 20g
- Cholesterol: 220mg

Tips for Perfect Overnight Cheesy Asparagus Strata
After making this strata more times than I can count (and learning from a few kitchen disasters!), here are my foolproof tips to ensure yours turns out perfect every single time:
- Use slightly stale bread: Day-old English muffins absorb the custard better without turning mushy. No time to wait? Lightly toast fresh muffins for 5 minutes at 300°F first.
- Dry those veggies thoroughly: After blanching, press the asparagus between paper towels like you’re wringing out a wet swimsuit. Any extra moisture makes the strata soggy.
- Press down the layers: Before adding the custard, gently press everything with clean hands to compact it slightly. This prevents floating muffin islands!
- Room temperature eggs are key: Cold eggs don’t blend as smoothly into the milk. If you forgot to take them out early, submerge whole eggs in warm water for 5 minutes.
- Check for doneness early: Ovens vary—start checking at 35 minutes. If the top browns too fast, tent loosely with foil while the center finishes cooking.
One more “grandma tip” from me? Let the baked strata rest those full 5 minutes before cutting—it makes cleaner slices and lets the custard set up beautifully. (Waiting is the hardest part when your kitchen smells this good!)
Ingredient Substitutions and Variations
One of my favorite things about this strata is how easily it adapts to whatever ingredients I have on hand or dietary needs I’m cooking for. Here are all the delicious ways you can mix it up without losing that wonderful strata magic:
- Meat swaps: Not a ham fan? Try crispy bacon pieces, cooked breakfast sausage, or even leftover roasted chicken. For vegetarian versions, I love using sautéed mushrooms or meatless crumbles.
- Veggie variations: Out of asparagus? No problem! Try broccoli florets, zucchini slices, or baby spinach (just wilt it first and squeeze out excess water). In summer, I adore using cherry tomatoes – their burst of acidity balances the richness beautifully.
- Bread options: English muffins give great texture, but stale French bread, sourdough, or even croissants make fabulous substitutes. For gluten-free, use your favorite GF bread – just toast it first so it holds up better.
- Cheese choices: While Colby-Jack melts like a dream, sharp cheddar, gruyère, or even pepper jack add wonderful flavor twists. Dairy-free? Violife’s mozzarella shreds work surprisingly well here!
- Custard tweaks: For extra richness, swap half the milk for heavy cream. Watching calories? Skim milk still gives great results. Lactose-intolerant? Almond or oat milk works in a pinch.
Last Christmas, I made a version with roasted butternut squash and sage that had everyone begging for seconds. That’s the beauty of strata – it’s really just a delicious blank canvas waiting for your personal touch!
Serving and Storage Suggestions
Nothing beats slicing into this golden, cheesy strata while it’s still piping hot from the oven! Here’s how I love to serve it for maximum enjoyment (plus my tried-and-true storage tricks for those rare leftovers).
Perfect Pairings: I always put out a big fruit salad—the fresh sweetness balances the strata’s richness beautifully. For brunch, add crispy hash browns and strong coffee (the darker roast cuts through all that cheese perfectly!). When serving for dinner (yes, we do breakfast-for-dinner often!), I pair it with a simple arugula salad dressed in lemon vinaigrette.
Leftover Love: Cool any leftovers completely, then cover tightly with foil or transfer to an airtight container. It keeps wonderfully in the fridge for up to 3 days. To reheat, I do individual portions in the microwave at 50% power for 1-2 minutes (stir halfway) or the whole pan covered with foil in a 350°F oven for 15-20 minutes. Pro tip: sprinkle a tiny bit of water over the top before reheating to prevent drying out!
What Not to Do: I learned the hard way that freezing changes the texture—the custard becomes grainy and the muffins turn rubbery. Also, resist cutting the whole strata at once if not serving immediately—it dries out faster. I just slice what we’ll eat and leave the rest whole in the baking dish.
Honestly? I think the leftovers might be even better—the flavors meld together overnight. My husband always “accidentally” makes extra so we can enjoy it for quick breakfasts all week!
Nutritional Information
Calories: 320 Protein: 20g
Total Fat: 18g (9g saturated)
Carbohydrates: 22g
Fiber: 2g
Cholesterol: 220mg
Sodium: 800mg
Important Note: These values are estimates. Nutrition varies based on specific brands and any substitutions you use (like low-fat cheese or turkey bacon would change the numbers).
For those tracking macros, each serving provides a good balance of protein and carbs—perfect for a satisfying brunch that keeps you full for hours! The eggs and cheese deliver that 20g protein per serving.
Frequently Asked Questions
What is strata in a recipe?
Strata is a layered casserole that typically combines bread, eggs, cheese, and other ingredients that soak overnight before baking. The name comes from the “strata” (layers) that meld together into a savory bread pudding-like dish.
How do I know when strata is done?
Your strata is done when the center reaches 160°F (a knife inserted should come out clean), the top turns golden brown, and the edges bubble slightly. The custard will be set but still slightly jiggly in the center when you pull it out—it’ll finish setting as it rests.
Can I freeze cheesy asparagus strata?
I don’t recommend freezing this strata. The texture of the bread becomes rubbery and the custard turns grainy when frozen and thawed. For best results, store leftovers in the fridge up to 3 days and reheat portions as needed.
Can I make this vegetarian?
Absolutely! Simply omit the ham and add extra veggies like mushrooms, spinach, or meatless crumbles. The eggs and cheese provide plenty of protein—just ensure any veggie additions are well-drained to prevent sogginess.
What’s the minimum soak time?
While 8 hours is ideal, you can get away with a 4-hour soak in a pinch. The bread won’t absorb as much custard, but it’ll still be delicious—just expect slightly more distinct layers rather than a cohesive texture.
Share Your Overnight Cheesy Asparagus Strata
Nothing makes me happier than seeing your kitchen adventures with this recipe! Did you add a special twist? Maybe swap in caramelized onions or use your grandma’s favorite cheese? I want to hear all about it—the triumphs, the oops moments, and everything in between. Drop a comment below to tell me how yours turned out (or tag me on Instagram @[yourhandle] so I can see that golden, cheesy masterpiece!). Your photos might just inspire someone else to try their first strata.
And hey—if this recipe becomes your new go-to for lazy Sunday brunches or holiday mornings like it has for me, pay it forward! Share it with that friend who’s always asking for your “secret” breakfast recipes. After all, good food tastes even better when we enjoy it together.
You can also find more delicious recipes on Facebook.
Happy cooking, friends! May your strata always be cheesy, your asparagus crisp-tender, and your mornings full of delicious smells.