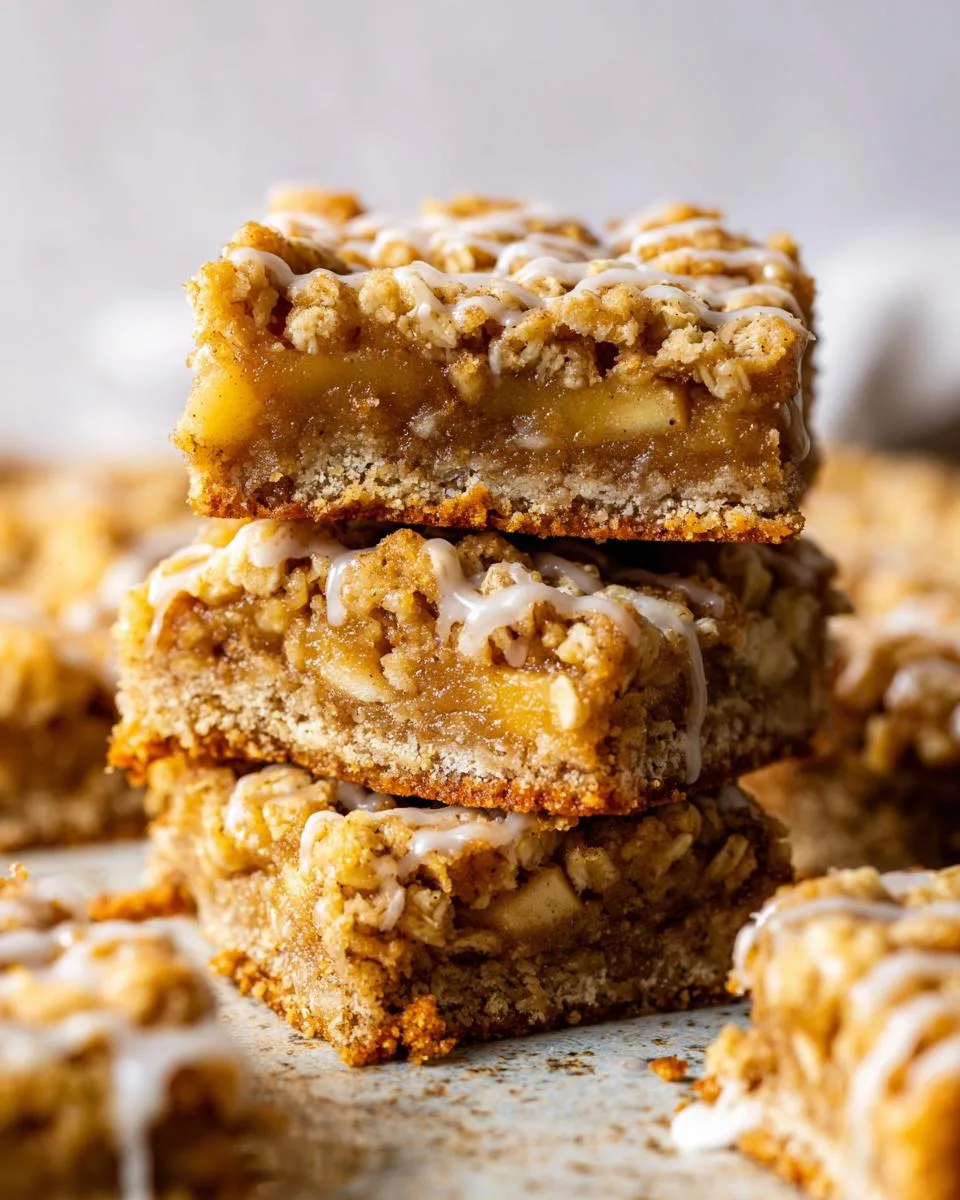
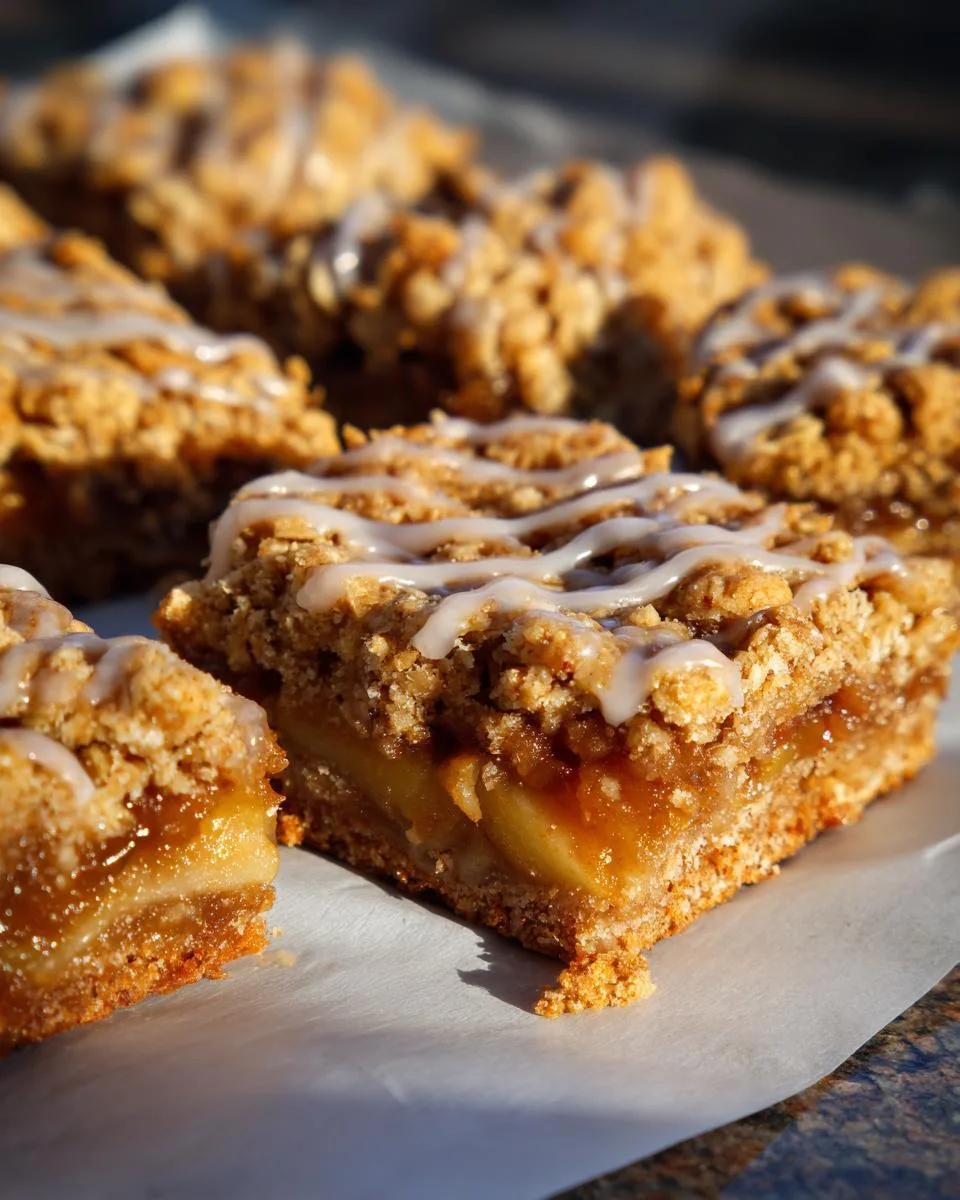
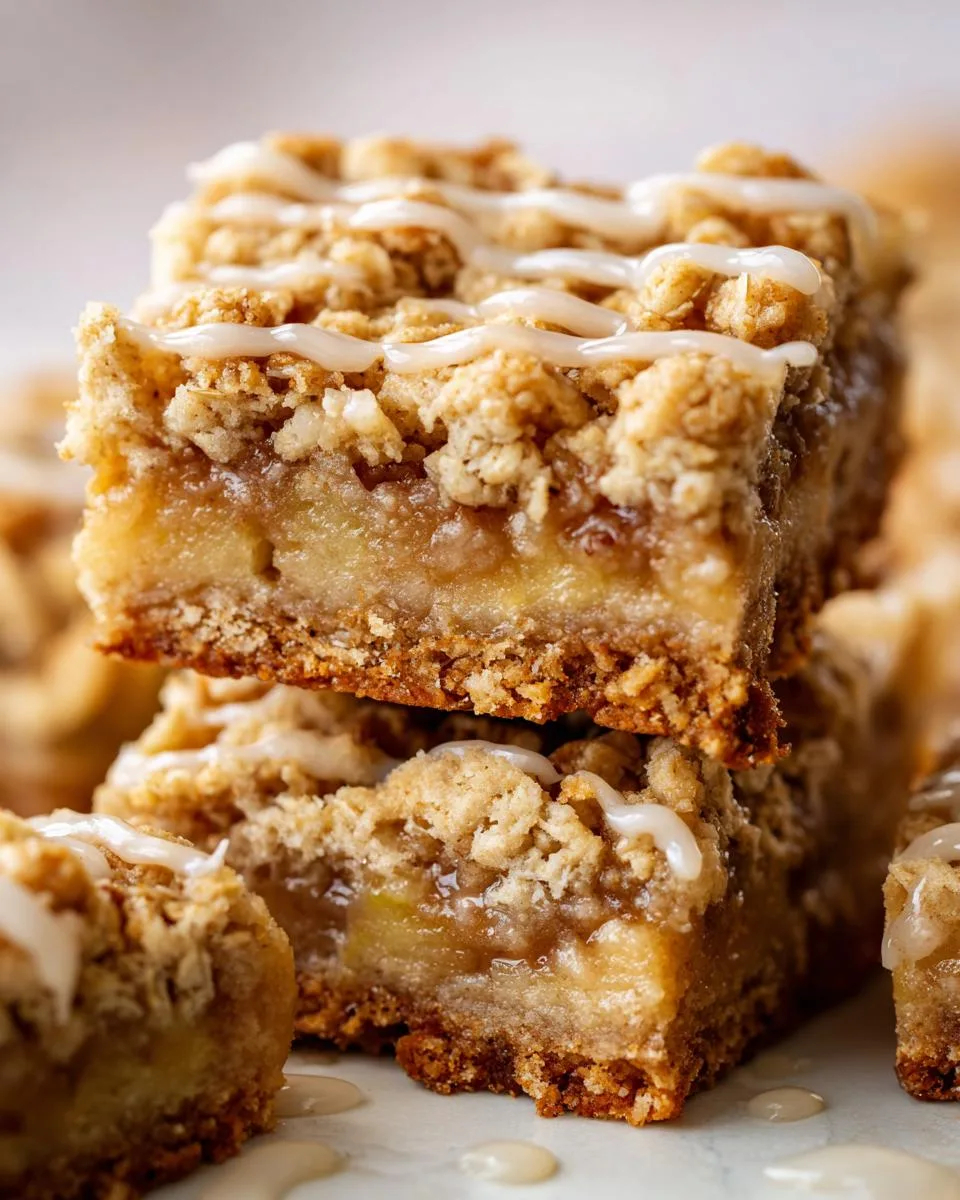
Oh my gosh, let me tell you about these apple bars – they’re the kind of dessert that makes you close your eyes and sigh after the first bite. I’ve been making them for years, ever since my neighbor shared her recipe when I first moved in. That buttery oat crust? The way the sweet-tart apples soften into a jammy filling? Absolute perfection. And the best part? They come together in about an hour with simple ingredients you probably already have. No fancy techniques here – just straightforward baking magic that’ll make your kitchen smell like autumn heaven. Trust me, once you try these apple bars, they’ll become your go-to dessert for potlucks, bake sales, or just because it’s Tuesday.
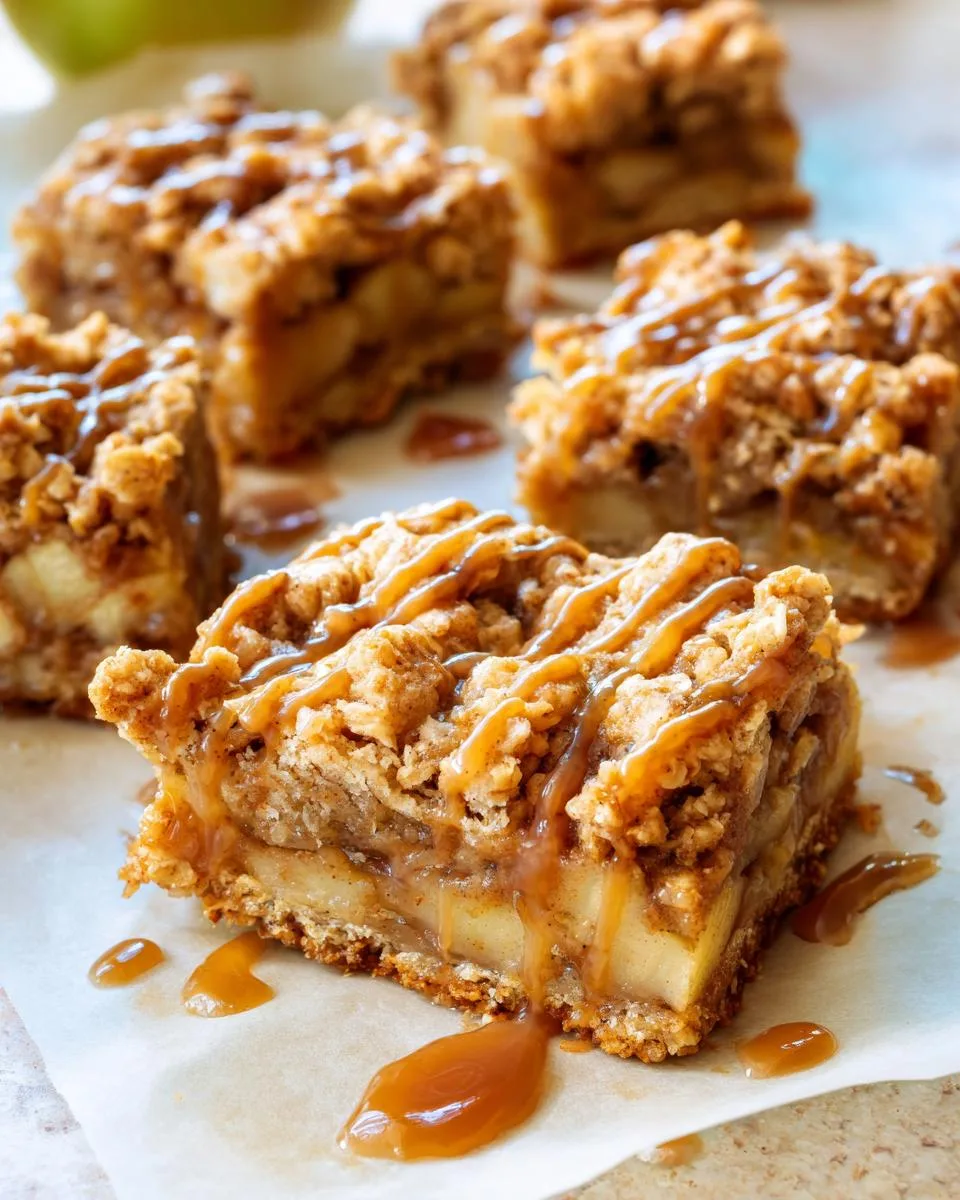
Table of Contents
Table of Contents
Why You’ll Love These Apple Bars
Listen, I know you’re going to fall head over heels for these apple bars – just like I did! Here’s why:
- Crazy easy to make – No fancy equipment needed, just a bowl and your hands. Perfect for when you need something impressive but don’t want the fuss.
- That texture though – The oat crust gets perfectly crisp while the apples turn soft and jammy. It’s like apple pie’s easier, more portable cousin.
- Works for any occasion – Breakfast? Sure! Afternoon snack? Absolutely. Fancy dessert with ice cream? You bet. These bars don’t judge.
- Kids go nuts for them – My picky eaters actually ask for seconds. The sweet cinnamon flavor wins every time.
- Makes your house smell amazing – That warm apple-cinnamon aroma is basically fall in oven form.
Ingredients for Perfect Apple Bars
Okay, let’s gather our treasures! Here’s exactly what you’ll need for those dreamy apple bars:
- 2 cups all-purpose flour – spooned and leveled, please! No packing it down.
- 1 cup old-fashioned oats – not quick oats, they’ll disappear in the crust.
- 3/4 cup brown sugar – packed tight, this makes the crust caramel-y.
- 1/2 cup granulated sugar – for that perfect sweetness balance.
- 1 teaspoon ground cinnamon – split (half for crust, half for apples).
- 1/2 teaspoon salt – don’t skip this flavor booster!
- 1 cup cold butter – cubed small (I pop mine in the freezer for 10 minutes first).
- 4 cups peeled, chopped apples – about 3 medium apples, 1/2-inch chunks work best.
- 2 teaspoons cornstarch – our secret against sogginess.
- 1 tablespoon lemon juice – keeps the apples bright.
- 1 teaspoon vanilla extract – the good stuff, not imitation.
- 1/4 teaspoon nutmeg (optional) – but oh so good if you’ve got it.
- 1/2 cup powdered sugar + 1–2 tablespoons milk – for that pretty drizzle (totally optional but recommended).
Ingredient Substitutions & Notes
Out of something? No sweat! Here are my tested swaps:
- Flour: Gluten-free 1:1 blend works beautifully.
- Apples: Granny Smith for tartness, Honeycrisp for sweetness – mix them for balance!
- Sugar: Swap 1/4 cup brown sugar for honey or maple syrup (reduce milk in glaze).
- Butter: Coconut oil works in a pinch, but the texture changes slightly.
- Cornstarch: Tapioca starch is a great alternative.
Step-by-Step Apple Bars Recipe
Alright, let’s make some magic happen! I’ll walk you through each step like we’re baking together in my kitchen. Promise it’s easier than it looks.
Crust First – The Foundation
Start by preheating your oven to 350°F (175°C) – no cheating here, that temperature matters! Line your 9×13-inch pan with parchment paper, leaving some overhang. Trust me, you’ll thank me later when those bars pop right out.
Now grab that big bowl and whisk together flour, oats, brown sugar, granulated sugar, salt, and HALF the cinnamon. See those butter cubes? Toss them in and get ready for the fun part – use your fingers to pinch and rub everything together until it looks like wet sand with some pea-sized chunks remaining. Set aside 1½ cups of this mixture (I use a measuring cup) for the topping later.
The Perfect Apple Layer
Press the remaining crumb mixture firmly into your prepared pan – I mean really press it down with your palms. Bake this naked crust for 10-12 minutes until it’s just starting to golden at the edges.
While that’s baking, toss your chopped apples with cornstarch, lemon juice, vanilla, remaining cinnamon, and nutmeg if using. Let them sit for about 5 minutes – this helps draw out some juices so they don’t make everything soggy.
The Grand Finale
Spread those saucy apples evenly over your par-baked crust. No need to drain them – that cornstarch will work its magic! Sprinkle your reserved crumb mixture over the top like you’re decorating a cake.
Back into the oven it goes for 30-35 minutes. You’ll know it’s done when the topping turns golden brown and you see little bubbles peeking through around the edges. Oh, that smell!
Here’s the hardest part – let it cool COMPLETELY before cutting. I know, I know… but rushing leads to crumbly messes. Worth the wait!
Print
Irresistible 3-Ingredient Apple Bars That Wow
- Prep Time: 20 minutes
- Cook Time: 45 minutes
- Total Time: 1 hour 5 minutes
- Yield: 12 bars 1x
- Category: Dessert
- Method: Baking
- Cuisine: American
- Diet: Vegetarian
Description
Delicious apple bars with a crumbly oat crust and sweet apple filling. Perfect for dessert or a snack.
Ingredients
- 2 cups all-purpose flour
- 1 cup old-fashioned oats
- 3/4 cup brown sugar
- 1/2 cup granulated sugar
- 1 teaspoon ground cinnamon (for crust and topping)
- 1/2 teaspoon salt
- 1 cup cold butter, cut into small cubes
- 4 cups peeled, chopped fresh apples
- 2 teaspoons cornstarch
- 1 tablespoon lemon juice
- 1 teaspoon vanilla extract
- 1/2 teaspoon ground cinnamon (for apple filling)
- 1/4 teaspoon nutmeg (optional)
- 1/2 cup powdered sugar
- 1–2 tablespoons milk
Instructions
- Preheat the oven to 350°F (175°C) and line a 9×13-inch pan with parchment paper.
- In a large bowl, combine flour, oats, brown sugar, granulated sugar, salt, and the first portion of cinnamon. Cut in the butter until the mixture resembles coarse crumbs. Set aside 1½ cups of this mixture for the topping.
- Press the remaining mixture evenly into the prepared pan and bake for 10–12 minutes until lightly golden.
- Toss the chopped apples with cornstarch, lemon juice, vanilla extract, the second portion of cinnamon, and nutmeg. Let the mixture sit for a few minutes.
- Spread the apple mixture evenly over the baked crust. Sprinkle the reserved crumb mixture on top.
- Bake again for 30–35 minutes or until the topping is golden and the apples are bubbly.
- Allow the bars to cool completely before lifting them out of the pan. Drizzle the glaze over the cooled bars or enjoy them plain.
Notes
- Store in an airtight container for up to 3 days.
- Use Granny Smith apples for a tart flavor.
- For a crispier topping, add extra oats.
Nutrition
- Serving Size: 1 bar
- Calories: 280
- Sugar: 22g
- Sodium: 120mg
- Fat: 12g
- Saturated Fat: 7g
- Unsaturated Fat: 4g
- Trans Fat: 0g
- Carbohydrates: 40g
- Fiber: 2g
- Protein: 3g
- Cholesterol: 30mg
How to Prevent Soggy Apple Bars
The cornstarch is your best friend here – it thickens those apple juices beautifully. Also, don’t skip par-baking the crust first! If your apples seem extra juicy, pat them gently with paper towels before mixing. And remember – cooling time isn’t optional if you want clean slices.
Serving & Storage Tips
Oh, let me tell you how I love serving these apple bars – warm from the oven with a scoop of vanilla ice cream slowly melting over the top. Pure heaven! But they’re just as delicious at room temperature with your morning coffee (no judgment here).
For storage, keep them in an airtight container – they’ll stay fresh for about 3 days at room temp. If it’s super humid, pop them in the fridge (they’ll last up to 5 days that way). You can also freeze them for up to 3 months – just wrap individual bars in plastic wrap before tossing in a freezer bag. Quick 30-second zap in the microwave brings them right back to life!
Apple Bars FAQ
You’ve got questions? I’ve got answers! Here’s everything I’ve learned after making these apple bars about a hundred times:
What apples work best for apple bars?
For the perfect balance, I like mixing tart Granny Smith with sweet Honeycrisp apples. But honestly? Any baking apple works – just avoid super soft varieties. The firmer the apple, the better texture you’ll get after baking. Pro tip: If your apples are extra juicy, give them a quick pat with paper towels before mixing.
How long do these stay fresh?
At room temp in an airtight container, they’re perfect for 3 days. In the fridge? Maybe 5 days – though the texture changes slightly. But let’s be real… they never last that long in my house!
Help! My bars turned out soggy – what went wrong?
First, cornstarch is your BFF – don’t skip it! Also, make sure your crust gets that initial bake before adding apples. And seriously – let them cool completely before cutting. I know it’s hard to wait, but it makes all the difference.
What’s the best way to serve apple bars?
My family fights over them warm with vanilla ice cream melting on top. For breakfast (yes, breakfast!), I just dust them with powdered sugar. They’re also amazing with caramel drizzle or a dollop of whipped cream for special occasions. Basically, you can’t go wrong!
Nutritional Information
Each apple bar clocks in at about 280 calories – but who’s counting when they taste this good? Keep in mind these numbers can vary depending on your exact ingredients (especially apple sweetness and butter brands). The oats and apples give you 2g of fiber per serving, which makes me feel slightly better about eating two… or three.

Final Thoughts
Now go make these apple bars and watch them disappear! Tag me when you do – I’d love to see your creations. And hey, if they become your new obsession like they did mine? You’re welcome. Check out more recipes on our site!