There’s something magical about walking into a bakery and smelling fresh chocolate chip cookies – that warm, buttery aroma that makes your mouth water instantly. I’ve spent years trying to recreate that perfect bakery-style chocolate chip cookie at home – you know, the kind with crisp golden edges, a soft, chewy center, and pockets of melty chocolate in every bite. My obsession started when I was little, pressing my nose against the bakery case, dreaming about those thick cookies stacked high behind the glass.
After countless batches (and a few kitchen disasters), I finally cracked the code. The secret? A simple mix of melted butter, the right balance of sugars, and – most importantly – patience. These bakery-style chocolate chip cookies deliver that professional bakery taste with every homemade batch. They’re slightly underbaked in the center for that perfect chew, loaded with chocolate chips, and just sturdy enough to hold their shape without being cakey. One bite takes me right back to those childhood bakery visits, but now I get to enjoy them fresh from my own oven.
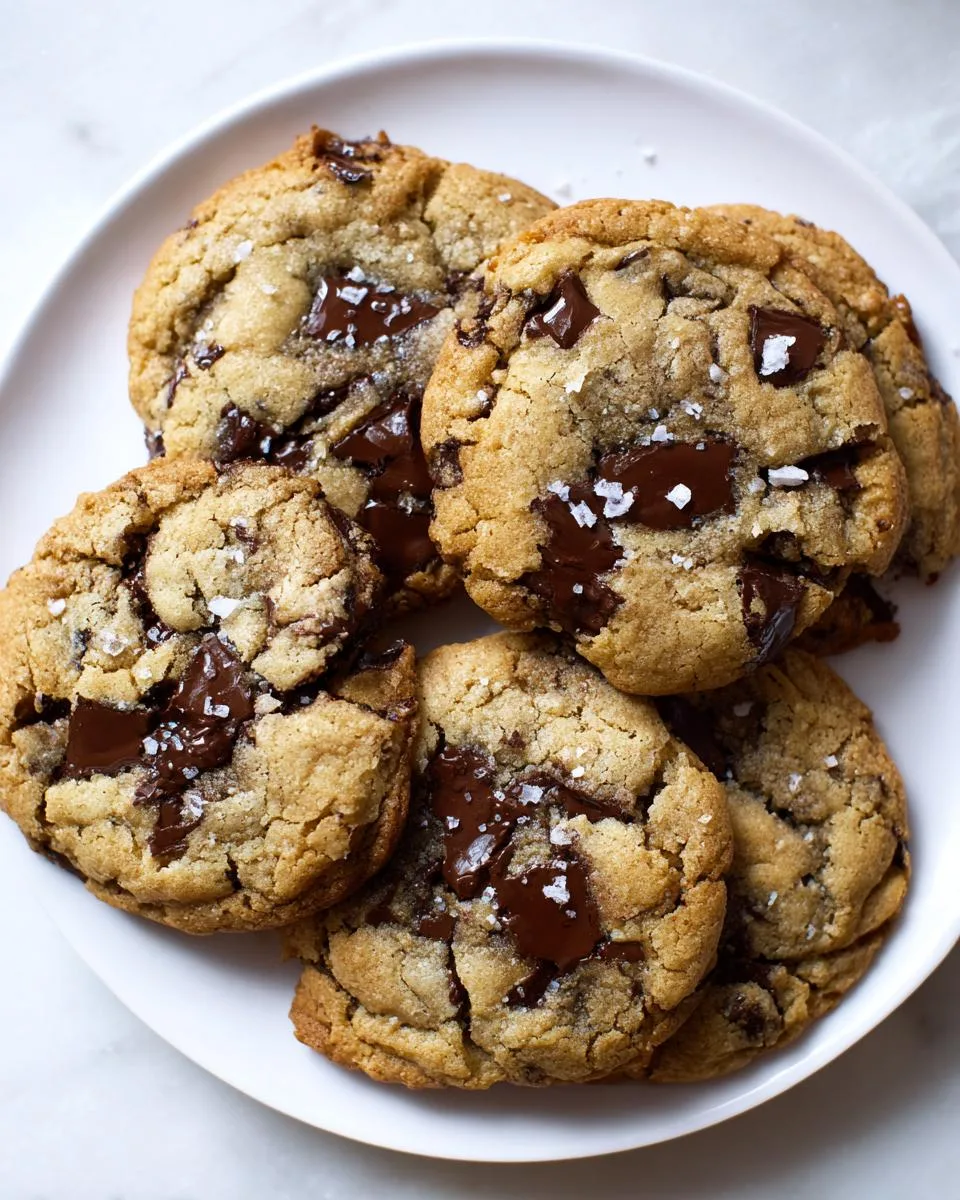
Table of Contents
Table of Contents
Why You’ll Love These Bakery Style Chocolate Chip Cookies
Oh my gosh, these cookies are EVERYTHING. Let me tell you exactly why they’ll become your new go-to recipe:
- That perfect bakery-style texture – crisp golden edges giving way to a soft, almost doughy center
- Loaded with melty chocolate in every single bite (I use three whole cups because why not?)
- They hold their shape beautifully – no sad, flat cookies here!
- Simple ingredients you probably have in your pantry right now
- That magical bakery aroma filling your whole house as they bake
Trust me, one bite and you’ll never go back to store-bought or those sad, thin cookies again. These are the real deal – just like your favorite bakery makes them, but even fresher and more delicious!
Ingredients for Bakery Style Chocolate Chip Cookies
Okay, let’s gather our cookie arsenal! Here’s exactly what you’ll need for those perfect bakery-style chocolate chip cookies – and yes, every single detail matters here:
- 14 tablespoons unsalted butter – That’s 1¾ sticks, melted but cooled slightly (warm is okay, hot will scramble your eggs – oops!)
- 1 cup granulated sugar – Just regular white sugar does the trick
- ½ cup packed light brown sugar – Pack it in that measuring cup like you mean it!
- 2 large eggs – Room temp is ideal, but I’ve used cold in a pinch
- 1 teaspoon vanilla extract – The good stuff, not imitation
- 2½ cups all-purpose flour – Fluff it before measuring for accuracy
- 1 teaspoon baking soda – Make sure it’s fresh!
- ½ teaspoon salt – I use sea salt because I’m fancy like that
- 3 cups chocolate chips – My secret? Mix semisweet and dark chips for the perfect balance
- Extra goodies – Flaky sea salt for topping if you’re feeling extra (and you should!)
See? Nothing weird or complicated – just quality ingredients ready to work some magic in your oven!

How to Make Bakery Style Chocolate Chip Cookies
Alright, let’s make some cookie magic happen! This is where the real fun begins. I’ll walk you through each step like I’m right there in your kitchen with you – because trust me, I’ve made every mistake possible with these cookies and learned exactly what works.
Mixing the Dough
First things first – grab that bowl of melted butter that’s cooled slightly (you didn’t forget to let it cool, right? Hot butter makes scary scrambled egg cookies). Toss in both sugars and really go to town mixing them together. I use my sturdy wooden spoon for this – you want it fully combined until it looks like thick caramel sauce.
Now, crack in those eggs one at a time, mixing well after each. This is where I usually make a mess – egg shells everywhere! Stir in the vanilla too – that heavenly smell is just the beginning.
In another bowl, whisk together your flour, baking soda, and salt. Slowly add it to the wet ingredients – don’t dump it all at once or you’ll have a flour explosion (ask me how I know). Mix just until the flour disappears – overmixing makes tough cookies, and nobody wants that.
Here comes the best part – the chocolate chips! Gently fold in all three glorious cups (yes, three – no skimping!). I save about ¼ cup to press on top later because pretty cookies make me happy.
Chilling the Dough
Now for the hardest part – waiting. Cover your bowl with plastic wrap and pop it in the fridge for at least an hour. I know, I know – the temptation to bake immediately is real. But this step is what gives you those thick, bakery-style cookies that don’t spread into pancake shapes.
The cold dough bakes up taller and the flavors actually deepen as it chills. Sometimes I make the dough at night and bake fresh cookies in the morning – the overnight chill makes them even better! Your patience will be rewarded, I promise.
Baking the Cookies
Preheat your oven to 375°F while the dough chills – a hot oven is key for that perfect texture. Line your baking sheets with parchment paper (no sticking disasters today!).
Use a cookie scoop or two spoons to form balls slightly taller than they are wide – this helps them stay thick. I make mine about 3 tablespoons each. Press a few extra chocolate chips on top because more chocolate is always better.
Bake for 10-13 minutes – but here’s the trick: pull them out when the edges are golden but the centers still look slightly underdone. They’ll keep cooking on the hot pan as they cool. Let them sit for 5-10 minutes before moving – this is when they firm up to that perfect chewiness.
See those gorgeous golden edges with the soft centers? That’s bakery perfection right there! Sprinkle with flaky salt now if you’re feeling fancy – the salty-sweet combo is incredible.
Print
Bakery Style Chocolate Chip Cookies: 3 Amazing Secret
- Prep Time: 15 mins
- Cook Time: 13 mins
- Total Time: 1 hour 28 mins (including chilling)
- Yield: 24 cookies 1x
- Category: Dessert
- Method: Baking
- Cuisine: American
- Diet: Vegetarian
Description
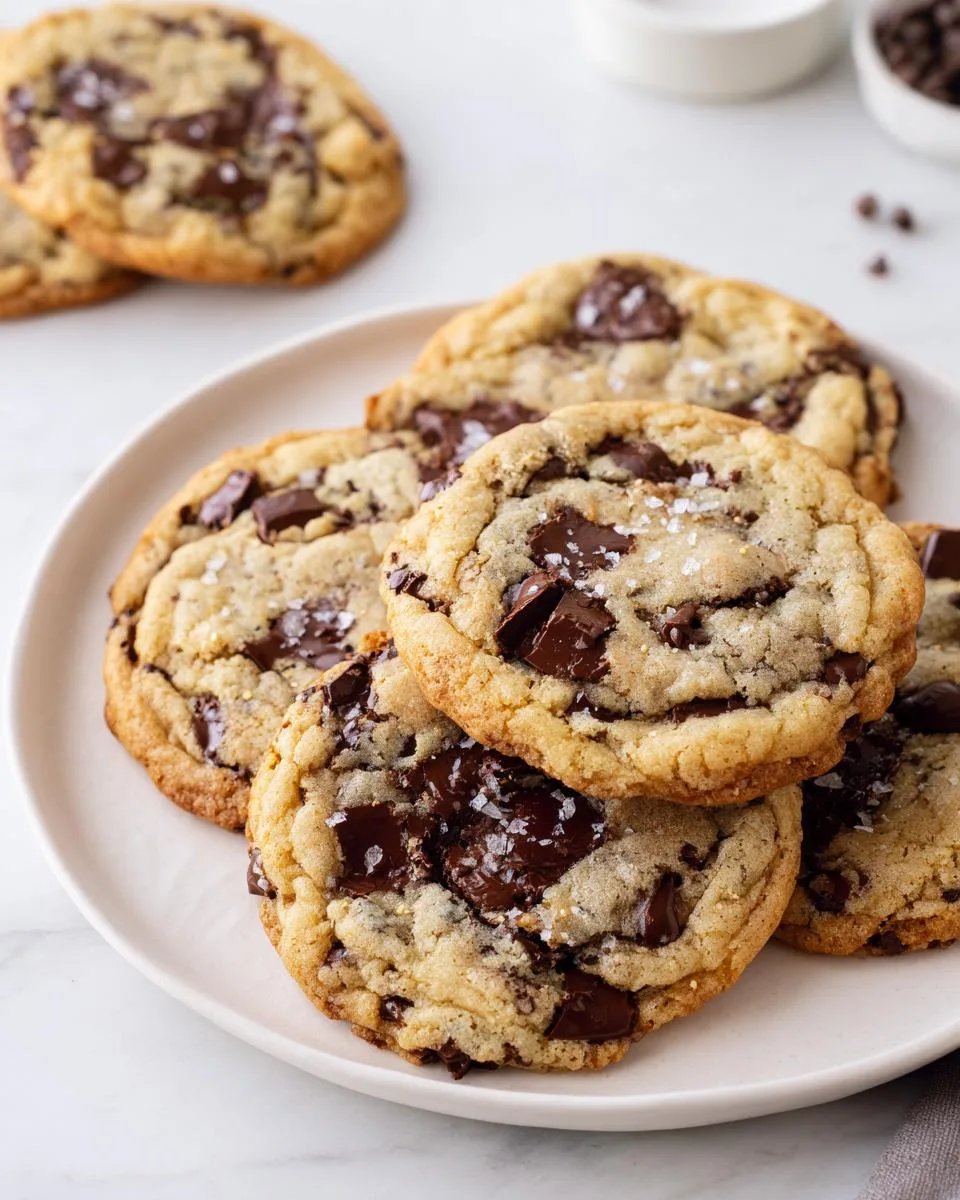
Bakery-style chocolate chip cookies are thick, chewy, and loaded with chocolate chips. They have a golden edge and a soft center, just like the ones from your favorite bakery.
Ingredients
- 2 large eggs
- 2½ cups all-purpose flour
- 1 teaspoon baking soda
- ½ teaspoon salt or sea salt
- 1 cup granulated sugar
- ½ cup packed light brown sugar
- 1 teaspoon vanilla extract
- 3 cups chocolate chips (mix of semisweet and dark)
- 14 tablespoons unsalted butter, melted and slightly cooled
- Extra chocolate chips and flaky sea salt for topping (optional)
Instructions
- Mix flour, baking soda, and salt in a medium bowl. Set aside.
- Beat melted butter, granulated sugar, and brown sugar in a large bowl until smooth. Add eggs one at a time, mixing well after each. Stir in vanilla extract.
- Gradually add dry ingredients to the wet mixture. Mix until a thick dough forms. Fold in chocolate chips, saving some for topping.
- Cover and refrigerate dough for at least 1 hour or overnight.
- Preheat oven to 375°F (190°C). Line baking sheets with parchment paper.
- Scoop dough into balls, slightly taller than wide. Place on baking sheet and press extra chocolate chips on top.
- Bake for 10–13 minutes until edges are golden and centers are soft.
- Let cookies cool on the baking sheet for 5–10 minutes before transferring to a wire rack. Sprinkle with flaky sea salt if desired.
Notes
- Chilling the dough prevents spreading and enhances flavor.
- Underbake slightly for a soft center.
- Use a mix of chocolate chips for better texture.
- Store in an airtight container for freshness.
Nutrition
- Serving Size: 1 cookie
- Calories: 220
- Sugar: 18g
- Sodium: 110mg
- Fat: 10g
- Saturated Fat: 6g
- Unsaturated Fat: 3g
- Trans Fat: 0g
- Carbohydrates: 30g
- Fiber: 1g
- Protein: 2g
- Cholesterol: 35mg
Tips for Perfect Bakery Style Chocolate Chip Cookies
After burning more batches than I’d like to admit (and eating all the “mistakes” anyway), I’ve learned a few tricks to guarantee bakery-worthy cookies every single time:
- Mix your chips – Using both semisweet and dark chocolate creates pockets of different melty goodness in every bite
- Underbake on purpose – Pull them out when centers still look slightly doughy – they’ll set perfectly as they cool
- Make ’em tall – Shape dough balls slightly taller than wide for that professional bakery dome
- Salt is magic – A pinch of flaky sea salt on top right after baking elevates them to gourmet status
- Parchment is your friend – No sticking disasters and easy cleanup – win/win!
- Butter temperature matters – Melted but cooled butter gives that perfect chew without greasiness
The best tip? Share them warm – that first melty bite is pure happiness. Though good luck not eating them all yourself first!
Ingredient Notes and Substitutions
Okay, real talk – sometimes you gotta improvise in the kitchen! Here’s my cheat sheet for when you’re missing something or want to mix it up:
- Salted butter? No problem – just skip the extra salt in the recipe.
- Out of brown sugar? Use all white sugar, but your cookies will be crisper and less chewy (sob!).
- Chocolate chip options: Milk, dark, white, or even chopped chocolate bars all work – just keep that 3 cup total!
- Gluten-free? A 1:1 gluten-free flour blend can work, but texture might vary.
- Egg-free? I’ve had luck with flax eggs, but they’ll spread more.
Remember – baking is chemistry, so major swaps might change your results. But hey, imperfect cookies still taste amazing!
Storing and Reheating Bakery Style Chocolate Chip Cookies
Alright, let’s talk about keeping these beauties fresh – because let’s be real, they probably won’t last long anyway! For maximum chewiness, store them in an airtight container at room temperature with a slice of bread (trust me, the bread keeps them soft!). They’ll stay perfect for about 3-4 days – if they make it that long.
Want that fresh-from-the-oven magic days later? Just pop a cookie in the microwave for 10-15 seconds – the chocolate gets all melty again and it’s like you just baked them. For a crispier edge, a quick 2-minute toast in the oven at 350°F works wonders. And yes, I’ve totally eaten them straight from the freezer too – no judgment here!
Nutritional Information for Bakery Style Chocolate Chip Cookies
Let’s be real – we’re not eating cookies for their health benefits! But since you asked, here’s the scoop on what’s in each glorious bakery-style chocolate chip cookie (based on making 24 cookies from this recipe):
- Calories: 220 (worth every single one!)
- Fat: 10g (mostly from all that delicious butter)
- Carbs: 30g (hello, sugar rush!)
- Protein: 2g (from the eggs and flour)
Remember – these are estimates and will vary based on your exact ingredients and cookie size. My advice? Enjoy every bite and save the calorie counting for another day!
FAQs About Bakery Style Chocolate Chip Cookies
Alright, let’s tackle those burning cookie questions! After years of baking (and eating) these bad boys, I’ve got answers to everything you’re wondering:
How long do these cookies stay fresh?
In my house? About 12 hours – ha! But realistically, stored properly in an airtight container at room temp, they’ll stay soft and delicious for 3-4 days. Pro tip: toss in a slice of bread to keep them extra chewy. For longer storage, freeze the baked cookies for up to 3 months – just microwave for 15 seconds when the craving hits!
Why did my cookies turn out flat?
Oh honey, we’ve all been there! Flat cookies usually mean your butter was too warm (did you skip the cooling step?), your baking soda is old (check that expiration date!), or – the big one – you didn’t chill the dough. That fridge time is CRUCIAL for thick, bakery-style cookies. Next time, be patient – I promise it’s worth it!
How can I tell when the cookies are done?
Here’s my foolproof test: edges golden brown, centers still look slightly underdone. They’ll keep cooking on the hot pan – that’s how you get that perfect soft center. If you wait until they look fully baked in the oven, they’ll be overdone and crunchy. Trust the process!
Got more cookie questions? Drop them in the comments – I could talk bakery-style chocolate chip cookies all day! And if you try these, let me know how they turn out. Happy baking! Check out our Facebook page for more baking tips!


