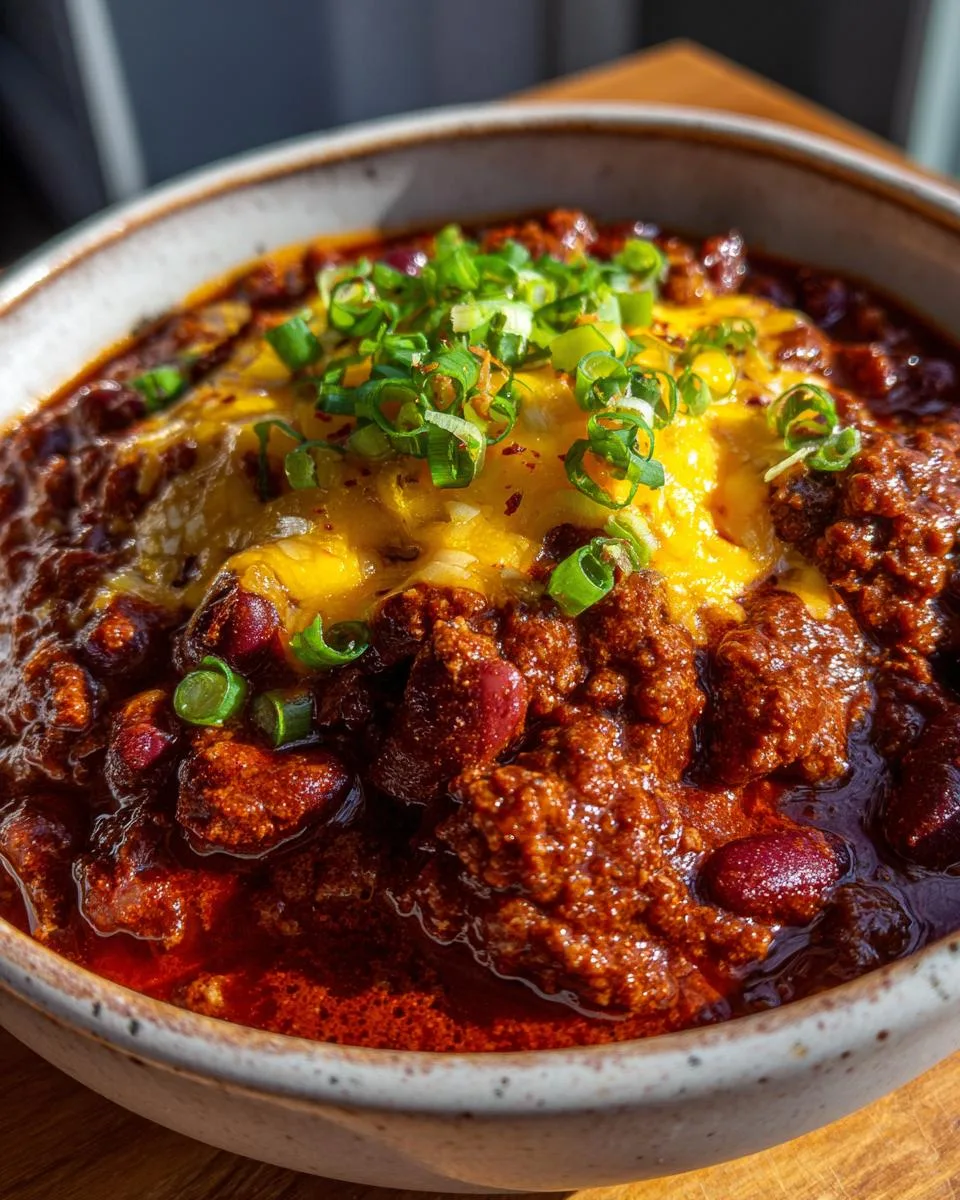
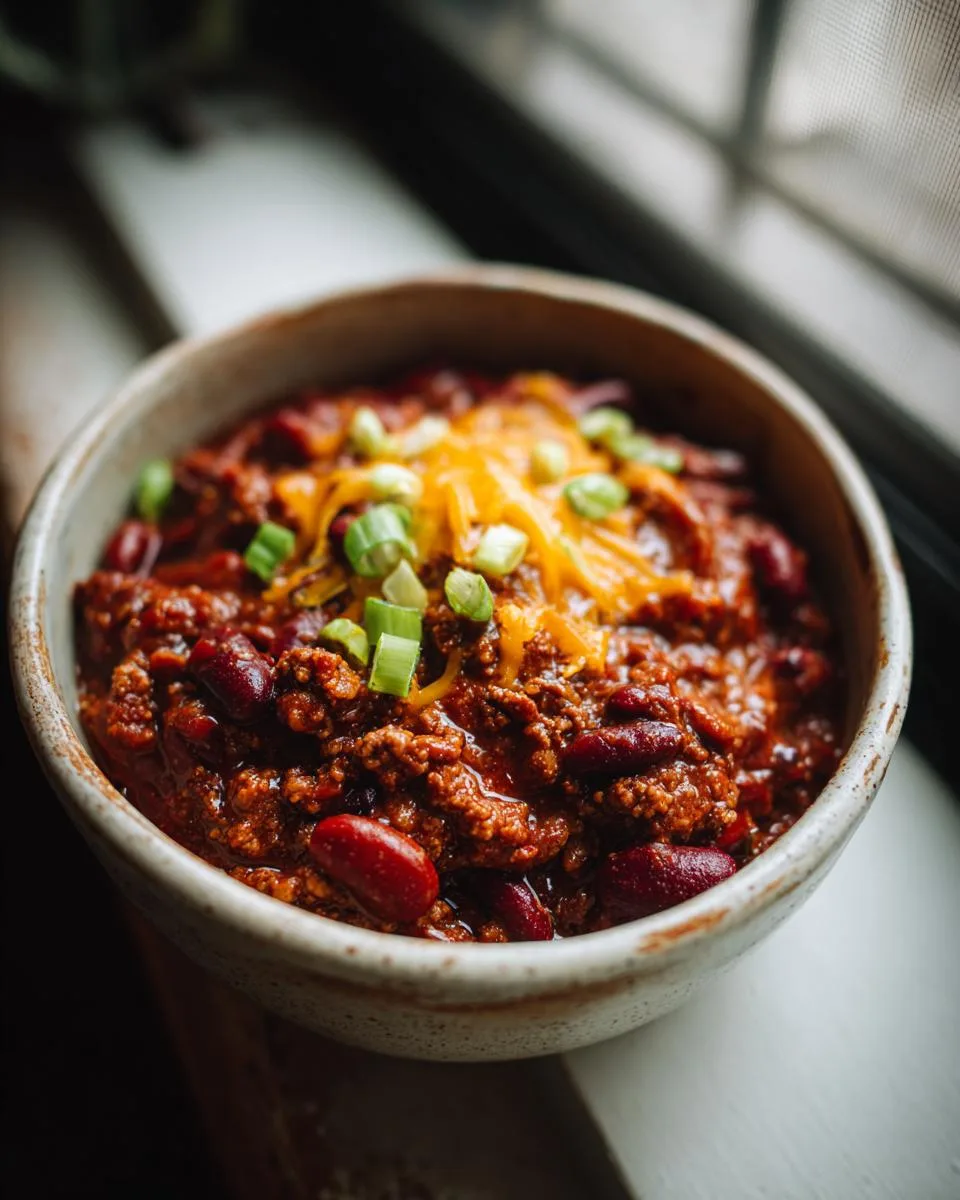
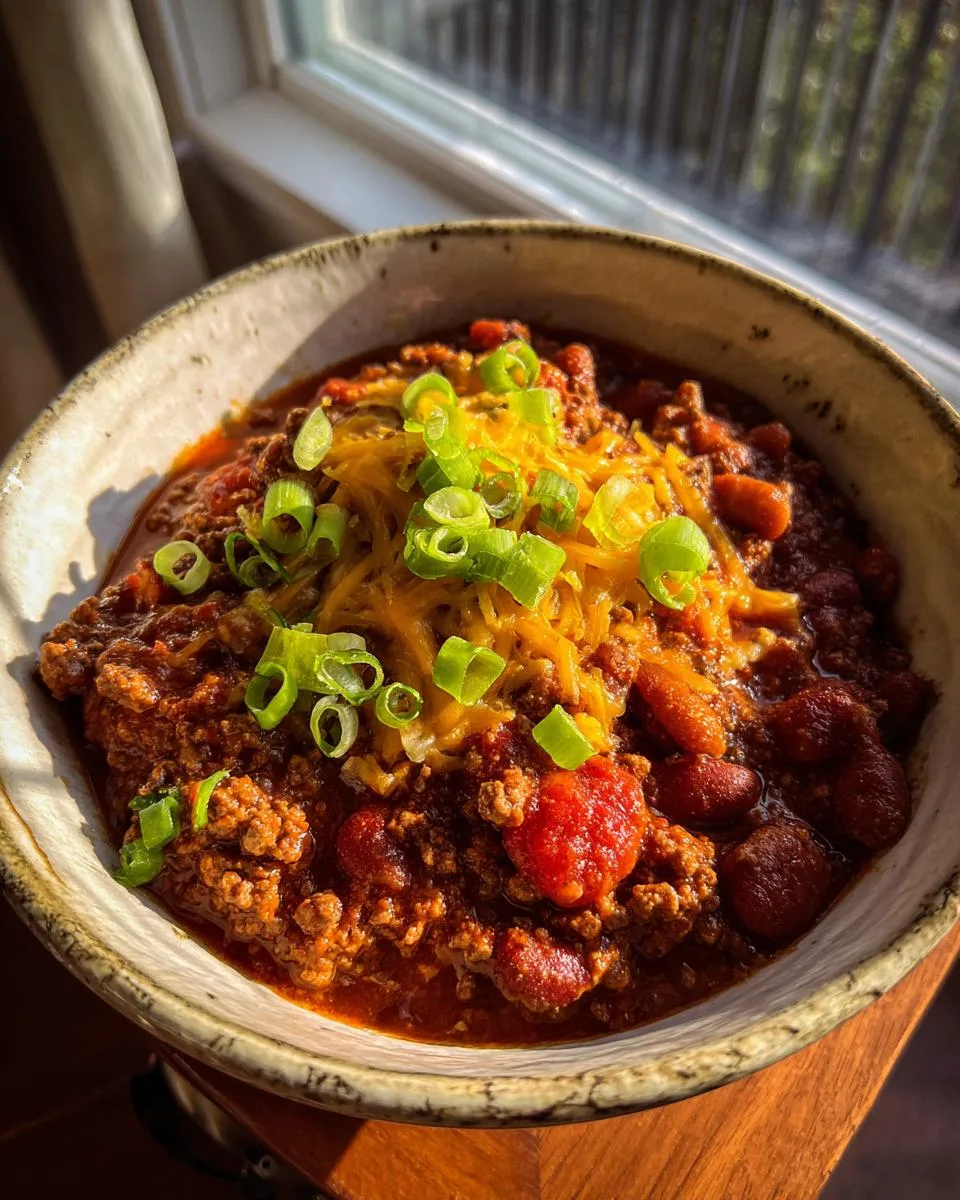
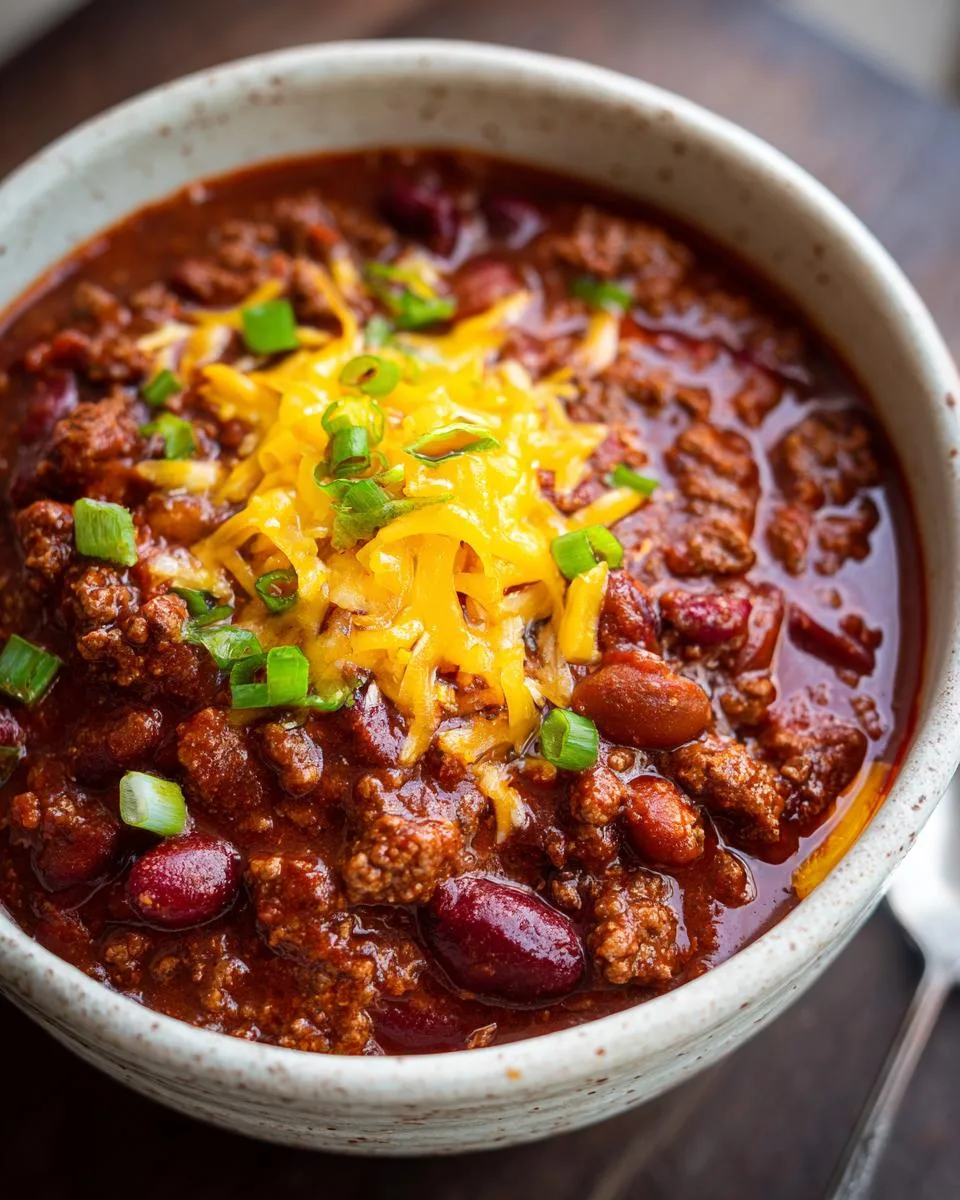
Let me tell you about the chili recipe that changed everything for me. I still remember the first time I entered it in our town’s annual cook-off – the judges went crazy for that perfect balance of smoky, sweet, and just the right kick of heat. This isn’t just any chili; it’s my award-winning masterpiece that’s been tested and tweaked more times than I can count. The secret? It’s all in how the spices mingle with those slow-simmered tomatoes and that little splash of maple syrup (trust me on this one). Every time I make this chili, it brings back memories of my dad’s old camping trips where he’d cook it over the fire – except now I’ve polished it to competition-level perfection. You’re about to discover why this recipe has won over so many chili lovers.
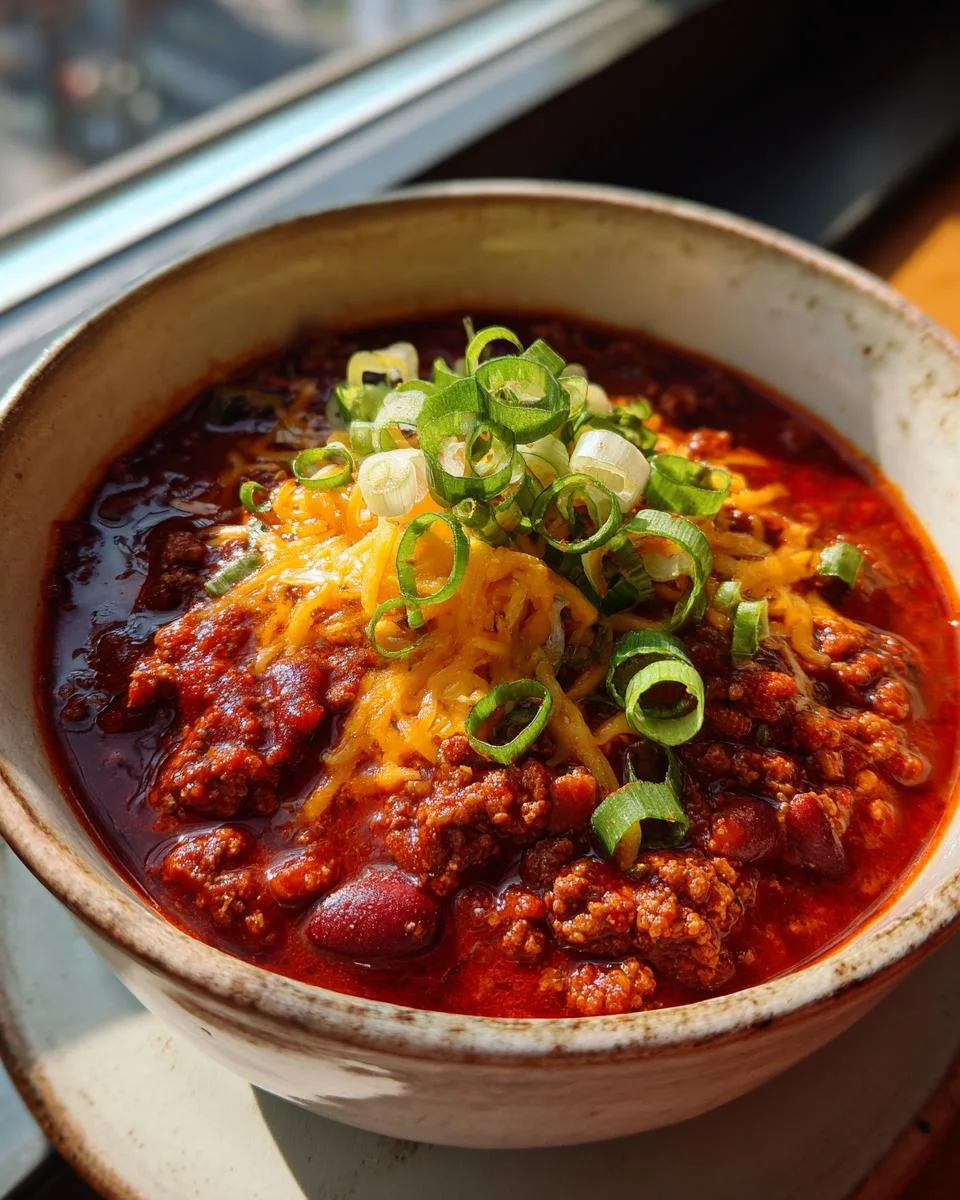
Table of Contents
Table of Contents
Why You’ll Love This Best Chili Recipe Award Winning
This chili isn’t just good—it’s the kind that makes people ask for seconds (and the recipe). Here’s why it’s a winner every time:
- Rich, deep flavor from the perfect blend of spices and that sneaky splash of maple syrup
- Competition-approved texture—thick, hearty, and packed with tender beef and beans
- Ready in under an hour, but tastes like it simmered all day
- Flexible for any crowd—adjust the heat level without losing that award-winning taste
Seriously, this is the chili that ruined all other chilis for me. Once you try it, you’ll get it.
Ingredients for the Best Chili Recipe Award Winning
Here’s everything you’ll need to make chili that’ll have people begging for your secret – and yes, every single ingredient matters! I’ve learned through years of competitions that precision here makes all the difference between good chili and award-winning chili.
- 1 lb. ground beef (I swear by 85/15 blend – enough fat for flavor without being greasy)
- 1/2 medium yellow onion, finely diced (none of those big crunchy chunks!)
- 1 tablespoon minced garlic (fresh is best, but I won’t judge if you use the jarred kind)
- 1 (15-oz.) can pinto beans, drained and rinsed (this removes that weird canned liquid taste)
- 1 (15-oz.) can kidney beans, same deal – drain and rinse!
- 1 (15-oz.) can tomato sauce (the plain kind, not pasta sauce)
- 1 (15-oz.) can diced tomatoes (don’t drain these – we want all that juicy goodness)
- 3 tablespoons tomato paste (this is our flavor booster secret weapon)
- 1 tablespoon maple syrup (sounds weird, but it balances the acidity perfectly)
- 3 tablespoons chili powder (yes, tablespoons – this ain’t no wimpy chili)
- 2 teaspoons garlic powder (because you can never have too much garlic)
- 2 teaspoons ground cumin (that warm, earthy flavor that makes chili taste like chili)
- 1/2 teaspoon smoked paprika (this is what gives it that competition-level depth)
- 1/2 teaspoon salt (plus more to taste at the end)
- 1/4 teaspoon ground pepper (freshly cracked if you’re feeling fancy)
- 1 cup beef broth (chicken broth or water works in a pinch, but beef is best)
Optional toppings for serving: (because presentation counts in competitions too!)
- Shredded cheddar cheese (the sharper, the better)
- Fritos (for that classic Frito pie crunch)
- Sliced green onions (a pop of color and freshness)
See? Nothing too crazy – just good ingredients treated right. Now let’s make some magic!
Equipment You’ll Need
Don’t worry – you won’t need any fancy gadgets for this chili. Just grab these basics from your kitchen:
- A large stockpot (this makes a big batch – trust me, you’ll want leftovers)
- A wooden spoon for stirring (those tomato stains will wash right out)
- Measuring spoons (precision matters with those spices!)
- A can opener (because wrestling with cans is no way to start)
That’s it! Now let’s get cooking.
How to Make the Best Chili Recipe Award Winning
Okay, here’s where the magic happens! I’ve made this chili so many times I could do it in my sleep, but I’ll walk you through each step like I’m right there in the kitchen with you. Just follow along and you’ll have competition-worthy chili in no time.
Step 1: Sauté the Base
First, grab that big stockpot and set it over medium-high heat – we want it nice and hot before anything touches the bottom. Now toss in your ground beef, diced onion, and minced garlic all at once. Here’s my pro tip: use your wooden spoon to break up the beef into small, even crumbles as it cooks. We’re not making burger patties here!
Let everything sizzle together for about 7-10 minutes, stirring occasionally until that beef is fully browned with no pink spots left. Don’t rush this step – those browned bits at the bottom are flavor gold! But watch carefully – burnt garlic is the worst, and we want the onions soft and translucent, not crispy.
Step 2: Combine Ingredients
Now the fun part! Drain those beans well (I give them an extra shake in the colander) and dump them into the pot along with the tomato sauce, diced tomatoes (juice and all!), tomato paste, and that surprising-but-essential maple syrup. Stir everything together until it looks like a beautiful, messy chili party in your pot.
Next comes the spice parade: chili powder, garlic powder, cumin, smoked paprika, salt, and pepper. I like to sprinkle them evenly over the top before stirring so they distribute well. Then pour in that cup of beef broth – it’ll look watery at first, but don’t panic! We’re about to transform it.
Step 3: Simmer to Perfection
Crank the heat up to bring your chili to a lively boil – you should see bubbles breaking the surface all over. This is where the flavors start getting to know each other! After about 2 minutes of boiling, reduce the heat to low and let it gently simmer uncovered.
Set your timer for 10-15 minutes – this is when the magic really happens. You’ll notice the liquid reducing and the chili thickening to that perfect, spoon-coating consistency we want. Give it an occasional stir and taste about halfway through – this is when I usually add another pinch of salt if needed. When it’s done, the chili should mound slightly on a spoon rather than running right off. Trust me, that first bite will make all the stirring worth it!
Print
Best Chili Recipe Award Winning – 3 Simple Secrets for Perfection
- Prep Time: 15 minutes
- Cook Time: 25 minutes
- Total Time: 40 minutes
- Yield: 6 servings 1x
- Category: Main Dish
- Method: Stovetop
- Cuisine: American
- Diet: Low Lactose
Description
Award-winning chili recipe with rich flavors and perfect balance of spices.
Ingredients
- 1 lb. ground beef, I used 85/15
- 1/2 medium yellow onion, finely diced
- 1 tablespoon minced garlic
- 1 15-oz. can pinto beans, drained and rinsed
- 1 15-oz. can kidney beans, drained and rinsed
- 1 15-oz. can tomato sauce
- 1 15-oz. can diced tomatoes
- 3 tablespoons tomato paste
- 1 tablespoon maple syrup
- 3 tablespoons chili powder
- 2 teaspoons garlic powder
- 2 teaspoons ground cumin
- 1/2 teaspoon smoked paprika
- 1/2 teaspoons salt
- 1/4 teaspoon ground pepper
- 1 cup beef broth, chicken broth or water works, too
- Optional Toppings: shredded cheddar cheese, Fritos, green onion
Instructions
- Heat a large stockpot over medium/high heat.
- Add ground beef, yellow onion, and minced garlic and sauté for 7-10 minutes or until beef is fully browned.
- Add pinto beans, kidney beans, tomato sauce, diced tomatoes, tomato paste, and maple syrup to the pot and stir to combine.
- Add spices and 1 cup of broth and stir to combine.
- Bring beef chili to a boil, then reduce heat to low and let simmer for 10-15 minutes to thicken.
- Top with your favorite toppings and enjoy.
Notes
- Beans are allowed in competition chili.
- Canned tomatoes work well for this recipe.
- Cook the chili for 10-15 minutes after boiling to thicken.
- Main judging criteria include flavor, texture, and spice balance.
Nutrition
- Serving Size: 1 bowl
- Calories: 350
- Sugar: 8g
- Sodium: 800mg
- Fat: 12g
- Saturated Fat: 4g
- Unsaturated Fat: 6g
- Trans Fat: 0g
- Carbohydrates: 35g
- Fiber: 8g
- Protein: 22g
- Cholesterol: 50mg
Tips for the Best Chili Recipe Award Winning
After years of perfecting this chili, I’ve picked up some tricks that make all the difference:
- Let it rest – Chili tastes even better after sitting 30 minutes (the flavors really marry)
- Broth matters – Splurge on good beef broth or make your own for deeper flavor
- Spice control – Start with less chili powder if you’re sensitive, then add more after tasting
- The maple secret – Don’t skip it! It cuts acidity without making the chili sweet
- Texture trick – For thicker chili, mash some beans against the pot while stirring
Remember – great chili isn’t rushed. Taste as you go and trust your instincts!
Common Questions About the Best Chili Recipe Award Winning
I get asked about this chili recipe all the time – turns out when you win awards with a dish, people want to know your secrets! Here are the questions that come up most often (and my honest answers):
Are beans allowed in competition chili?
This one always makes me laugh because yes – beans are absolutely allowed in most chili competitions! The whole “real chili has no beans” thing is just Texas pride talking. My award-winning recipe uses both pinto and kidney beans, and judges have never docked points for them. Beans add texture and heartiness that makes chili feel complete. Just make sure they’re properly drained and rinsed first – nobody wants that slimy canned liquid in their bowl!
Can I use fresh tomatoes instead of canned?
You can, but here’s why I don’t: canned tomatoes are picked and packed at peak ripeness, so they actually have more consistent flavor than most grocery store tomatoes. Plus, they’ve got that perfect balance of acidity and sweetness that develops during canning. Fresh tomatoes can make your chili watery unless you cook them down forever. Save yourself the trouble and grab the canned ones – I promise the judges won’t know the difference!
How do I know when the chili is done cooking?
Great question! The magic happens during that 10-15 minute simmer after boiling. You’re looking for three signs: 1) It should coat the back of a spoon without running right off, 2) The liquid should be reduced but still saucy (not thick like paste), and 3) The flavors should taste balanced – not like separate ingredients. Pro tip: chili actually tastes best after resting 20-30 minutes, so don’t stress if it seems a tad thin right off the heat.
What do judges look for in competition chili?
Having judged a few cook-offs myself, I can tell you it comes down to three things: flavor (that perfect balance of spicy, smoky, and slightly sweet), texture (tender meat, creamy beans, and a sauce that’s neither too thick nor too thin), and aroma (it should smell irresistible from three feet away!). Presentation matters too – that’s why I always serve mine with colorful toppings. But really, when you taste this chili, you’ll understand why it keeps winning – every bite is just packed with layers of deliciousness!
Got more questions? Drop them in the comments – I’m always happy to chat chili! You can also check out more of my favorite recipes for inspiration.
Serving Suggestions
Now for the best part – loading up your bowl! My competition trick is serving this chili with a little something crunchy, something creamy, and something fresh. Try it over Fritos with a dollop of sour cream and shredded sharp cheddar – the way my dad always did it. Or go fancy with avocado slices and pickled jalapeños. For the ultimate comfort meal, pour it over a split square of warm cornbread (the sweet kind that soaks up all that saucy goodness). Honestly, it’s so good you could eat it straight from the pot – not that I’ve ever done that…
Storage & Reheating
Here’s the beautiful thing about this chili – it actually gets better as it sits! But you’ll want to store it right so those flavors stay perfect. I always make a double batch because this stuff disappears fast in my house.
Refrigerating Your Leftovers
Let the chili cool to room temperature first (but don’t leave it out more than 2 hours – food safety first!). Then transfer it to an airtight container – I like using glass because plastic can hold onto smells. It’ll keep beautifully in the fridge for 3-4 days. The magic happens overnight as all those spices mingle – you’ll swear it tastes even better on day two!
Freezing for Future Cravings
This chili freezes like a dream! Portion it into freezer bags (I do 2-cup servings) and lay them flat to freeze – they’ll stack nicely later. Don’t forget to label with the date! It’ll stay perfect for 3 months in the freezer. When you’re ready, just thaw overnight in the fridge or use the defrost setting on your microwave.
Reheating Like a Pro
My favorite way to reheat is on the stovetop over medium-low heat – stir frequently and add a splash of broth or water if it looks too thick. If you’re in a hurry, the microwave works too – just cover the bowl with a damp paper towel and heat in 60-second bursts, stirring between each. The key is gentle heating – we want to warm it through without turning the beans mushy. And don’t forget to taste before serving – sometimes a pinch of salt brings everything back to life!
Pro tip: Those frozen portions are perfect for chili dogs, baked potatoes, or quick weeknight dinners when you don’t feel like cooking. Just saying – future you will thank present you for being so thoughtful!
Nutritional Information
Okay, let’s talk numbers – because even award-winning chili should fit into real life! Here’s the breakdown per serving (about 1 generous bowlful):
- Calories: 350 (perfect for a hearty meal)
- Protein: 22g (thanks to that beef and beans combo)
- Carbs: 35g (with 8g fiber to keep you full)
- Sugar: 8g (mostly from the tomatoes and that touch of maple syrup)
- Fat: 12g (4g saturated – we’re not going crazy here)
- Sodium: 800mg (easy to reduce if you use low-sodium broth)
Now, here’s my real-talk disclaimer: these numbers can wiggle a bit depending on your exact ingredients. Used extra-lean beef? Numbers change. Skipped the cheese topping? Different ballgame. But this gives you a solid baseline – and honestly, when chili tastes this good, who’s counting? (Okay, maybe competition judges… but that’s why we balance flavor and nutrition!)
Share Your Feedback
Alright, chili champion – now it’s your turn! I want to hear how your batch turned out. Did you stick to the recipe or put your own spin on it? Maybe you discovered the perfect topping combo I haven’t tried yet? Drop me a comment below – I read every single one (yes, really!).
If this chili brought your family running to the table like mine always does, pay it forward! Share this recipe with that friend who still thinks chili comes from a can. Tag me if you post pics – nothing makes me happier than seeing your steaming bowls of homemade goodness. And hey, if you enter it in a competition? You better tell me how you placed! You can follow along with our cooking adventures over on Facebook.
Most importantly – keep cooking with love. That’s the real secret ingredient that makes any recipe award-worthy.