You know those mornings when you’re scrambling to pack lunch while simultaneously trying not to burn your toast? Yeah, me too. That’s exactly why I fell in love with these Chicken Rice Lunchbox Cups – they’re my secret weapon against hectic weekdays. I first threw this together one Sunday night when I was desperate for something easy, and wow, did it deliver! The magic is in that sticky-sweet honey sesame sauce that coats every bite of tender chicken and crisp veggies. Just pop them in containers, and boom – you’ve got four days of lunches ready to grab-and-go. No more sad desk salads or overpriced takeout!
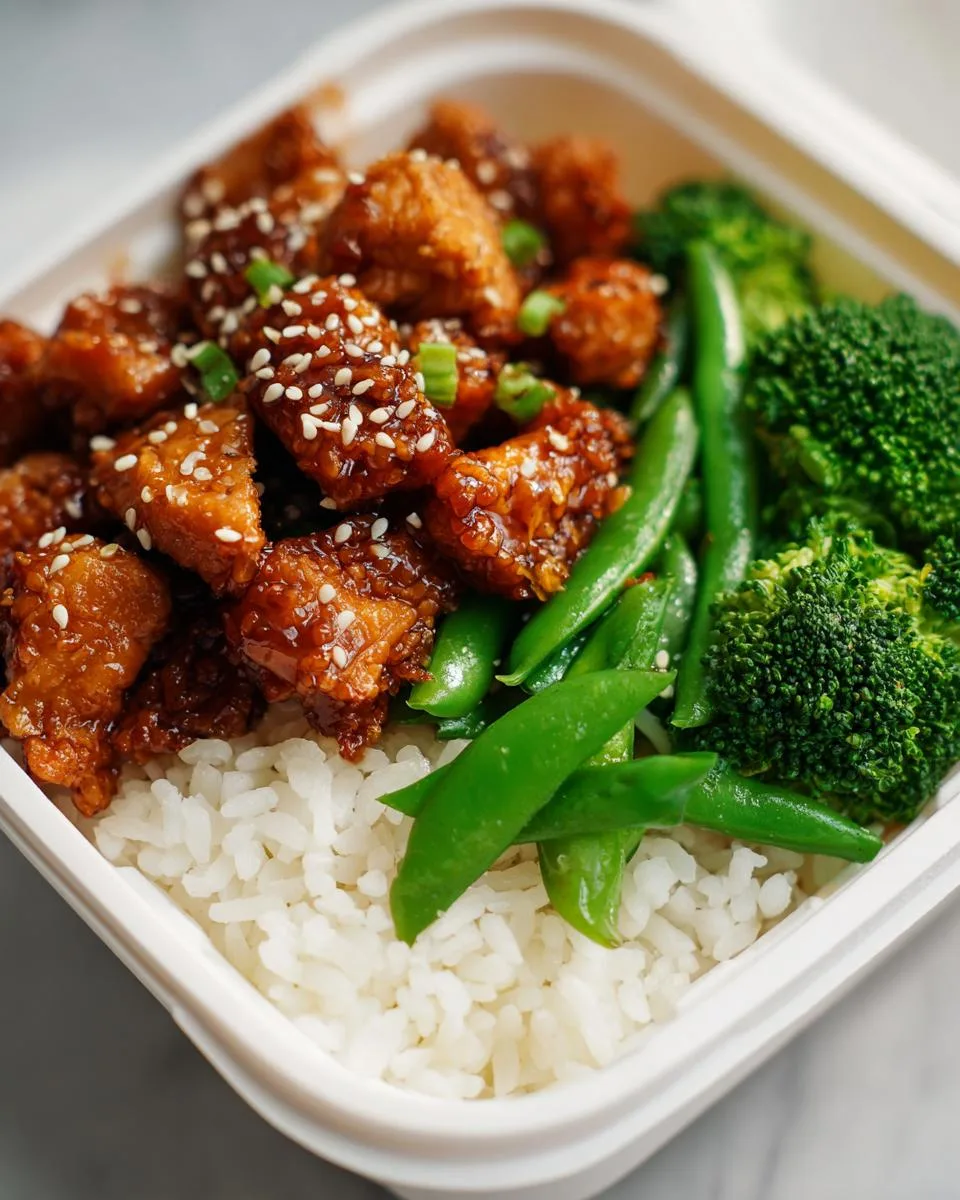
Table of Contents
Table of Contents
Why You’ll Love These Chicken Rice Lunchbox Cups
Let me count the ways these little cups will change your lunch game forever:
- Meal prep magic: Whip up a batch on Sunday and you’re set for the whole workweek – no more lunchtime panic!
- That sauce though: The honey sesame glaze is what dreams are made of – sticky, sweet with just the right kick from those red pepper flakes.
- Perfectly balanced: You get protein from the chicken, fiber from the veggies, and just enough carbs to keep you going all afternoon.
- Kid-approved: My picky eater actually asks for seconds when I pack these in his lunchbox (parenting win!).
- Customizable: Swap ingredients based on what’s in your fridge – it’s practically foolproof.
Trust me, once you try these, you’ll wonder how you ever survived lunch hour without them.
Ingredients for Chicken Rice Lunchbox Cups
Okay, let’s gather everything you’ll need to make these flavor-packed lunchbox cups! I’ve separated the ingredients into two groups because that sauce? It deserves its own spotlight. Pro tip: measure everything before you start cooking – it makes the process SO much smoother when you’re not scrambling mid-recipe.
Honey Sesame Sauce
- ¼ cup chicken stock or water (I use stock for extra flavor, but water works in a pinch)
- ¼ cup reduced sodium soy sauce (regular works too, just taste before adding salt later)
- ¼ cup honey (or maple syrup if you’re going vegan – same sticky sweetness!)
- 1 tablespoon sesame oil (this is the flavor bomb – don’t skip it!)
- ½ teaspoon red pepper flakes (adjust up or down based on your spice tolerance)
- 1 teaspoon cornstarch (our secret thickening agent – makes the sauce cling perfectly)
Chicken Lunch Bowls
- ¾ cup rice (uncooked; that’s about 2 cups cooked – I love jasmine but any white rice works)
- 2 tablespoons olive oil (divided – we’ll use half for veggies, half for chicken)
- 3 cups broccoli (chopped into small pieces – bite-sized florets work best)
- 3 cups snap peas (ends trimmed – such a satisfying crunch!)
- 2 large chicken breasts (cut into 1 inch cubes – uniform pieces cook evenly)
- salt & pepper (to taste – I’m generous with both)
- sesame seeds (for garnish – these make everything look fancy with zero effort)
See? Nothing too crazy – just good, fresh ingredients that come together into something magical. Now let’s get cooking!
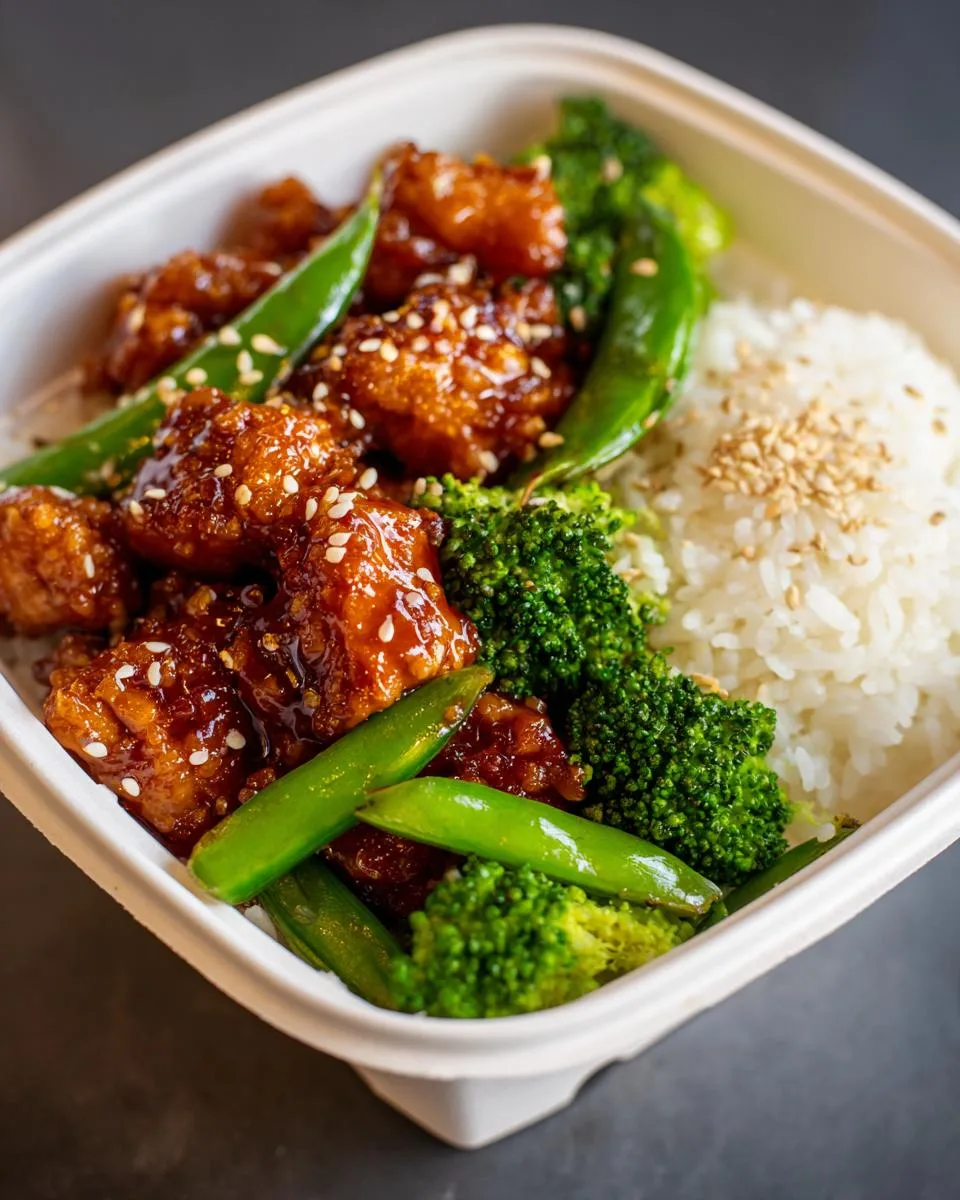
How to Make Chicken Rice Lunchbox Cups
Alright, let’s dive into making these lunchbox cups! I promise it’s easier than you think – just follow these simple steps, and you’ll have meal prep magic ready in no time. The key is doing everything in order, so the components come together perfectly. Here’s exactly how I do it every Sunday (while probably dancing to 80s music in my kitchen):
Step 1: Prepare the Honey Sesame Sauce
Grab a mason jar or any container with a tight lid – this is our no-mess sauce station! Dump in all the sauce ingredients: chicken stock, soy sauce, honey, sesame oil, red pepper flakes, and that crucial teaspoon of cornstarch. Now shake it like you’re in a cooking competition! The cornstarch will seem invisible at first, but trust me, it’s the hero that’ll thicken our sauce beautifully later. Set this golden elixir aside while we work on the other components.
Step 2: Cook the Rice
While your sauce is resting, cook your rice according to package directions – I usually go for the absorption method because it’s foolproof. Once it’s fluffy and perfect, immediately divide it evenly among your four meal prep containers. This keeps the rice from clumping and makes assembly a breeze later. Pro tip: I sometimes sprinkle a few drops of water over the rice before storing to keep it moist when reheating.
Step 3: Sauté the Vegetables
Time to wake up those veggies! Heat 1 tablespoon of olive oil in your largest pan over medium-high heat. Toss in the broccoli and snap peas – you should hear that satisfying sizzle. Stir them around for 5-7 minutes until they’re bright green and just tender enough to bite through without crunching (unless you like extra crispness – no judgment here!). Transfer them directly onto the waiting rice in your containers.
Step 4: Cook the Chicken
Same pan, another tablespoon of oil (no need to wash it – we’re building flavor here!). Add your cubed chicken, season generously with salt and pepper, and if you’re feeling spicy, an extra pinch of those red pepper flakes. Cook for 7-10 minutes, stirring occasionally, until there’s no pink inside and the edges get that perfect golden color. Want to be extra sure it’s done? The internal temp should hit 165°F.
Step 5: Simmer the Sauce
Now for the magic moment! Pour that shaken sauce right over the cooked chicken in the pan. It’ll bubble and thicken almost immediately – stir constantly for about 2 minutes until it transforms into a glossy, sticky coating that clings to every chicken piece. The smell alone will make your stomach growl! This is when I usually sneak a taste (chef’s privilege) and adjust seasoning if needed.
Step 6: Assemble the Lunchbox Cups
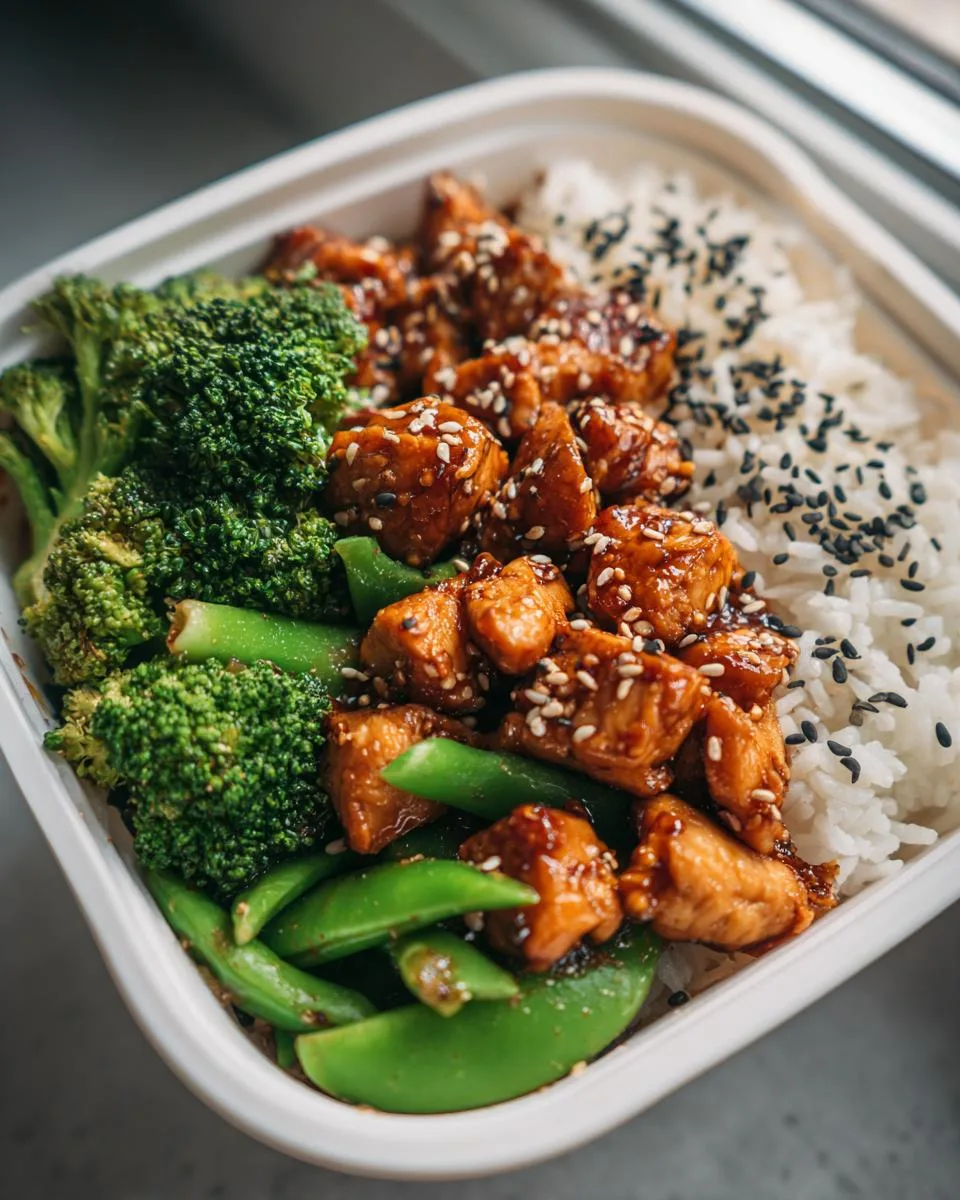
The grand finale! Divide the saucy chicken evenly between your containers, placing it right on top of the veggies and rice. Drizzle any remaining sauce from the pan over everything – don’t let those precious drops go to waste! Finish with a sprinkle of sesame seeds (they make it look restaurant-worthy) and snap on the lids. Boom – four days of delicious lunches ready to grab on your way out the door!
Print
Irresistible Chicken Rice Lunchbox Cups for 4 Days
- Prep Time: 15 minutes
- Cook Time: 20 minutes
- Total Time: 35 minutes
- Yield: 4 servings 1x
- Category: Lunch
- Method: Stovetop
- Cuisine: Asian-Inspired
- Diet: Low Calorie
Description
A simple and flavorful chicken rice lunchbox cup recipe with a honey sesame sauce, perfect for meal prepping.
Ingredients
- Honey Sesame Sauce:
- ¼ cup chicken stock or water
- ¼ cup reduced sodium soy sauce
- ¼ cup honey (or maple syrup)
- 1 tablespoon sesame oil
- ½ teaspoon red pepper flakes
- 1 teaspoon cornstarch
- Chicken Lunch Bowls:
- ¾ cup rice (uncooked; or roughly 2 cups cooked)
- 2 tablespoons olive oil (divided)
- 3 cups broccoli (chopped into small pieces)
- 3 cups snap peas (ends trimmed)
- 2 large chicken breasts (cut into 1 inch cubes)
- salt & pepper
- sesame seeds (garnish)
Instructions
- Shake together all honey sesame sauce ingredients and set aside.
- Cook rice according to package instructions. Divide between 4 storage containers.
- Heat 1 tablespoon olive oil in a large pan. Add broccoli and snap peas. Cook for 5-7 minutes, until bright green and tender. Add to the rice in the storage containers.
- Add remaining 1 tablespoon olive oil to pan. Add the chicken to the pan. Season with salt and pepper, and red pepper flakes (if desired). Cook for 7-10 minutes, until cooked through.
- Add the sauce to the pan and simmer for 2 minutes, until thickened.
- Add the chicken to the lunch containers and drizzle with sauce. Garnish with sesame seeds if desired.
- Store in the fridge for up to 4 days. Reheat to serve.
Notes
- Store in the fridge for up to 4 days.
- Reheat before serving.
- Adjust red pepper flakes for desired spice level.
Nutrition
- Serving Size: 1 container
- Calories: 450
- Sugar: 15g
- Sodium: 650mg
- Fat: 12g
- Saturated Fat: 2g
- Unsaturated Fat: 8g
- Trans Fat: 0g
- Carbohydrates: 55g
- Fiber: 6g
- Protein: 30g
- Cholesterol: 65mg
Tips for Perfect Chicken Rice Lunchbox Cups
After making these lunchbox cups more times than I can count, I’ve picked up some foolproof tricks to make them even better:
- Spice it your way: That ½ teaspoon of red pepper flakes is just a starting point – add more for heat lovers or leave it out entirely for kiddos.
- Veggie freshness matters: Use crisp, bright-colored broccoli and snap peas – they’ll keep their texture better during storage.
- Reheat like a pro: Microwave at 50% power for 2 minutes, stir, then go another minute – this prevents that dreaded rubbery chicken texture.
- Prep smart: Cut all ingredients to similar sizes so everything cooks evenly and fits nicely on your fork.
- Sauce separation solution: If sauce thickens too much in the fridge, just add a teaspoon of water before reheating.
Little tweaks make a big difference – these are the secrets my friends beg me to share!
Storage and Reheating Instructions
Here’s the deal – these chicken rice cups taste amazing fresh, but with proper storage, they’ll be just as good days later! I’ve learned a few tricks to keep everything tasting its best until you’re ready to dig in.
First, make sure your containers are airtight – those little sauce droplets love to escape! Store them in the fridge for up to 4 days (I write “Eat by” dates on the lids so I don’t forget). The veggies stay crisper if you don’t over-microwave them – 90 seconds usually does the trick for me.
When reheating, here’s my golden rule: take the lid off but leave it slightly ajar. This lets steam escape so your snap peas don’t turn to mush. If the rice seems dry, sprinkle a teaspoon of water over it before microwaving. And whatever you do, don’t nuke it on high power – medium does the job without turning your chicken rubbery!
Pro tip: If you’re taking these to work, pack some extra sesame seeds in a tiny baggie. Sprinkle them on after reheating for that just-made freshness. Little touches make all the difference between a good lunch and a “Wow, did you make this?” lunch!
Variations for Chicken Rice Lunchbox Cups
This recipe is endlessly adaptable – here are some of my favorite healthy swaps that keep the same delicious flavors:
Grain Alternatives:
• Quinoa for rice (use 1 cup, rinse first)
• Cauliflower rice (reduce to 3 cups riced cauliflower)
Brown rice (use 1 cup + 2 tbsp extra sauce)
Protein Swaps:
• Tofu (extra-firm, pressed and cubed)
Shredded chicken (great for meal prep)
1 cup edamame for chicken
Veggie Variations:
• 1 cup snap peas + 1 cup shredded carrots
1 cup broccoli + 1 cup red peppers
1 cup mushrooms + 1 cup snow peas
Little changes make it new every time – these are the mix-ups that keep my lunch exciting!
FAQ About Chicken Rice Lunchbox Cups
How long can you keep these in a lunchbox?
Safely refrigerated for up to 4 days in airtight containers – the rice stays perfect!
Can I freeze these meal prep cups?
Absolutely! Freeze for 2 months. Thaw in the fridge overnight before reheating.
What’s the best way to reheat from frozen?
Microwave at 50% power for 3 minutes, stir, then 1 minute more – add 1 tsp water first!
Can I make these dairy-free?
Easily! Just swap the butter for coconut oil – the flavors still pop.
Are these gluten-free as written?
Yes! Just use tamari instead of soy sauce to keep it 100% GF.
Nutritional Information
Per Serving:
- Calories: 420
- Total Fat: 12g (15% DV)
- Saturated Fat: 2.5g (13% DV)
- Cholesterol: 85mg (28% DV)
- Sodium: 620mg (27% DV)
- Total Carbs: 45g (15% DV)
- Fiber: 4g (14% DV)
- Sugars: 3g
- Protein: 28g
- Vitamin D: 0.5mcg (2% DV)
- Calcium: 4%
- Iron: 2.5mg (14% DV)
- Potassium: 8%
Note: Values are estimates and vary by ingredients used.
Rate This Recipe
Did you make this chicken rice lunchbox cups? We’d love to hear how it turned out for you! Share your thoughts and any personal twists you added in the comments below.
Did this recipe make your meal prep easier this week? Tap the stars to let others know how much you enjoyed it!
Pro tip: Bookmark this page or print the recipe card – that way you can easily find your new favorite lunchbox solution!
For more delicious recipes and cooking inspiration, check out our recipes page!
You can also find more great recipes like this on Grandma and Me Cooking.