Okay, let me tell you about the first time I had Texas Roadhouse chili – it was love at first bite! I’d dragged my whole family there after hearing rave reviews, and when that steaming bowl landed in front of me, the aroma alone had me hooked. Rich, meaty, with just the right kick of heat, it was everything chili should be. But here’s the thing – I’m the kind of person who needs to recreate my favorite restaurant dishes at home. After months (okay, maybe years) of tweaking, I finally nailed this copycat Texas Roadhouse chili recipe that tastes just like the real deal.
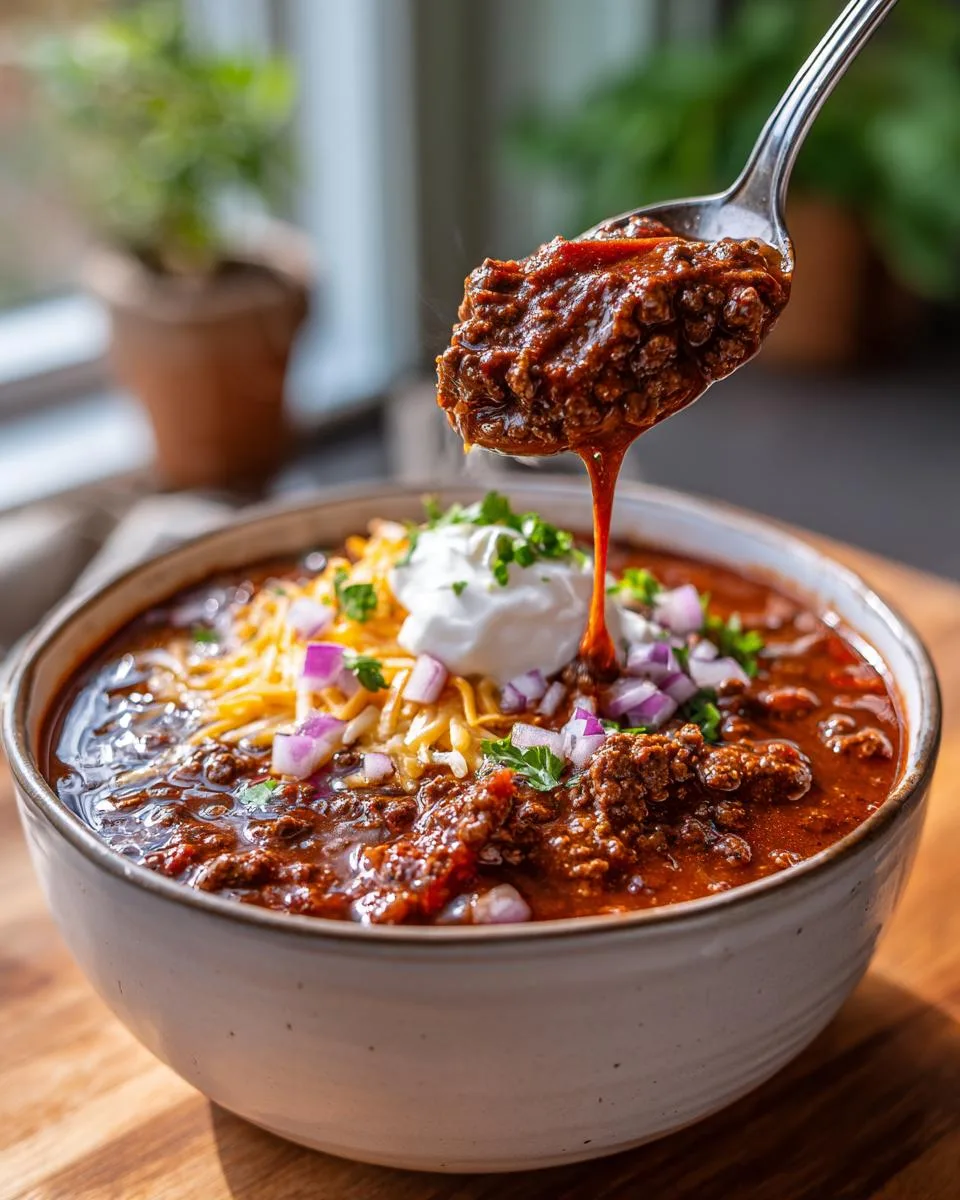
Table of Contents
Table of Contents
Why You’ll Love This Copycat Texas Roadhouse Chili
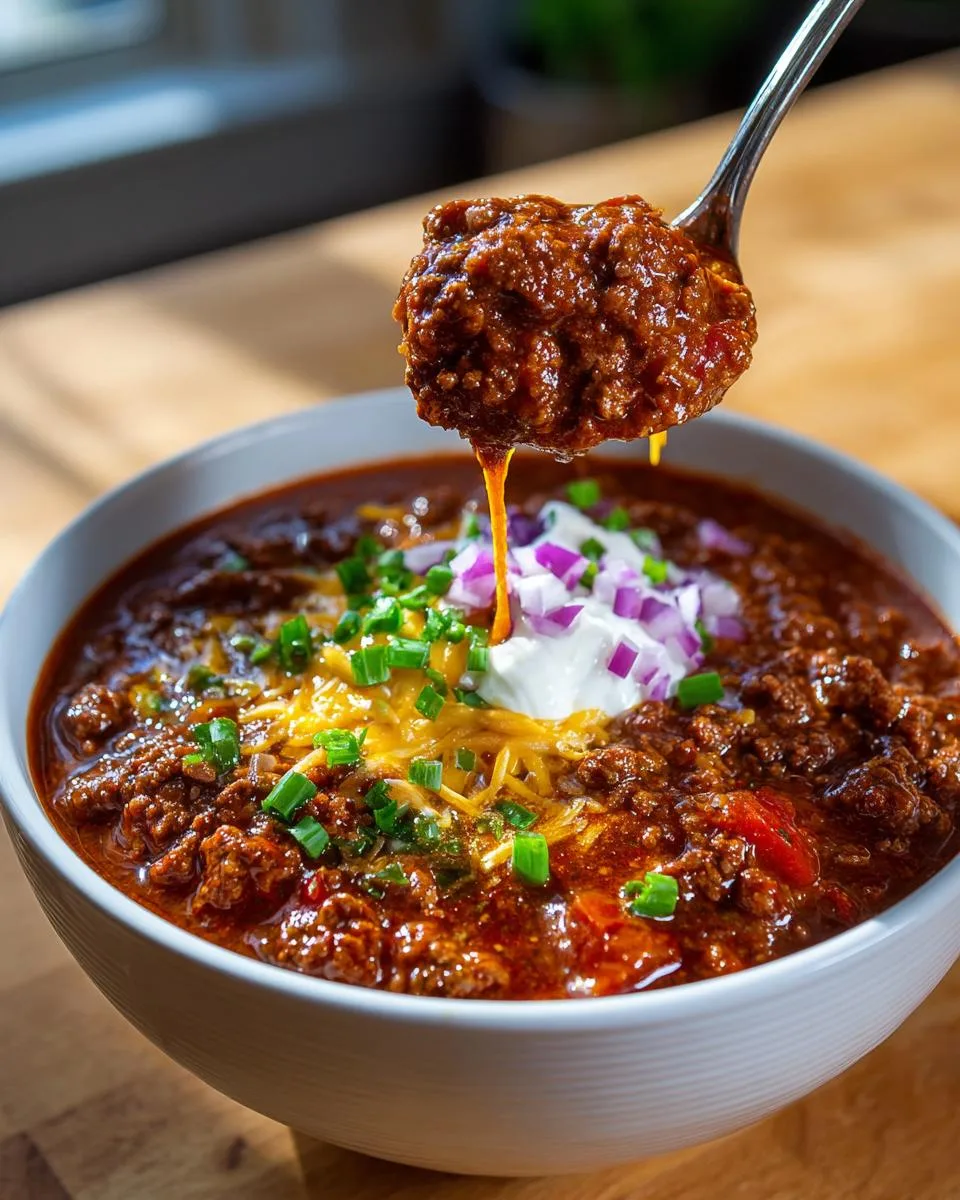
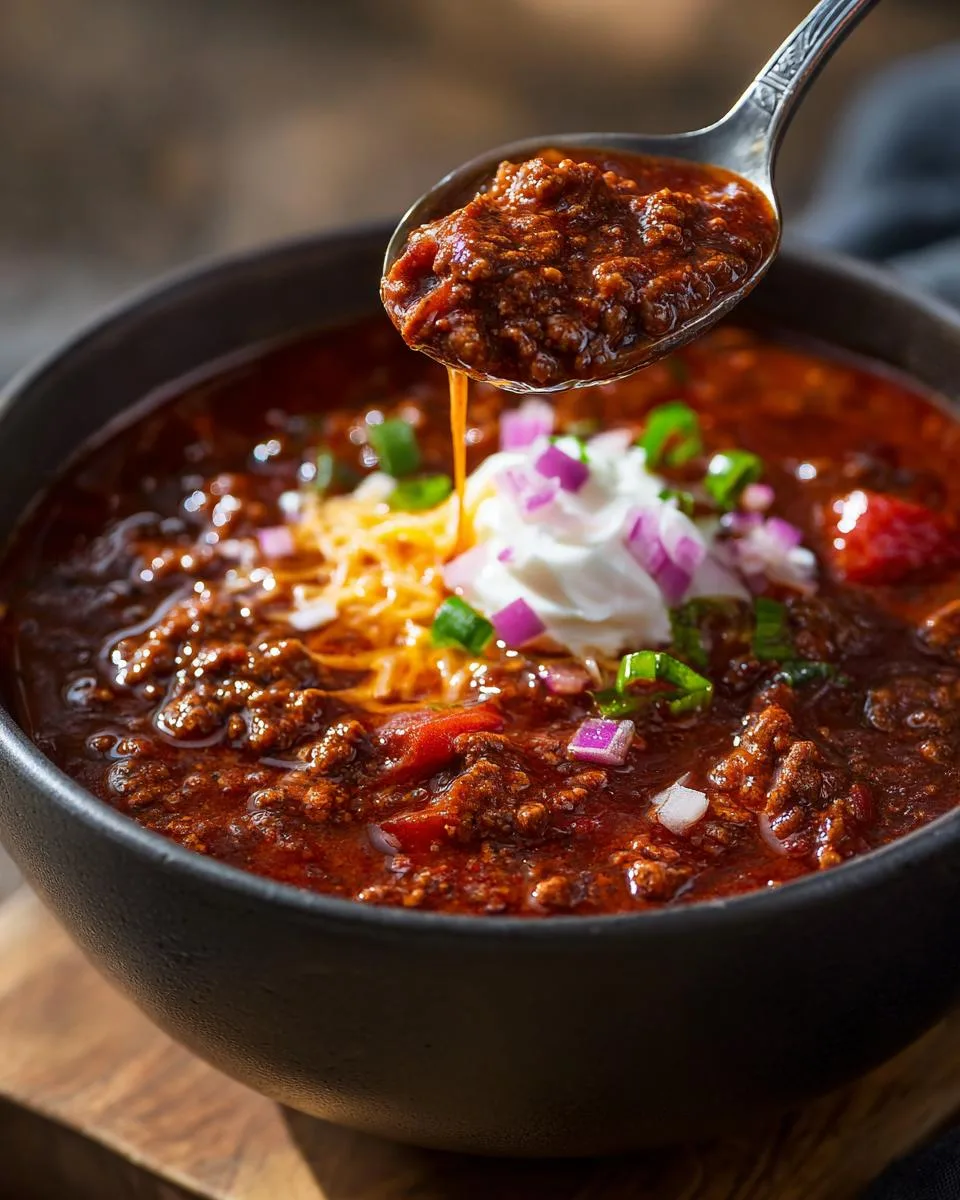
What makes this chili so special? It’s all about balance – the robust beef flavor mingles with smoky spices, while the tomatoes and broth create this incredible depth. And don’t even get me started on the toppings! Whether you go classic with shredded cheese and sour cream or spicy with extra jalapeños, this chili becomes your own masterpiece. The best part? It comes together in about an hour, and the simmering time fills your kitchen with the most mouthwatering smells. Trust me, once you try this version, you might never need to visit the restaurant again!
Listen, I know we all have our favorite chili recipes, but this copycat version? It’s in a league of its own. Here’s why you’re going to fall head over heels for it:
- Restaurant taste at home: That rich, smoky flavor you crave from Texas Roadhouse? We’ve cracked the code! The blend of spices and that perfect beefy goodness will have you double-checking you didn’t actually order takeout.
- Foolproof steps: No fancy techniques here – just good old-fashioned stovetop cooking. If you can brown meat and stir a pot, you’ve got this. (And that flour trick to thicken it? Pure genius.)
- Heat under control: Love it spicy? Pile on the jalapeños and extra cayenne. Prefer it mild? Easy adjustment – the flavor stays amazing either way. It’s your kitchen, your rules!
- Better with time: Like all great chilis, this one tastes even better the next day. The flavors really settle in when it sits overnight – if you can resist eating it all in one sitting, that is.
- Crowd-pleaser magic: From game day to cozy weeknights, this recipe always gets rave reviews. Top it your way – I’m partial to extra cheese and a dollop of sour cream, but my neighbor swears by crushed tortilla chips on hers.
Seriously, this chili checks all the boxes – simple enough for beginners, impressive enough for company, and downright delicious every single time. Once you try it, you’ll understand why it’s become my most-requested recipe!
Copycat Texas Roadhouse Chili Ingredients
Now let’s talk ingredients – because the magic starts with getting these just right. I’ve tested this recipe more times than I can count, and these exact measurements give you that perfect Roadhouse flavor every time. Here’s what you’ll need:
- 4 cups beef broth – This forms the flavorful base (use low-sodium if you’re watching salt)
- 1/3 cup tomato paste – For that deep, rich tomatoey goodness
- 1 tablespoon chili powder – The spice backbone of your chili
- 1 teaspoon paprika – Smoky sweet notes that make this special
- 1 teaspoon freshly ground black pepper – Freshly cracked makes all the difference
- 1/2 teaspoon salt – Adjust to taste after simmering
- 1/2 teaspoon cayenne pepper – The heat factor (scale up or down as you like)
- 1 pound 85% lean ground beef – This ratio gives perfect richness without being greasy
- 1/2 cup chopped onion – About one medium onion, diced small
- 1 jalapeño pepper, seeded and finely chopped – Remove seeds unless you want extra fire
- 2 cloves garlic, minced – Fresh is best here
- 1/4 cup all-purpose flour – Our secret thickener
- 1 (15-ounce) can diced tomatoes, undrained – The liquid helps build the sauce
- Toppings – Shredded cheese, chopped red onion, sliced jalapeño, sour cream (go wild!)
Pro tip from my kitchen disasters: measure everything before you start cooking. There’s nothing worse than realizing mid-stir that you’re out of tomato paste! (Okay, maybe burning the garlic is worse – but you get the idea.)
How to Make Copycat Texas Roadhouse Chili
Alright, let’s get cooking! I’ll walk you through each step like we’re standing side by side in the kitchen. The key here is patience – good chili can’t be rushed, but trust me, every minute is worth it when you take that first bite.
Step 1: Prepare the Broth Mixture
First things first – grab that big bowl and let’s make our flavor base. Pour in the beef broth and add that glorious tomato paste. Now, here’s my trick: whisk them together until you can’t see any tomato paste lumps left. It should look like a smooth, rich brown liquid.
Next, add all your spices – chili powder, paprika, black pepper, salt, and cayenne. I like to whisk them in one at a time while smelling the aroma build. (Seriously, this step smells amazing!) Make sure everything’s fully incorporated – you don’t want spice pockets in your final chili.
Step 2: Cook the Beef and Vegetables
Now, heat up your Dutch oven over medium-high – you want it nice and hot before adding the beef. Crumble in that ground beef and listen to that satisfying sizzle! This is where patience pays off – let it cook undisturbed for a couple minutes to get good browning, then break it up.
After about 5-7 minutes when the beef is nicely browned (no pink left!), toss in your onions, jalapeño, and garlic. Oh man, the smell right now is incredible! Stir everything together and cook until the onions turn translucent – about 5 more minutes. Don’t rush this step – those softened veggies add so much flavor!
Step 3: Thicken and Simmer
Here comes the magic touch – sprinkle that flour evenly over everything. Stir constantly for about a minute – this cooks out the raw flour taste and starts the thickening process. Now, slowly pour in your broth mixture while stirring. It’ll look thin at first, but don’t panic!
Crank up the heat to high until it comes to a boil – you’ll see it start to thicken already. Then add those diced tomatoes with their juices, give it one good stir, and reduce the heat to low. Now the hardest part – walk away! Let it simmer uncovered for 30 minutes, stirring occasionally. The wait kills me every time, but that slow simmer turns good chili into GREAT chili.
You’ll know it’s ready when it coats the back of a spoon beautifully. Taste and adjust salt if needed – then dive in or load it up with toppings! (I won’t judge if you skip the bowl and eat it straight from the pot…)
Print
5-Star Copycat Texas Roadhouse Chili – Irresistible Comfort!
- Prep Time: 15 minutes
- Cook Time: 45 minutes
- Total Time: 60 minutes
- Yield: 6 servings 1x
- Category: Main Dish
- Method: Stovetop
- Cuisine: American
- Diet: Low Lactose
Description
A copycat recipe for Texas Roadhouse chili with rich flavors and optional toppings.
Ingredients
- 4 cups beef broth
- 1/3 cup tomato paste
- 1 tablespoon chili powder
- 1 teaspoon paprika
- 1 teaspoon freshly ground black pepper
- 1/2 teaspoon salt
- 1/2 teaspoon cayenne pepper
- 1 pound 85% lean ground beef
- 1/2 cup chopped onion
- 1 jalapeño pepper, seeded and finely chopped
- 2 cloves garlic, minced
- 1/4 cup all-purpose flour
- 1 (15-ounce) can diced tomatoes, undrained
- shredded cheese, chopped red onion, sliced jalapeño, and/or sour cream (optional)
Instructions
- Gather all ingredients.
- Whisk together beef broth, tomato paste, chili powder, paprika, black pepper, salt, and cayenne pepper in a large bowl until well combined. Set aside.
- Heat a 6-quart Dutch oven over medium-high heat. Add ground beef and cook until browned, 5 to 7 minutes.
- Stir in onion, jalapeño, and garlic. Cook until vegetables are softened, about 5 minutes.
- Sprinkle flour over the beef mixture. Cook, stirring constantly, for 1 minute.
- Stir in the broth mixture gradually until incorporated. Bring the mixture to a boil over high heat.
- Add diced tomatoes. Reduce heat to low and simmer, uncovered, until chili thickens, about 30 minutes, stirring occasionally.
- Top with cheese, red onion, jalapeño, and/or sour cream, if desired.
Notes
- Adjust cayenne pepper for desired spiciness.
- Store leftovers in an airtight container for up to 3 days.
Nutrition
- Serving Size: 1 cup
- Calories: 320
- Sugar: 5g
- Sodium: 900mg
- Fat: 18g
- Saturated Fat: 7g
- Unsaturated Fat: 9g
- Trans Fat: 0.5g
- Carbohydrates: 15g
- Fiber: 3g
- Protein: 25g
- Cholesterol: 70mg
Tips for the Best Copycat Texas Roadhouse Chili
After making this chili more times than I can count, I’ve learned a few tricks that take it from good to “Oh my gosh, is this really homemade?” territory. Here are my can’t-live-without tips:
- Adjust the heat last minute: That cayenne pepper can sneak up on you! I always start with the 1/2 teaspoon, then let the chili simmer for 20 minutes before deciding if I want more kick. Remember – you can always add heat, but you can’t take it out!
- Deglaze like a pro: If any tasty brown bits stick to the pot when browning the beef, splash in a little broth before adding the veggies. Those caramelized bits hold SO much flavor – don’t let them go to waste!
- Stir with purpose: During that 30-minute simmer, stir occasionally but not constantly. Every 7-10 minutes is perfect – enough to prevent sticking but not so much that the chili can’t develop those deep flavors we love.
- Fat is flavor: I know it’s tempting to drain the beef fat after browning, but resist! That 15% fat in the 85% lean beef adds incredible richness. Just trust me on this one – Roadhouse wouldn’t drain it either.
- Tomato paste power: For extra depth, try browning the tomato paste with the beef for a minute before adding liquids. It intensifies the flavor in the best way possible!
One last secret? Let the chili rest off heat for 10 minutes before serving. The flavors meld beautifully, and it thickens up just a bit more. (Also prevents burnt tongues – not that I’d know anything about that…)
Serving Suggestions for Copycat Texas Roadhouse Chili
Now comes the best part – dressing up your masterpiece! I swear half the fun of Texas Roadhouse chili is customizing each bowl with all those delicious toppings. Here’s how I like to serve mine, plus some wild card ideas that might just become your new favorites.
First, the classics – these are non-negotiable in my book:
- Shredded cheddar cheese – It melts into that hot chili like a dream. I use a full handful because, well, life’s too short for skimpy cheese portions.
- Sour cream – That cool, creamy contrast against the spicy chili? Perfection. Dollop it right in the center so it slowly melts into rivers of creaminess.
- Chopped red onion – The sharp crunch cuts through the richness beautifully. Plus, they look so pretty scattered on top!

But wait – let’s get creative! Try these next-level toppings when you’re feeling adventurous:
- Pickled jalapeños – Tangy and spicy all at once. These add way more flavor than fresh ones in my opinion.
- Crumbled cornbread – Why have it on the side when you can crumble it right into the bowl? It soaks up the chili like the best edible sponge.
- Diced avocado – Creamy, cool, and totally unexpected. Especially good if you overdid the cayenne!
- Crushed tortilla chips – For that satisfying crunch in every bite. My nephew calls this “chili nachos” and inhales it.
And here’s my ultimate pro tip: set up a topping bar when serving a crowd! Put everything in little bowls with spoons and let everyone go wild. It turns dinner into an interactive experience, plus you’ll look like the host with the most.
Oh! Almost forgot – what to serve with this chili? A big hunk of warm cornbread is my top pick, but saltine crackers work in a pinch. My weirdo brother-in-law actually eats his with grilled cheese sandwiches (don’t knock it ’til you try it!). However you serve it, just make sure to have plenty of napkins handy – this chili’s worth every messy bite.
Storage & Reheating
Okay, confession time – I rarely have leftovers because this chili disappears so fast in my house. But on the rare occasion I do manage to save some, here’s how to keep it tasting just as amazing as day one!
Storing your chili: First rule – let it cool to room temperature before packing it up (but don’t leave it out more than 2 hours). Pour it into an airtight container – I’m obsessed with glass ones because they don’t absorb smells. Press plastic wrap directly on the surface before sealing to prevent that weird “skin” from forming. It’ll keep beautifully in the fridge for up to 3 days.
Reheating like a pro: For single servings, the microwave works fine – just stir every 30 seconds to heat evenly. But if you want restaurant-quality results, the stovetop is your best friend. Dump the chili into a pot with a splash of water or broth (it thickens when cold), then warm it over medium-low heat, stirring often. Takes about 10 minutes, but the texture stays perfect.
Here’s my weird-but-brilliant tip: if your reheated chili seems too thick, stir in a little brewed coffee instead of water. Sounds crazy, but it thins the chili while adding depth of flavor without tasting like coffee. Learned this trick from an old Texas cookbook!
Can you freeze it? Absolutely! Portion it into freezer bags, squeeze out all the air, and lay them flat to freeze. They’ll keep for 3 months – just thaw overnight in the fridge before reheating. The texture changes slightly (the tomatoes get a bit mushier), but the flavor stays fantastic. Perfect for those “I don’t feel like cooking” nights!
One last thing – if you do freeze it, write the date on the bag unless you enjoy freezer roulette. (Ask me how I know…) Happy storing!
Nutritional Information
Now, let’s talk numbers – not because we’re counting (who does that with chili?), but because it’s good to know what’s fueling all that deliciousness! Keep in mind these are estimates – your exact values might vary depending on toppings and ingredient brands. Here’s the breakdown per 1-cup serving:
- 320 calories – Honestly, worth every single one when you taste it
- 25g protein – That beef really delivers the goods
- 18g fat (7g saturated) – Remember, fat equals flavor here
- 15g carbs – Mostly from the tomatoes and flour
- 3g fiber – Thanks to all those veggies
- 900mg sodium – Use low-sodium broth if you’re watching this
- 5g sugar – Natural sugars from the tomatoes
A little disclaimer from my kitchen to yours: these numbers don’t include toppings! That cheese and sour cream will add more, but hey – some things in life are worth the splurge. If you’re tracking closely, measure your portions and toppings. Otherwise, just enjoy every hearty, satisfying bite!
Fun fact: this chili actually gets healthier as leftovers! The flavors meld and deepen overnight, meaning you might find yourself satisfied with a slightly smaller portion. (Or not – no judgment here!)
FAQs About Copycat Texas Roadhouse Chili
I get so many questions about this recipe – seems like everyone wants their chili to taste just like Texas Roadhouse’s! Here are the answers to the most common ones I hear:
Why 85% lean ground beef specifically?
Oh, this matters more than you’d think! That 15% fat content mimics the restaurant’s texture perfectly – enough richness to carry the flavors without making the chili greasy. I tried it with 90% lean once and it just wasn’t the same. Trust me, Roadhouse isn’t using extra-lean beef either!
Can I customize the toppings?
Absolutely! That’s half the fun. The restaurant serves it with basic cheese and onions, but at home? Go wild! My neighbor adds crispy bacon bits, my sister throws on diced avocado – there are no wrong answers here. Think of the chili as your canvas and those toppings as your paint.
What does paprika add to the flavor?
That’s the secret whisper of smokiness you can’t quite put your finger on! Regular paprika gives sweet depth, while smoked paprika kicks it up a notch. Roadhouse’s version has that subtle smoky background note – that’s the paprika working its magic.
Is the flour really necessary?
For that signature Roadhouse thickness? 100% yes. I tried skipping it once (lazy moment) and ended up with chili soup. The flour blends with the beef fat to create that perfect spoon-coating consistency we all love. Cornstarch works in a pinch though!
Can I make it in a slow cooker?
You bet! Brown the beef and veggies first (don’t skip this – it builds flavor!), then dump everything in the crockpot on LOW for 4-6 hours. The longer it cooks, the better it tastes. Just stir occasionally so the bottom doesn’t burn.
Still have questions? Drop them in the comments – I love chatting chili! Now go grab that Dutch oven and get cooking. Your taste buds are in for the best kind of trouble. You can also check out my other favorite recipes for more inspiration!
Ingredient Substitutions
Listen, I know we don’t all have the exact same ingredients lying around – life happens! Here are my tried-and-true swaps that still deliver amazing results when you’re in a pinch:
- Ground turkey or chicken instead of beef – Works great if you’re looking for a lighter option! Just add an extra tablespoon of oil when browning since poultry is leaner. The flavor profile changes slightly, but it’s still delicious.
- Cornstarch or arrowroot powder instead of flour – Mix 2 tablespoons with cold water to make a slurry, then stir it in during the last 10 minutes of simmering. Perfect for gluten-free needs!
- Vegetable broth instead of beef broth – Makes this vegetarian-friendly (just skip the meat too). The flavor will be different but still tasty – I add a splash of soy sauce for umami depth.
- Fresh tomatoes instead of canned – About 2 cups diced works. Add a 1/4 cup of water or extra broth since fresh tomatoes aren’t as juicy as canned.
- Serrano pepper instead of jalapeño – If you like more heat! Remove seeds unless you’re feeling brave. Or use 1/4 teaspoon crushed red pepper flakes if that’s all you’ve got.
Here’s my golden rule about substitutions: change only one major ingredient at a time if you want that true Roadhouse flavor. The first time I tried substituting THREE things? Let’s just say it tasted more like “Texas Wrong-house” chili. Learned that lesson the hard way!
Oh! Almost forgot – if you’re out of tomato paste, use 1 cup tomato sauce and reduce the broth by 1/2 cup. It won’t be quite as rich, but it’ll do in a pinch. Now go forth and substitute wisely, my friends! If you want to see how I handle substitutions in other recipes, check out my Big Mac Wrap.
Share Your Copycat Texas Roadhouse Chili
Okay, friends – now it’s your turn! I’ve poured my chili-loving heart into this recipe (and probably splattered some on my apron too), but the real magic happens when you make it your own. Did you add an extra kick of cayenne? Throw in some unexpected toppings? I want to hear all about your chili adventures! You can also follow along with my cooking journey on Facebook.
Leave a comment below telling me how your batch turned out. Was it just like the restaurant? Even better? (No shame if you tweaked it – that’s how great recipes evolve!) And if you snapped a photo of your masterpiece, I’d absolutely love to see it. There’s nothing more satisfying than seeing those bowls loaded with melty cheese and all the fixings.
Here’s my promise – I read every single comment and question. Seriously, chili talk is my love language! Your feedback helps me create even better recipes, and who knows – your brilliant idea might end up in my next batch. Now grab that spoon and dig in – happy chili making!