Oh my gosh, you guys – Halloween baking is my absolute favorite! There’s nothing like watching kids’ faces light up when they see these spooky Graveyard Halloween Brownies. I’ve been making them every October since my niece was tiny, and now it’s our little tradition. The best part? They look fancy but are SO simple to throw together for parties.

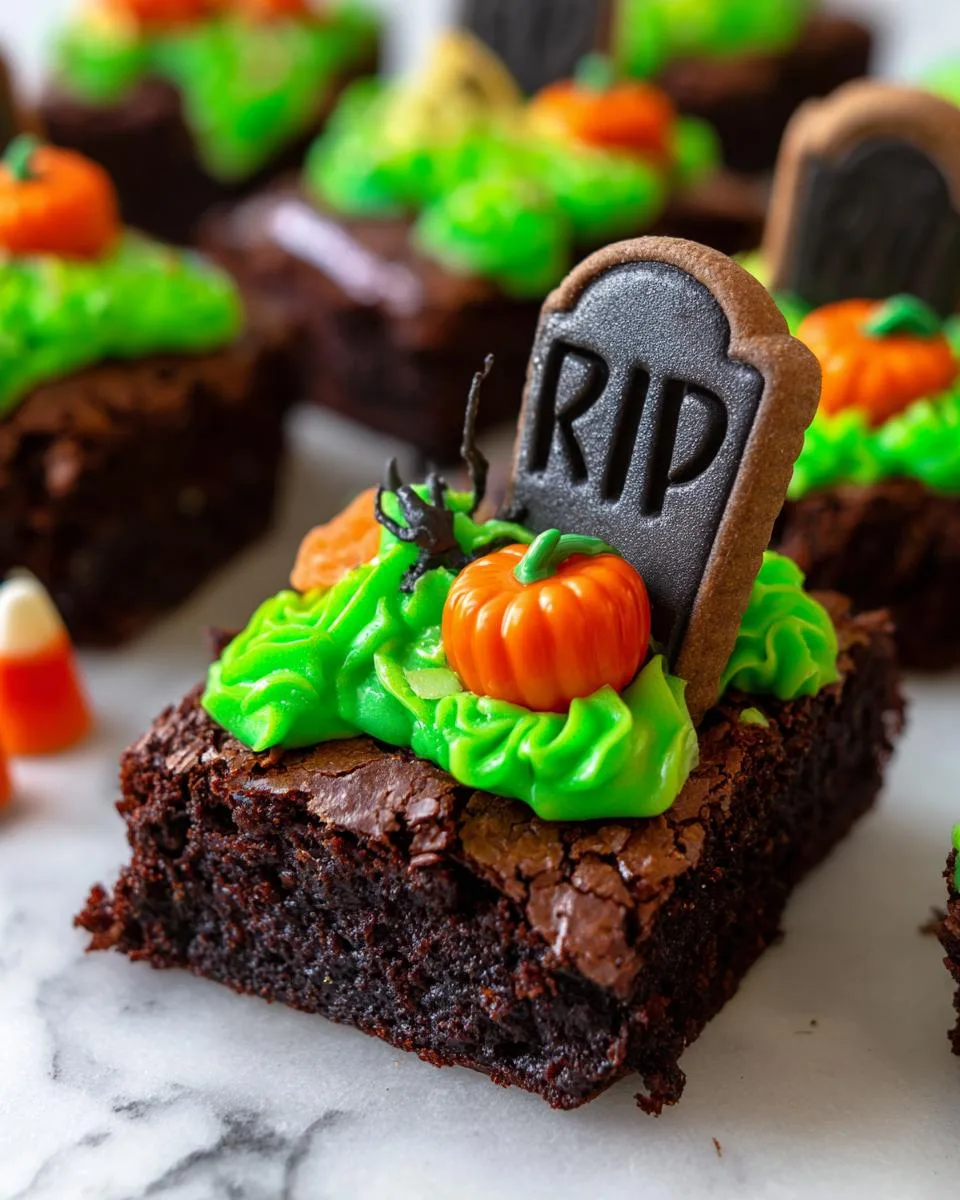
Picture this: rich, fudgy brownies topped with cookie “headstones” and candy pumpkin “ghosts” peeking through green frosting “grass.” The first time I made them, my kitchen looked like a mad scientist’s lab – flour everywhere, green food coloring on my elbows – but the results were pure magic. Even my “too cool for school” teenager couldn’t resist sneaking bites before the party!
Table of Contents
Table of Contents
Why You’ll Love These Graveyard Halloween Brownies
Trust me, these creepy-cute treats will disappear faster than a ghost in the night at your Halloween bash. The combination of chewy brownies, crunchy cookies, and sweet frosting is downright addictive. Plus, decorating them is half the fun – perfect for getting kids involved in the kitchen!
Listen, I know Halloween treats can be intimidating – but these graveyard brownies? They’re foolproof magic. Here’s why they’ve become my go-to party showstopper every October:
- Easiest decorating ever – No fancy piping skills needed! Just slap on some frosting and stick in the cookies. Even my 5-year-old nephew can help (and he’s usually more interested in eating the decorations).
- Crowd-pleasing flavors – That combo of fudgy brownies, sweet frosting, and crunchy Milano cookies? Absolute perfection. I’ve seen grown adults fight over the last one.
- Instant Halloween vibes – The spooky “RIP” headstones and candy pumpkins make them look straight out of a haunted bakery. Instagram gold, my friends.
- Perfect for last-minute parties – Use boxed brownie mix and store-bought cookies when you’re in a pinch. I won’t tell!
Seriously, these disappear faster than candy corn after trick-or-treating. You’ve been warned!
Print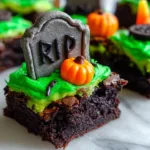
Spooky Graveyard Halloween Brownies That Wow in 5 Steps
- Prep Time: 15 minutes
- Cook Time: 30 minutes
- Total Time: 45 minutes
- Yield: 12 brownies 1x
- Category: Dessert
- Method: Baking
- Cuisine: American
- Diet: Vegetarian
Description
Spooky Halloween brownies decorated to look like graveyard headstones with RIP cookies and candy pumpkins.
Ingredients
- Prepared brownie batter for an 8” pan
- 12 milano cookies
- Black decorating gel
- 12 candy pumpkins
- 1 cup powdered sugar
- 1/4 cup butter (salted or unsalted), softened
- 2 teaspoons milk
- Green food coloring, a few drops to reach desired color
Instructions
- Line an 8” baking pan with parchment paper, leaving overhang for easy removal.
- Pour brownie batter into the pan and smooth into an even layer. Bake according to recipe instructions.
- Let brownies cool completely. Remove from pan using parchment paper. Cut into 12 rectangles.
- Mix frosting ingredients for 2 minutes until light and fluffy. Adjust thickness with powdered sugar or milk as needed. Add green food coloring.
- Use black gel to write ‘RIP’ on each milano cookie. Optionally trim the bottom edge to shorten the ‘headstones’.
- Press each cookie into the top of a brownie like a headstone.
- Spoon green frosting near each headstone and place a candy pumpkin on top.
Notes
- Use store-bought brownie mix for quicker prep.
- Adjust frosting color intensity with more or less food coloring.
- Serve immediately or store in an airtight container.
Nutrition
- Serving Size: 1 brownie
- Calories: 250
- Sugar: 20g
- Sodium: 150mg
- Fat: 10g
- Saturated Fat: 5g
- Unsaturated Fat: 3g
- Trans Fat: 0g
- Carbohydrates: 35g
- Fiber: 1g
- Protein: 2g
- Cholesterol: 20mg

Ingredients for Graveyard Halloween Brownies
Alright, let’s talk ingredients – and I mean the good stuff. You probably have most of these in your pantry already (Halloween baking is all about making life easy!). Here’s what you’ll need to whip up these spooktacular treats:
- 1 batch of brownie batter – Homemade or boxed, I don’t judge! Just make sure it fits an 8-inch pan (my secret? Underbake slightly for extra fudginess).
- 12 Milano cookies – The perfect “headstone” shape! Pepperidge Farm knows what’s up.
- Black decorating gel – For those dramatic “RIP” messages (the messier, the spookier!).
- 12 candy pumpkins – The cute little orange guys that make it Halloween-y.
- 1 cup powdered sugar – The base for our “graveyard grass” frosting.
- ¼ cup softened butter – Not melted! Leave it out for 30 minutes first.
- 2 tsp milk – Any kind works. Add slowly – we can always thin it later!
- Green food coloring – Just a few drops for that eerie, mossy color.
Pro tip: If you’re baking with kids, get extra candy pumpkins. There will be casualties (read: eaten decorations).
Equipment Needed
Grab these trusty tools – I bet they’re already in your kitchen! You’ll need:
- 8-inch square baking pan – Metal works best for crisp edges
- Parchment paper – Lifesaver for clean brownie removal
- Mixing bowls – One for frosting, one for disasters (just kidding… mostly)
- Hand mixer or whisk – For that dreamy green frosting
- Small spatula – To spread our “graveyard grass” just right
That’s it! No fancy gadgets required – unless you count tiny hands eager to decorate!
How to Make Graveyard Halloween Brownies
Okay, here’s where the real fun begins! Making these graveyard brownies is like conducting a delicious Halloween science experiment. Just follow these steps, and you’ll have spooky treats that’ll make your party guests scream (with delight!).
Bake and Cool the Brownies
First things first – let’s get those brownies baked to perfection. Line your 8-inch pan with parchment paper, leaving some overhang on the sides – this is your golden ticket to easy removal later. Pour in your batter and smooth it out nice and even. Now here’s my secret: bake them about 2 minutes less than the package or recipe says. We want them just set in the middle for that perfect fudgy texture.
Once they’re done, resist the urge to cut them immediately! I know it’s hard – that chocolatey smell is intoxicating – but trust me, letting them cool completely prevents crumbly disasters. I usually pop them in the fridge for about 30 minutes if I’m impatient (which is always).
Prepare the Spooky Decorations
While the brownies cool, let’s create our graveyard scene! Grab those Milano cookies and write “RIP” with black gel – messy handwriting makes it extra creepy! If the cookies seem too tall, just trim the bottoms slightly with a knife.
Now for the “grass”: whip together the powdered sugar, softened butter, and milk until fluffy. Add green food coloring drop by drop until you get that perfect eerie shade. Too thick? Add a splash more milk. Too thin? More powdered sugar to the rescue!
Assembly time: Cut your cooled brownies into rectangles, spread on some green frosting, stick in a cookie headstone, and top with a candy pumpkin. Voila! Instant graveyard magic.
Tips for Perfect Graveyard Halloween Brownies
After making these spooky treats more times than I can count, I’ve learned a few tricks to avoid Halloween baking disasters. Here are my hard-earned lessons:
- Frosting too runny? Chill it for 10 minutes first – cold butter firms it right up. Been there, done that with green frosting rivers!
- Cookies cracking? Gently press them into the brownies instead of pushing hard. Those Milano “headstones” can be delicate.
- Brownies sticking? That parchment paper overhang is your best friend. Pull slowly and evenly for clean slices.
- Food coloring stains? Wear gloves unless you want green thumbs for days (ask me how I know).
- Decorations sliding? Press pumpkins lightly into the frosting – they’ll set as the frosting dries.
Remember – imperfections make them look creepier! A little mess adds haunted charm.
Variations for Graveyard Halloween Brownies
Oh, the possibilities are endless with these graveyard brownies! Here are some of my favorite spooky twists to keep things fresh each Halloween:
- Cookie swap – Try Nutter Butters as “ghost headstones” or Oreos for a chocolatey twist. Write with white icing for extra contrast!
- Candy chaos – Swap pumpkins for gummy worms “crawling” out of the frosting or candy corn “flowers” on the graves.
- Frosting flavors – Add a drop of peppermint extract to the frosting for a chilling surprise, or mix in cocoa powder for “dirt” colored grass.
- Spooky sprinkles – Top with black sanding sugar or bat-shaped sprinkles for extra Halloween magic.
The best part? No matter how you decorate them, they’ll disappear just as fast!
Serving and Storing Graveyard Halloween Brownies
Okay, here’s the fun part – showing off your spooky creations! I love arranging these graveyard brownies on a black platter with dry ice for extra haunted house vibes (kids go nuts for the “smoking graveyard” effect). For classroom parties, individual cupcake liners make them easy to grab-and-go.
Storage tip: Keep them in an airtight container at room temperature for up to 3 days – if they last that long! The frosting might soften a bit, but that just makes them extra delicious. Pro tip: Hide a few in the back of the fridge for yourself before the party starts!
Graveyard Halloween Brownies FAQs
I get questions about these spooky treats every year – here are all my graveyard brownie secrets! No gatekeeping here, friends.
Can I use homemade brownies instead of box mix?
Absolutely! My from-scratch brownie recipe works wonderfully (extra chocolate chunks = extra delicious headstones). Just make sure your batter fits an 8-inch pan – nobody wants a brownie volcano eruption!
Help! My cookies keep breaking when I write “RIP”!
Oh honey, I’ve been there. Try this: chill the cookies for 10 minutes first so they’re firmer. Use gentle pressure with the gel – think “ghostly whisper,” not “angry poltergeist.” If they crack? Frosting covers all sins!
Can I make these ahead for a party?
You bet! Bake the brownies 1-2 days early, then decorate the morning of. The frosting acts like edible glue, keeping everything fresh. Pro tip: store them single-layer so the headstones don’t topple!
What if my green frosting looks radioactive?
Hah! Been there. Start with 2 drops of coloring, mix, then add more gradually. Too bright? A tiny bit of brown food coloring tones it down to perfect “haunted moss” green.
No candy pumpkins available?
Get creative! Candy corn, orange M&Ms, or even jelly beans work in a pinch. One year I used white chocolate chips as “ghosts” – spooky improvising is part of the fun!
Nutritional Information
Okay, let’s be real – we’re not eating graveyard brownies for their health benefits! But since folks ask, here’s the scoop (all values per brownie are estimates):
- Calories: About 250 – consider it fuel for trick-or-treating!
- Sugar: 20g – hey, it’s Halloween!
- Fat: 10g – that’s what makes them so gloriously fudgy
Disclaimer: These numbers vary based on your specific ingredients. I’m a baker, not a mathematician – so enjoy responsibly!
For more Halloween inspiration, check out our dessert recipes or our fun Halloween drinks. You can also follow our baking adventures on Facebook!


