Picture this: It’s Halloween night, the air smells like cinnamon and melted chocolate, and a plate of warm, gooey cookies disappears faster than kids can say “trick or treat.” That’s exactly what happened last year when I first made these Halloween Oreo Stuffed Chocolate cookies for our neighborhood party. I swear, they were gone before I could even snap a photo!

Table of Contents
Table of Contents
Why Halloween Oreo Stuffed Chocolate Cookies are Loved
What I love most is how they combine childhood nostalgia (who didn’t grow up dunking Oreos in milk?) with that homemade cookie warmth. My kids now demand we make them every October – though honestly, I’ve caught myself baking batches year-round when the Oreo craving hits!
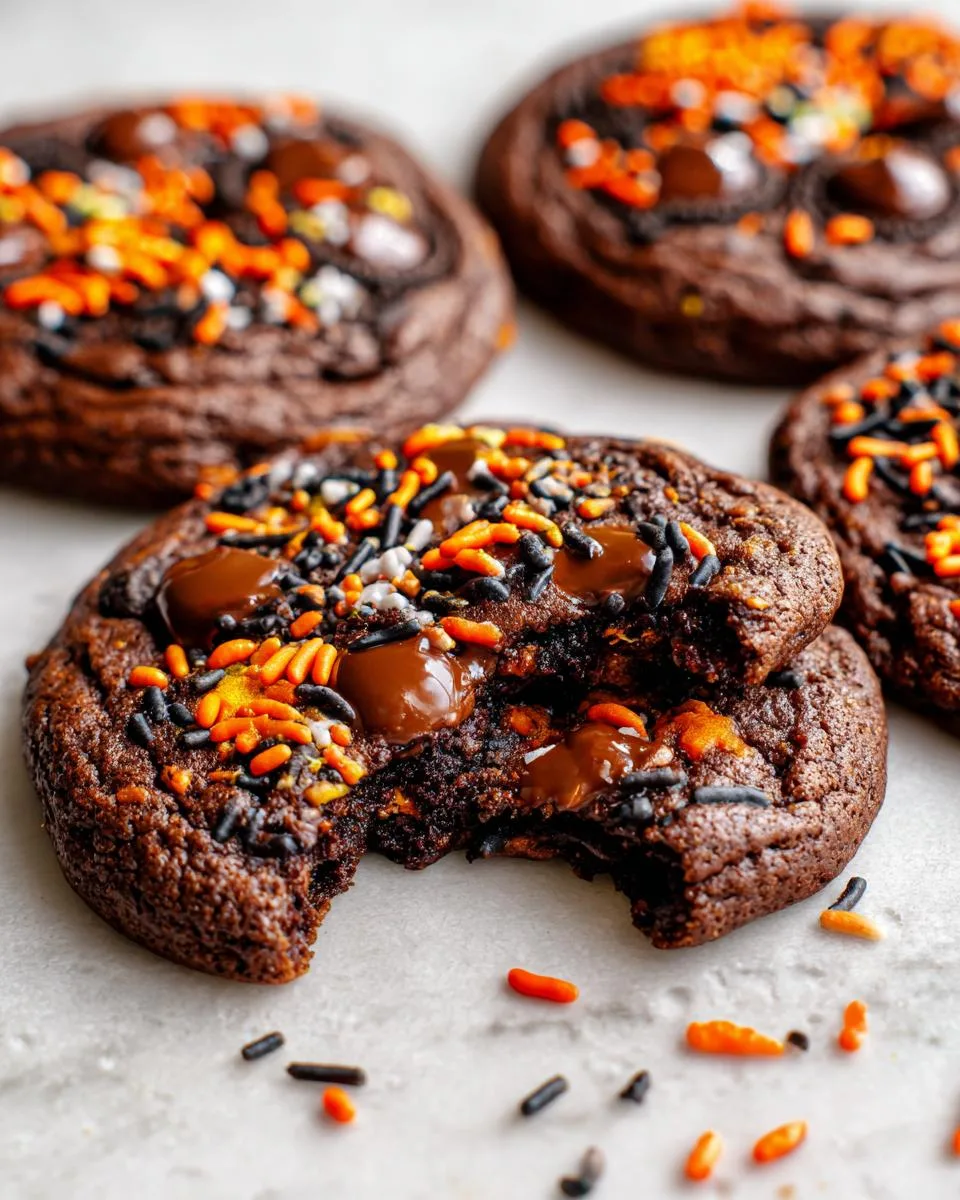
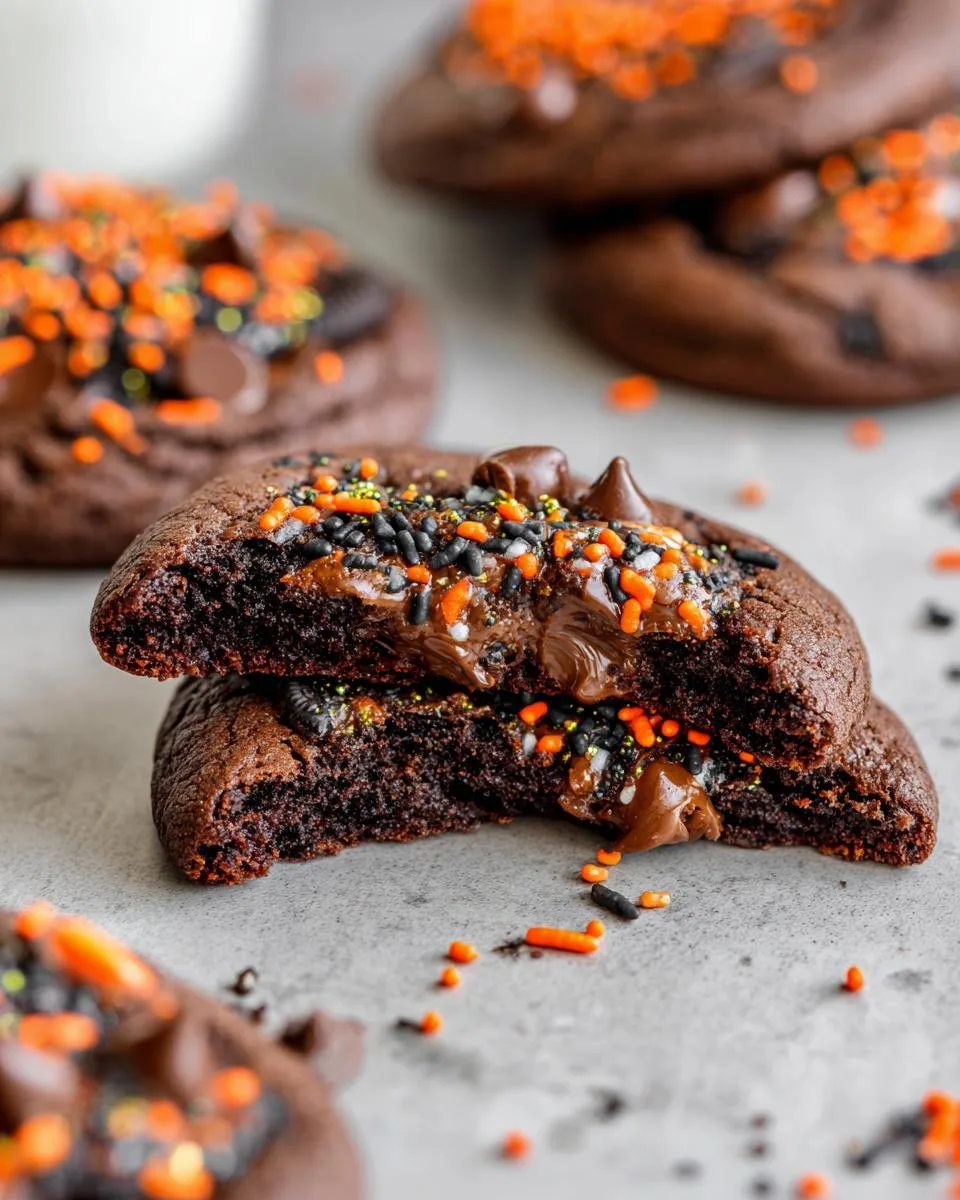
These aren’t just any cookies – they’re little edible surprises, like finding the full-size candy bar in your trick-or-treat bag. Imagine biting into a soft chocolate chip cookie only to discover a festive Halloween Oreo hiding inside, all wrapped up in sprinkles and melty chocolate chips. The orange and black Oreo filling peeks through when you break them apart, making them perfect for Halloween parties or just treating yourself during spooky movie nights.
Print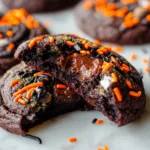
Halloween Oreo Stuffed Chocolate Cookies – 9 Epic Bites of Joy
- Prep Time: 15 mins
- Cook Time: 10 mins
- Total Time: 25 mins
- Yield: 9 cookies 1x
- Category: Dessert
- Method: Baking
- Cuisine: American
- Diet: Vegetarian
Description
Delicious Halloween-themed cookies stuffed with Oreos and chocolate chips, perfect for festive treats.
Ingredients
- 1/2 cup butter (slightly softened)
- 1/2 cup brown sugar
- 1/3 cup granulated sugar
- 1 egg
- 1 tsp vanilla extract
- 1 & 3/4 cup flour
- 3 tbsp corn starch
- 1/2 tsp baking soda
- 1/4 tsp salt
- 2/3 cup semi-sweet chocolate chips (more for topping)
- 9 Halloween Oreos
- 1/4 cup Halloween sprinkles
Instructions
- Preheat the oven to 350°F. Line a baking sheet with parchment paper or a silpat.
- In a medium bowl, cream the butter and both sugars together.
- Add the vanilla and egg, mixing until smooth.
- Gradually add the dry ingredients (flour, corn starch, baking soda, salt) and stir just until combined.
- Fold in the chocolate chips and sprinkles.
- Scoop 1/4 cup of dough, flatten it, place an Oreo in the center, and fold the dough over, sealing it.
- Place on the baking sheet and bake for 10 minutes.
- Top with extra chocolate chips while warm. Cool for 5 minutes on the sheet, then transfer to a rack.
Notes
- Cookies will look underdone but firm up as they cool.
- Use festive sprinkles for extra Halloween flair.
Nutrition
- Serving Size: 1 cookie
- Calories: 320
- Sugar: 25g
- Sodium: 180mg
- Fat: 14g
- Saturated Fat: 7g
- Unsaturated Fat: 5g
- Trans Fat: 0g
- Carbohydrates: 45g
- Fiber: 2g
- Protein: 4g
- Cholesterol: 35mg
Halloween Oreo Stuffed Chocolate Ingredients
Okay, let’s talk ingredients – and I mean exactly what you’ll need to make these cookies as magical as they were at my Halloween party last year. Trust me, I’ve learned through trial and error (mostly error) that the little details here make all the difference!
First up – the butter. You’ll want 1/2 cup of slightly softened butter. Not melted! Just leave it out for about 30 minutes before baking. I learned this the hard way when I once tried microwaving it – let’s just say my first batch spread into one giant cookie monster.
For sugars:
- 1/2 cup packed brown sugar – pack it in there like you’re building a sandcastle
- 1/3 cup granulated sugar – no packing needed here
Wet stuff:
- 1 large egg – straight from the fridge is fine
- 1 tsp vanilla extract – the good stuff if you’ve got it
Dry team:
- 1 & 3/4 cups all-purpose flour – spooned and leveled, don’t scoop!
- 3 tbsp cornstarch – our secret for that perfect soft texture
- 1/2 tsp baking soda
- 1/4 tsp salt – just a pinch to balance the sweetness
The fun parts:
- 2/3 cup semi-sweet chocolate chips plus extra for topping
- 9 Halloween Oreos – yes, exactly nine (I’ve counted!)
- 1/4 cup Halloween sprinkles – optional but oh-so-festive
Pro tip: The Halloween Oreos with their orange filling make these extra special, but regular Oreos work in a pinch if you can’t find the seasonal ones. Just add extra sprinkles to keep that Halloween spirit!
How to Make Halloween Oreo Stuffed Chocolate
Alright, let’s dive into the fun part – turning all those ingredients into cookie magic! I’ve made these enough times now that I could probably do it in my sleep (though I don’t recommend that – hot ovens and sleepy bakers don’t mix well). Follow these steps, and you’ll have cookies that’ll disappear faster than a ghost in the night.
Mixing the Dough
First things first – preheat that oven to 350°F. Trust me, you don’t want to be waiting around with dough-covered hands while your oven heats up!
Now for the dough – this is where the magic starts. Grab a big bowl and cream together your softened butter with both sugars. I use my trusty hand mixer, but a wooden spoon works if you’ve got some arm strength to spare. Beat them until they’re light and fluffy – about 2 minutes should do it. This step is crucial for that perfect cookie texture, so don’t rush it!
Next, add in your egg and vanilla. Mix just until combined – you’ll see the mixture come together beautifully. Now for the dry ingredients: whisk together your flour, cornstarch, baking soda, and salt in another bowl. Gradually add this to your wet ingredients, mixing just until no dry streaks remain. Overmixing is the enemy of tender cookies, so when in doubt, stop mixing!
Finally, gently fold in your chocolate chips and sprinkles (if using). The dough should be thick but scoopable – if it feels too sticky, you can chill it for 15 minutes. But honestly? I’m usually too impatient for that step!
Assembling and Baking
Here’s where the real fun begins – it’s Oreo-stuffing time! Scoop about 1/4 cup of dough (I use an ice cream scoop for this) and flatten it slightly in your palm. Place one Halloween Oreo right in the center, then carefully wrap the dough around it, sealing all edges. Don’t worry if it looks messy – it’ll bake up beautifully!
Place your stuffed dough balls on a parchment-lined baking sheet, leaving about 2 inches between them. They don’t spread too much, but you want some breathing room. Now into the oven they go for 10 minutes exactly. Here’s the trick – they’ll look underdone when you take them out (edges just set, centers still soft), but this is perfect! They’ll continue to firm up as they cool.
As soon as they come out of the oven, press a few extra chocolate chips into the tops while they’re still warm. This makes them look extra decadent and gives you those perfect melty chocolate pockets. Let them cool on the baking sheet for 5 minutes – this helps them set – then transfer to a wire rack. Try to resist eating them immediately (I’ve burned my tongue more times than I’d like to admit doing this)!
Tips for Perfect Halloween Oreo Stuffed Chocolate
After burning several batches (literally) and creating cookie monsters that spread across entire baking sheets, I’ve learned a few tricks to make these Halloween treats foolproof. Here’s everything I wish I knew when I first started making them!
- Let them cool properly – I know it’s tempting, but wait those full 5 minutes on the baking sheet! The cookies finish setting as they cool, and moving them too soon can cause breakage. The Oreo inside stays surprisingly crisp if you let them rest.
- Get creative with sprinkles – The orange and black Halloween sprinkles are classic, but I’ve used purple and green for monster-themed cookies, or even glow-in-the-dark sprinkles for extra spookiness. My kids love helping with this part!
- Dough too sticky? Pop it in the fridge for 15 minutes. I’ve found this especially helpful on humid days when the butter gets too soft. Chilled dough is much easier to work with when wrapping those Oreos.
- Center your Oreos – When wrapping the dough, make sure the cookie is right in the middle. My first batch had lopsided Oreos peeking out weirdly. A quick trick: flatten the dough into a small circle first, place the Oreo, then fold up the sides like wrapping a present.
- Make ahead option – You can prepare the stuffed dough balls and freeze them for up to a month! Just add 1-2 minutes to the baking time when cooking from frozen. Perfect for when unexpected trick-or-treaters show up!
One last tip from my mishaps – if your cookies do spread too much (it happens to all of us!), just call them “spooky ghost cookies” and pile on extra sprinkles. No one will know it wasn’t intentional!
Halloween Oreo Stuffed Chocolate Variations
Once you’ve mastered the classic version, it’s time to get creative! I’ve spent many Halloweens playing with different fillings and toppings – some were hits (hello, peanut butter cups), and some… well, let’s just say candy corn stuffing was a one-time experiment. Here are my favorite ways to mix things up when that Oreo craving strikes!
Spooky Swap-Outs for the Oreo Center
While Halloween Oreos are perfect, don’t be afraid to switch up the surprise inside:
- Peanut butter cups – Use the mini ones! Unwrap 9 (I’ve learned regular-sized make the cookies too thick) and freeze them for 10 minutes first so they hold their shape when wrapping.
- Mint Oreos – For an unexpected cool twist that pairs amazingly with the chocolate chips. My husband calls these his “witch’s brew cookies.”
- Golden Oreos with orange food coloring – Mix a drop into the cream filling before sandwiching them back together. Kids love this “pumpkin guts” version!
Crazy Crunchy Toppings
The sprinkle possibilities are endless – here’s what’s worked best in my kitchen:
- Crushed candy corn – Mix into the dough or press on top after baking for instant Halloween vibes (just know they’ll make the cookies sweeter).
- Crushed pretzels – That salty-sweet combo is addictive. I use about 1/4 cup mixed into the dough.
- Halloween M&M’s – Swap out half the chocolate chips for these festive candies. The colors bleed slightly when baked for a cool “melted witch” effect.
My most requested variation? “Zombie cookies” – I add a few drops of green food coloring to the dough and use red candy eyes after baking. They’re always the first to disappear at parties! The beauty of this recipe is how easily you can adapt it – as long as you keep that cornstarch in there for the perfect soft texture, you really can’t go wrong.
Storing and Serving Suggestions
Now, let me tell you how to keep these Halloween Oreo Stuffed Chocolate cookies tasting fresh – if they even last long enough to store! I’ve learned a few tricks over the years to keep them soft and delicious, whether you’re making them ahead or (more likely) trying to hide a few from your family.
The Best Way to Store Your Cookies
First rule – always let them cool completely before storing. I learned this the hard way when I once packed warm cookies into a container – next morning, I had a sticky, soggy mess. Now I wait until they’re room temperature, then layer them in an airtight container with parchment paper between layers. They’ll stay fresh this way for up to 3 days at room temperature – though honestly, mine never last that long!
For longer storage, you can freeze the baked cookies for up to 1 month. Just wrap each one individually in plastic wrap first – this prevents freezer burn and keeps them from sticking together. When the craving hits, let them thaw at room temperature for about an hour, or pop them in the microwave for 10 seconds if you can’t wait.

Bringing Them Back to Life
Here’s my favorite trick if your cookies have been sitting for a day or two and need reviving: 5 seconds in the microwave makes them taste fresh-baked again! The chocolate gets all melty, and the Oreo inside softens slightly – just like magic. Careful not to overdo it though, or you’ll have a chocolate lava situation on your hands (been there!).
If you’re feeling fancy, try warming them in a 300°F oven for 3 minutes. This works especially well if you’re serving them to guests – it makes your whole kitchen smell amazing!
Serving Ideas That’ll Wow Everyone
These cookies are fantastic on their own, but here’s how I like to take them to the next level for parties:
- Classic milk pairing – Dunk them just like regular Oreos, but with that extra chocolatey goodness. I serve them with small glasses of cold milk at kids’ parties – always a hit!
- Ice cream sandwich style – Slice one in half while still slightly warm and sandwich a scoop of vanilla ice cream in between. The warm cookie melts the ice cream just enough – absolute heaven.
- Halloween dessert board – Arrange them on a platter with other spooky treats like candy apples and popcorn balls for a festive display.
Pro tip: For grown-up gatherings, try pairing them with coffee or hot chocolate – the bitterness balances the sweetness perfectly. Last Halloween, I even served them with pumpkin spice lattes, and my friends still talk about it!
Remember, these cookies are at their absolute best the day they’re made, but with these storage tricks, you can enjoy that fresh-baked taste anytime. Just don’t blame me if you find yourself sneaking to the kitchen at midnight for “just one more” – I do it too!
Nutritional Information
Okay, let’s talk numbers – because even though these Halloween Oreo Stuffed Chocolate cookies taste like pure magic, I know some of us like to know what we’re indulging in! (Personally, I prefer the “ignorance is bliss” approach with desserts, but I get it.)
First, the big disclaimer: These values are estimates based on standard ingredients. Your exact numbers might vary depending on specific brands or if you go wild with the sprinkles (no judgment here!).
Per cookie (and let’s be real, who stops at one?):
- Calories: 320 – about the same as a fun-sized candy bar, but way more satisfying!
- Fat: 14g (7g saturated) – that’s the butter and chocolate doing their delicious work
- Carbs: 45g – mostly from the Oreo and sugars, obviously
- Fiber: 2g – hey, there’s carrots in Oreo filling… that counts, right?
- Protein: 4g – not bad for a dessert!
- Sugar: 25g – it’s Halloween, live a little!
Now, if you’re like me and eat two (or three) in one sitting while watching horror movies, just… maybe take the dog for an extra walk tomorrow. Or balance it out with some apple slices later. Or don’t – it’s the spooky season after all, and life’s too short to skip the good cookies!
Remember, these are treats, not health food – but that’s exactly what makes them special. Everything in moderation, including moderation… especially around Halloween!
Halloween Oreo Stuffed Chocolate FAQ
After making these cookies every Halloween for years (and fielding countless questions from curious neighbors), I’ve heard it all! Here are the answers to the most common questions that pop up whenever I serve these spooky treats.
What’s different about Halloween Oreos?
Oh, this is my favorite question! Halloween Oreos have that same classic cookie taste we all love, but with a fun orange-colored filling instead of the usual white. The flavor is slightly more vanilla-forward to me – not drastically different, but it makes the cookies extra festive when you break them open. Last year, they even had little bat designs stamped on some of the cookies! The colored filling is what makes these Oreo stuffed cookies so perfect for Halloween – that surprise pop of orange when you take a bite always gets “oohs” and “aahs.”
How long do these Oreo stuffed cookies stay fresh?
Okay, truth time – they rarely last more than a day in my house! But if you have more willpower than my family, they’ll stay delicious in an airtight container at room temperature for 3-4 days. The Oreo inside starts to soften after day two, which some people actually prefer (I’m team crispy Oreo myself). For longer storage, freeze them as I mentioned earlier – they’ll keep for a month frozen, though the sprinkles might lose some crunch.
Pro tip: If your cookies seem dry after a couple days, toss a slice of bread in the container overnight. The cookies will absorb the moisture from the bread and get soft again – it’s like magic!
Can I make Halloween Oreo stuffed cookies ahead of time?
Absolutely! I actually prefer making the dough balls ahead when I’m preparing for parties. Here’s my timeline:
- Up to 2 days ahead: Prepare the stuffed dough balls and keep them covered in the fridge. Just add 1 minute to the baking time since they’ll be cold.
- Up to 1 month ahead: Freeze the unbaked dough balls on a tray, then transfer to a freezer bag. Bake straight from frozen, adding 2-3 minutes to the time.
I don’t recommend baking them more than a day in advance though – the Oreos lose that perfect crisp texture. The dough holds up much better than the baked cookies for make-ahead prep. Last Halloween, I had three dozen dough balls ready in my freezer for unexpected guests – total lifesaver when the neighborhood kids came caroling!
Try This Recipe and Share Your Spooky Creations!
Alright, my fellow cookie monsters – it’s your turn now! I’ve shared all my hard-earned tricks (and fails) for these Halloween Oreo Stuffed Chocolate cookies, and I can’t wait to see what spooky variations you come up with. Will you go classic with the orange-filled Oreos? Get wild with peanut butter cup centers? Or maybe invent something completely new?
Here’s my challenge to you: Bake a batch this weekend and snap a photo of your creations. Did your cookies turn out perfectly round like little pumpkins? Did they spread into spooky ghost shapes? (Both have happened in my kitchen!) Drop a comment below telling me:
- Your favorite variation
- Any clever twists you added
- How fast they disappeared at your house
I read every comment and love seeing your baking adventures – the triumphs and the tasty disasters alike. Last year, one reader made “Frankenstein cookies” by adding green food coloring to the dough, and another created a spiderweb design with melted white chocolate on top. The creativity blew me away!
So grab those mixing bowls, preheat that oven, and let’s make this Halloween extra delicious. Tag me on social if you share photos – I’ll be looking for your spooky cookie masterpieces! Now if you’ll excuse me, I think it’s time I baked another test batch… purely for quality control purposes, of course.
For more delicious recipes, check out our recipes section. If you’re looking for more Halloween inspiration, you might enjoy our Halloween Stuffed Peppers or our fun Halloween Fruit Salad. You can also follow us on Facebook for more cooking tips and tricks!


