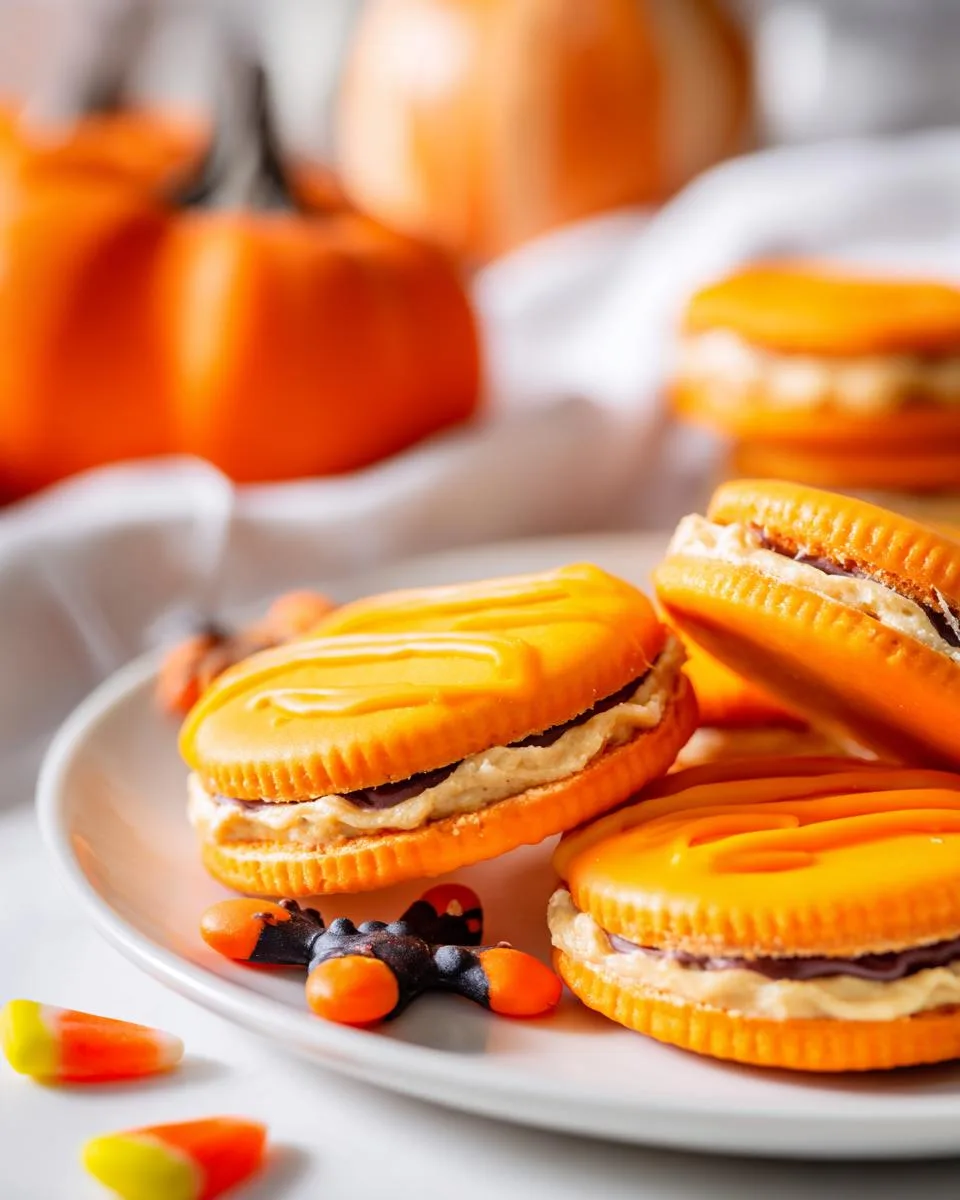
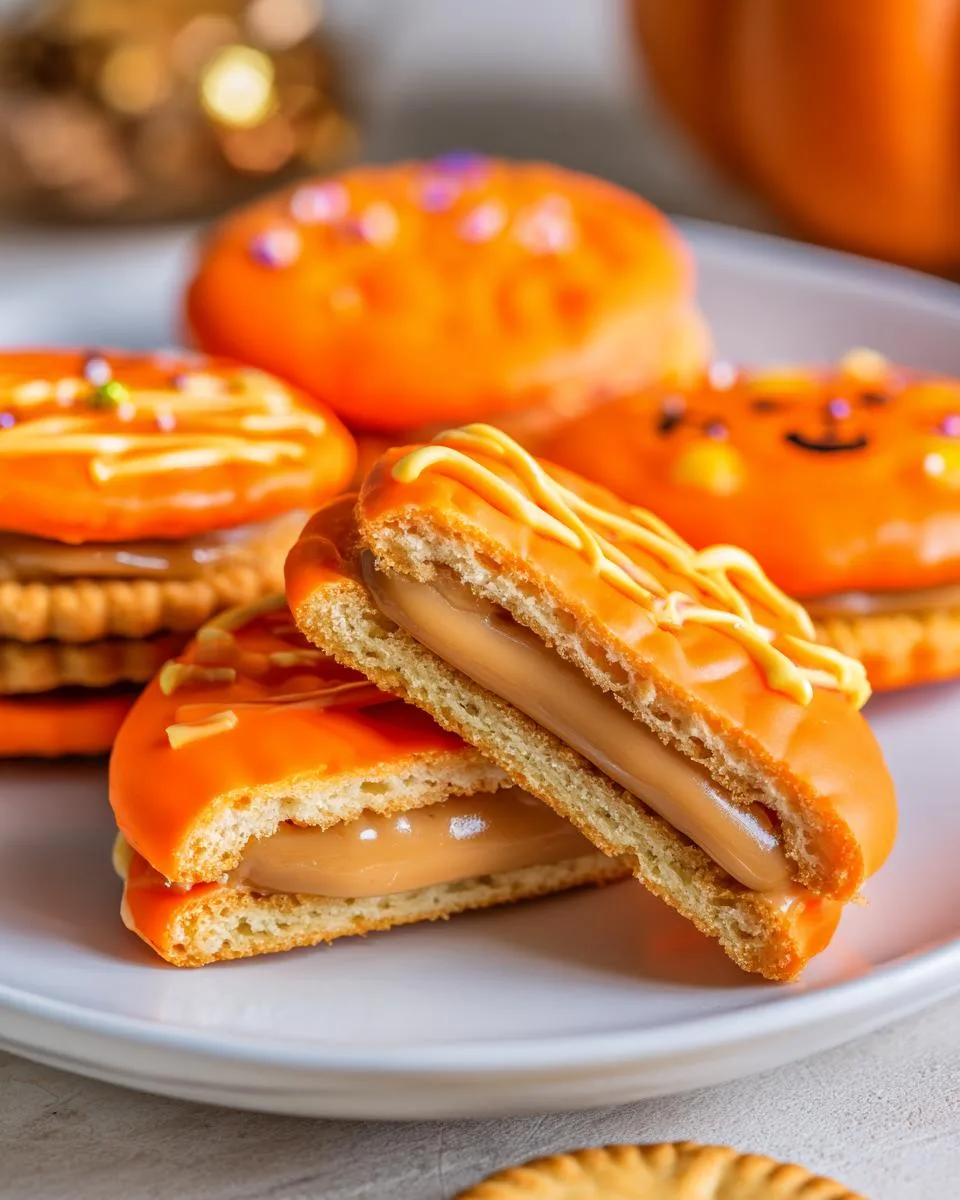
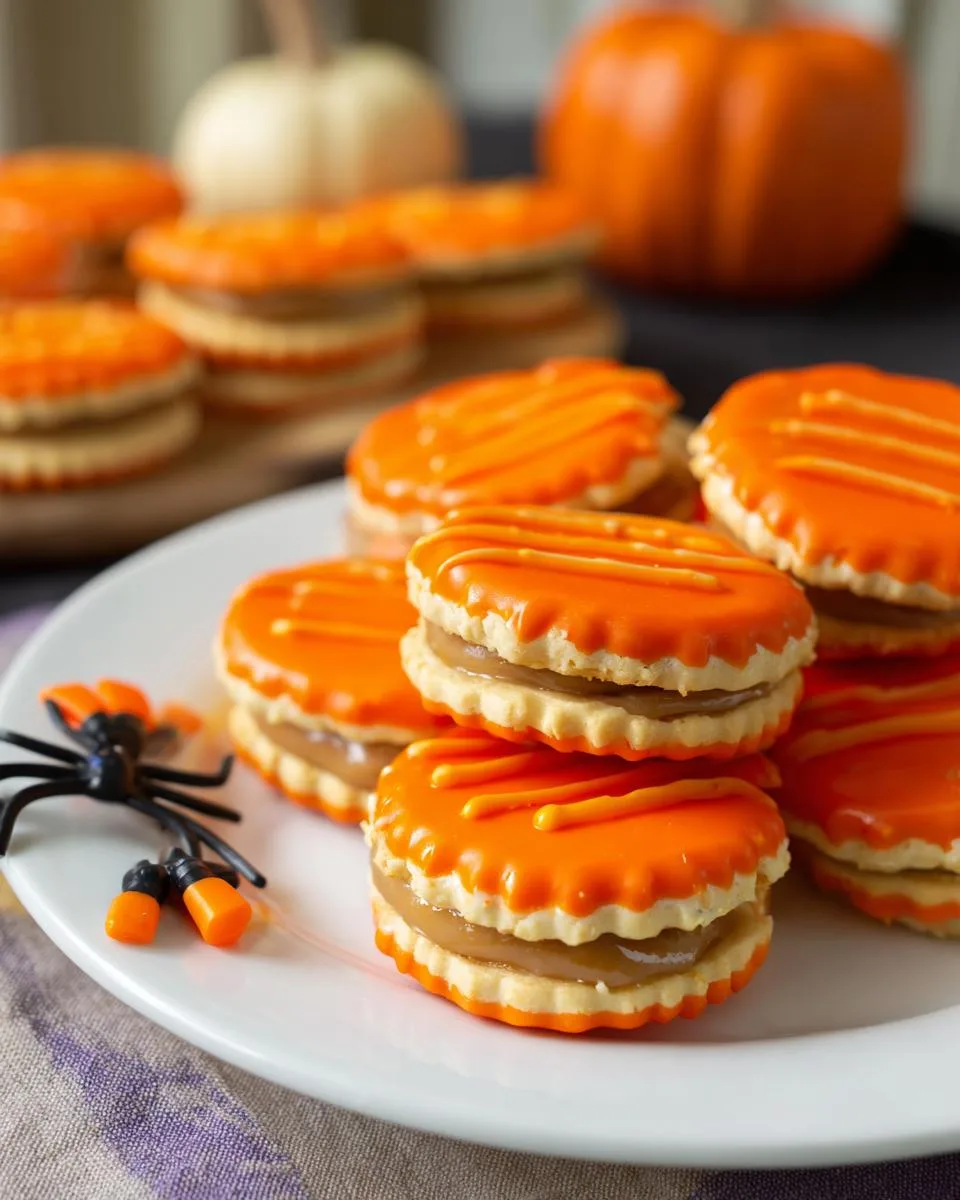
Oh my gosh, is there anything better than a Halloween treat that’s ridiculously easy and totally adorable? Every year, my kitchen becomes a haunted bakery, and these Halloween Peanut Butter Ritz Cookies are always the star of the spooky show. They are my absolute go-to because, let’s be real, who has time for complicated baking when you’re also trying to assemble a last-minute costume? The best part is that you probably have most of the stuff in your pantry right now. It’s just a matter of a little peanut butter, some crunchy crackers, and a whole lot of festive fun!
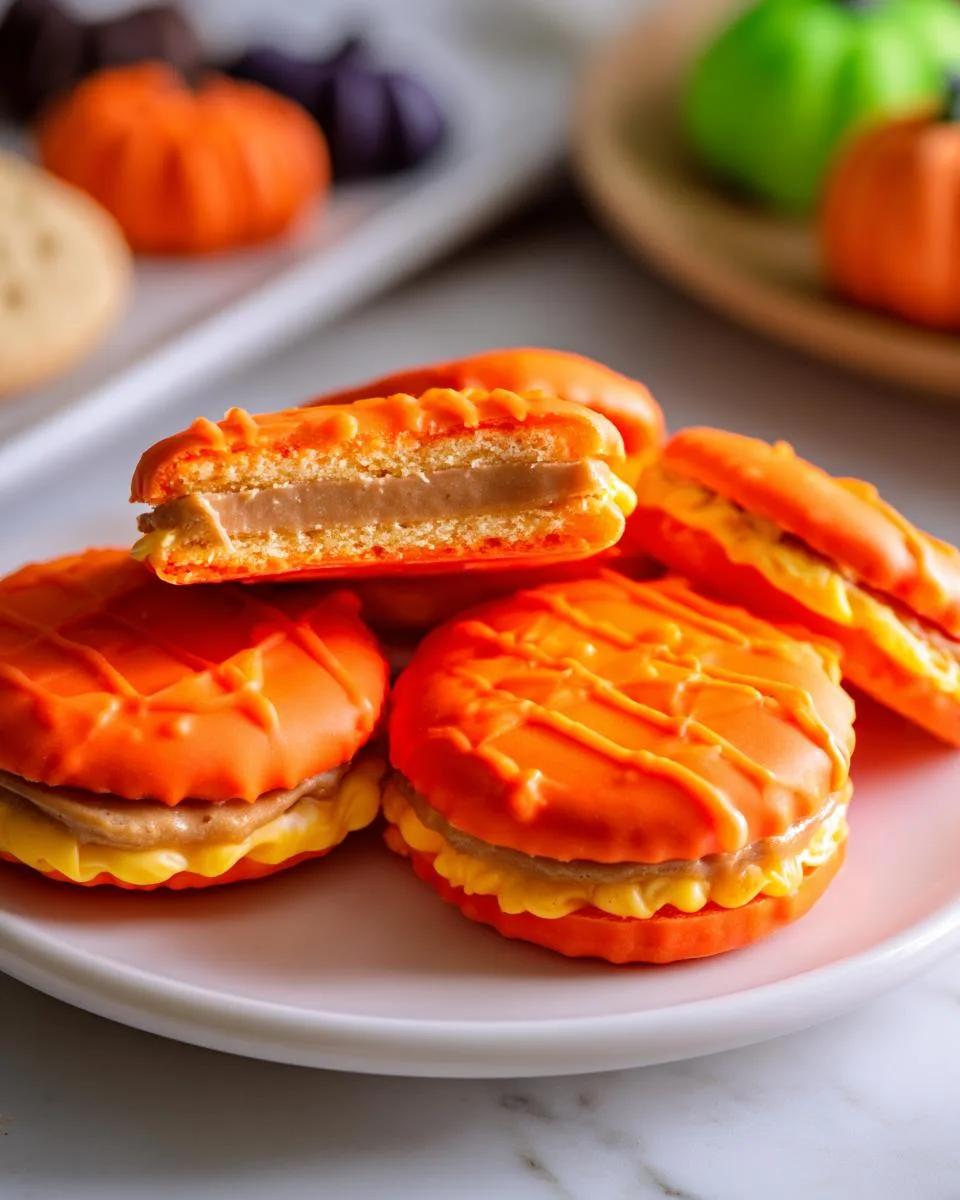
Table of Contents
Table of Contents
Why You’ll Love Halloween Peanut Butter Ritz Cookies
Trust me, these little bites of Halloween magic are about to become your new favorite tradition. Here’s why:
- No oven required – Just melt, dip, and decorate! Perfect for when you’re short on time (or patience).
- Kid-approved fun – My nieces go wild decorating these like mini monsters and pumpkins.
- Endless creativity – Orange coating for pumpkins, white for ghosts, or go wild with sprinkles!
- That salty-sweet crunch – The Ritz crackers stay perfectly crisp under all that chocolatey goodness.
- Party-perfect – They look fancy but take less effort than carving a pumpkin!
Seriously, these disappear faster than candy corn at my house every October!
Ingredients for Halloween Peanut Butter Ritz Cookies
Okay, let’s raid that pantry! You’ll need just four simple things to make these spooky-good treats. No fancy ingredients here – just the good stuff:
- 1 sleeve Ritz crackers (about 24 crackers) – That salty crunch is everything!
- ½ cup creamy peanut butter – Use the regular kind, not natural – we need that stickiness!
- 12 oz orange candy melts (or any Halloween color you love) – Wilton makes perfect Halloween shades!
- 2 tsp shortening (like Crisco) – This little bit makes the coating smooth as a ghost!
That’s it! Though I won’t judge if you grab extra sprinkles… you know, purely for “testing purposes.”
Equipment You’ll Need
Don’t worry – you won’t need any fancy gadgets for these Halloween Peanut Butter Ritz Cookies! Just grab these basics from your kitchen:
- Microwave-safe bowl – For melting that candy coating to silky perfection
- Baking sheet lined with parchment or wax paper – Your decorated cookies need a place to set
- Rubber spatula or fork – My weapon of choice for dipping and swirling
- Small spoon – For spreading that peanut butter just right
See? Told you this was easy! Now let’s make some magic.
How to Make Halloween Peanut Butter Ritz Cookies
Get ready for the easiest – and most addictive – Halloween kitchen project ever! These cookies come together so fast, you’ll have time to decorate while watching your favorite spooky movie. Just follow these simple steps and you’ll be snacking in no time!
Step 1: Assemble the Peanut Butter Sandwiches
Lay out half your Ritz crackers on a clean surface. Spread about 1 teaspoon of peanut butter on each – enough to stick, but don’t go overboard or it’ll ooze out when you press them together! Top with another cracker and give a gentle squeeze. Voila! Mini PB sandwiches ready for their Halloween makeover.
Step 2: Melt the Candy Coating
This is where the magic happens! In your microwave-safe bowl, combine the candy melts with shortening. Microwave in 30-second bursts, stirring well between each round. It usually takes about 1 1/2 to 2 minutes total. The shortening makes the coating glossy and perfect for dipping – but watch it like a hawk! Burnt candy melts are nobody’s friend.
Step 3: Dip and Decorate
Time for the fun part! Using a fork or dipping tool, fully submerge each peanut butter sandwich in the melted coating. Let the excess drip off – a little tap on the bowl’s edge helps. Work quickly to add sprinkles, candy eyes, or drizzle contrasting colors before the coating sets. Pro tip: Have all your decorations ready to go in small bowls for speedy decorating!
Step 4: Let the Cookies Set
Place your decorated treats on the prepared baking sheet. They’ll set at room temperature in about 15 minutes, but if you’re impatient like me, pop them in the fridge for 10 minutes to speed things up. The wait is the hardest part – but so worth it!
Print
Spooky 4-Ingredient Halloween Peanut Butter Ritz Cookies
- Prep Time: 20 minutes
- Cook Time: 15 minutes
- Total Time: 35 minutes
- Yield: 24 cookies 1x
- Category: Dessert
- Method: No-bake
- Cuisine: American
- Diet: Vegetarian
Description
Fun and festive Halloween treats made by sandwiching peanut butter between Ritz crackers and decorating with candy melts.
Ingredients
- Ritz crackers
- Creamy peanut butter
- 12 oz. or 16 oz. package(s) of candy melts or Almond Bark coating
- 2 tsp. shortening (such as Crisco) per each 12 oz. or 16 oz. package of candy melts or Almond Bark coating
Instructions
- Spread peanut butter on Ritz crackers and top with another Ritz to create sandwiches.
- Melt candy melts or almond bark coating with shortening in the microwave.
- Dip each cracker sandwich in the coating, covering completely.
- Place on a baking sheet lined with wax paper or parchment paper.
- Add decorations as per design.
- Let coating set completely or chill for quicker setting.
- Store in an airtight container at room temperature or refrigerate if needed.
Notes
- Use different candy melts and decorations for various Halloween designs.
- Store in an airtight container to maintain freshness.
- Chill if coatings are soft.
Nutrition
- Serving Size: 1 cookie
- Calories: 120
- Sugar: 8g
- Sodium: 85mg
- Fat: 7g
- Saturated Fat: 3g
- Unsaturated Fat: 3g
- Trans Fat: 0g
- Carbohydrates: 12g
- Fiber: 1g
- Protein: 2g
- Cholesterol: 5mg
Tips for Perfect Halloween Peanut Butter Ritz Cookies
Want to make sure your cookies turn out spook-tacular every time? Here are my tried-and-true tips:
- Use a fork for dipping – It lets the excess coating drip off perfectly.
- Keep decorations small – Tiny sprinkles or candy eyes stick better before the coating sets.
- Work in batches – Dip 3-4 cookies at a time to keep the coating warm and smooth.
- Store them right – Keep in an airtight container at room temp for up to 3 days.
Trust me, these little tricks make all the difference!
Variations and Substitutions
Oh, the possibilities are endless with these Halloween Peanut Butter Ritz Cookies! Here are some fun twists I’ve tried (and loved):
- Nut butter swap – Almond butter works great for peanut allergies, or try sunflower seed butter for school-safe treats!
- Spooky colors – Mix purple and green candy melts for Frankenstein vibes or do black coating for bats!
- Gluten-free? – Simple Mills almond flour crackers make an awesome crunchy substitute.
- Extra crunch – Sprinkle crushed pretzels on top before the coating sets for a sweet-salty bite.
The best part? You really can’t mess these up – every variation tastes delicious!
Storing and Serving Halloween Peanut Butter Ritz Cookies
Here’s the good news – these treats actually stay fresh longer than your average Halloween candy! For the best texture, pop them in an airtight container with parchment between layers. They’ll keep their crunch at room temperature for 3-5 days – if they last that long! If your kitchen runs warm, the fridge works too (just let them come to room temp before serving for maximum crispness). Pro tip: I always make a double batch because somehow these disappear faster than a ghost in the night!
Nutrition Information
Nutritional values are estimates and vary based on ingredients/brands used – these sweet little bites are meant for enjoying, not counting!
Frequently Asked Questions
Got questions about these spooky little treats? I’ve got answers! Here are the things people ask me most about my Halloween Peanut Butter Ritz Cookies:
How long do these cookies last?
Honestly, they rarely stick around long enough to test! But properly stored in an airtight container, they’ll stay fresh and crunchy for 3-5 days at room temperature. The peanut butter keeps them moist, and the candy coating acts like a protective shell.
Can I use something besides peanut butter?
Absolutely! My niece’s classroom is peanut-free, so we use sunflower seed butter with great success. Almond butter works too – just make sure it’s not the super oily natural kind. You need that sticky texture to hold everything together.
Any decorating tips for kids?
Keep it simple! Candy eyes are foolproof (and adorable). For tiny hands, put sprinkles in shaker containers. My favorite trick? Use a toothpick to “draw” little spiderwebs or fangs with melted chocolate before the coating sets. Messy? Maybe. Fun? Definitely!
Why add shortening to the candy melts?
Oh honey, this is my secret weapon! That little bit of shortening makes the coating silky smooth and helps it set with a perfect snap. Without it, the coating can be too thick and gloppy. Just 2 teaspoons makes all the difference!
For More recipes Follow me on Facebook!