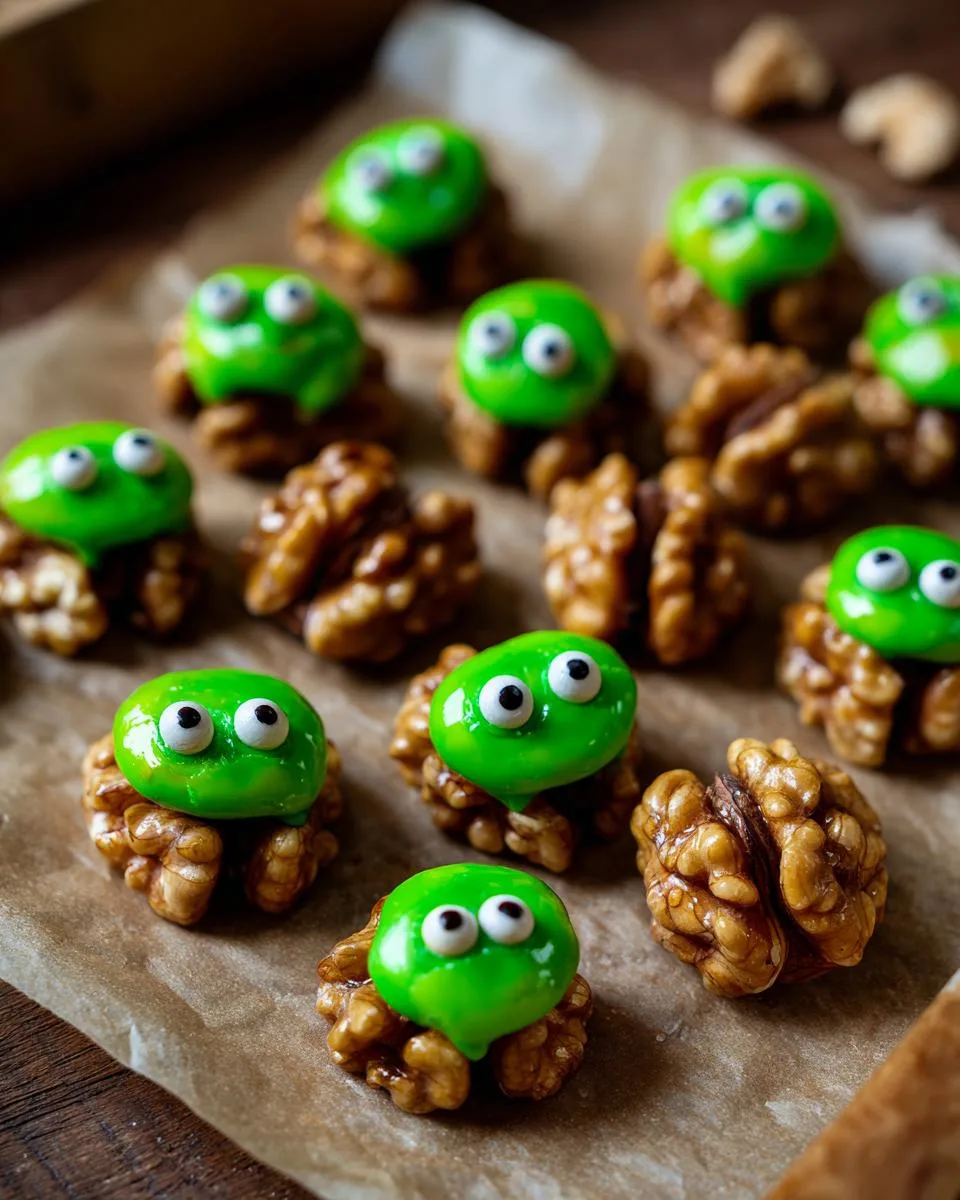
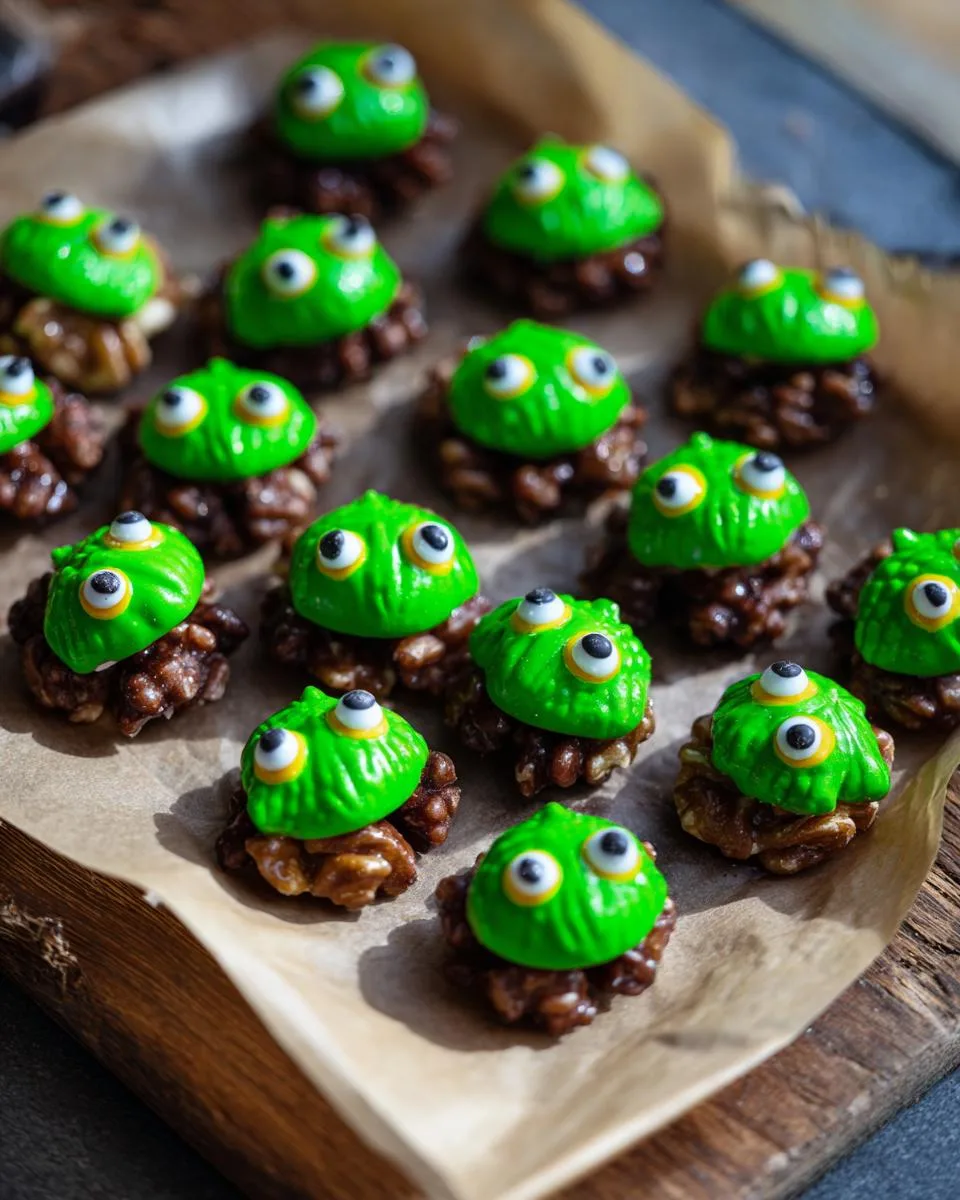
Every Halloween, my kitchen turns into a spooky workshop where I whip up fun, creepy treats with my kids. One of our absolute favorites? These adorable Halloween walnut goblins. They’re the perfect mix of cute and creepy, and the best part is how easy they are to make. Just grab some walnuts, candy melts, and a few edible decorations, and you’re ready to create a whole cast of Halloween characters. My kids love dipping the walnuts and adding googly candy eyes – it’s like crafting and snacking at the same time! Whether you’re hosting a party or just want a fun activity with the little ones, these walnut goblins are a must-try. Trust me, they’re a total crowd-pleaser!

Table of Contents
Table of Contents
Why You’ll Love These Halloween Walnut Goblins
These little guys are a total blast to make, and I promise, they’ll become your new Halloween tradition. Here’s why:
- Super easy – No baking, no fuss. Just melt, dip, and decorate. Even the little ones can help!
- Endlessly fun – Turn walnuts into goblins, pumpkins, or mummies. Let your creativity run wild!
- Perfect for parties – They’re a spooky-cute addition to any Halloween spread, and guests always go nuts for them (pun intended).
- Kid-approved – What’s not to love? Sweet, crunchy, and packed with silly personality.
Seriously, these might just be the easiest—and most adorable—Halloween treats you’ll make this year.
Ingredients for Halloween Walnut Goblins
Let’s talk ingredients – this is where the magic happens! You’ll be amazed how a handful of simple items transform into spooky little creatures. I always raid my pantry first before shopping because you might already have some of this stuff. Just make sure your walnuts are fresh – stale ones won’t give you that perfect crunch.
For the Goblins
- Whole walnut halves – About 20-24 good-looking ones (no broken pieces – we want our goblins to have perfect little faces!)
- Green candy melts – A 12-ounce bag should cover it (I like the bright lime green for extra goblin vibes)
- Candy eyes – The bigger, the creepier! You’ll need about 40-50 eyes for all your goblins
For the Pumpkins
- More walnut halves – Same as before, whole and unbroken
- Orange candy melts – 8 ounces will do (pick a classic pumpkin orange, not too neon)
- Mini M&M’s – Green or brown ones work best for the stems (I sneak a few extras for “quality control” while working)
For the Mummies
- Yes, more walnuts – You guessed it, another batch of perfect halves
- White candy melts – 10 ounces should cover your undead army
- More candy eyes – These little guys get two eyes each too (go for slightly smaller ones if you can find them)
Pro tip from my many messy Halloween sessions: grab extra candy melts just in case. It’s better to have leftovers than run out mid-goblin creation! And don’t stress if you can’t find candy eyes – you can always pipe little dots with black icing instead.
Equipment You’ll Need
Don’t worry—you won’t need any fancy gadgets for these Halloween walnut goblins. Just gather these basics, and you’re all set:
- Parchment paper – A must for easy cleanup and keeping those goblins from sticking.
- Microwave-safe bowls – One for each candy melt color (trust me, you don’t want to mix them accidentally!).
- Piping bag or ziplock bag – For those perfect mummy zigzags (snip a tiny corner if using a bag).
That’s it! No special tools, no stress—just spooky, snackable fun.
How to Make Halloween Walnut Goblins
Alright, let’s get spooky! Making these Halloween walnut goblins is a breeze—just follow these simple steps, and you’ll have a whole army of creepy-cute treats in no time. The key here is working in stages and letting each batch chill before moving on. Trust me, I’ve learned the hard way that rushing leads to smudged goblins and melty mummies!
Prepare Your Workspace
First things first—grab a large sheet pan and line it with parchment paper. This is your goblin-making headquarters! Make sure you’ve got enough space to spread out your walnuts because they’ll need room to set. I like to clear off my entire counter because, let’s be real, things might get a little messy (especially if kids are involved).
Making the Goblin Walnuts
Time to bring those green goblins to life! Here’s how:
- Melt the green candy melts in a microwave-safe bowl, stirring every 30 seconds until smooth. Don’t overheat—nobody likes burnt goblin coating!
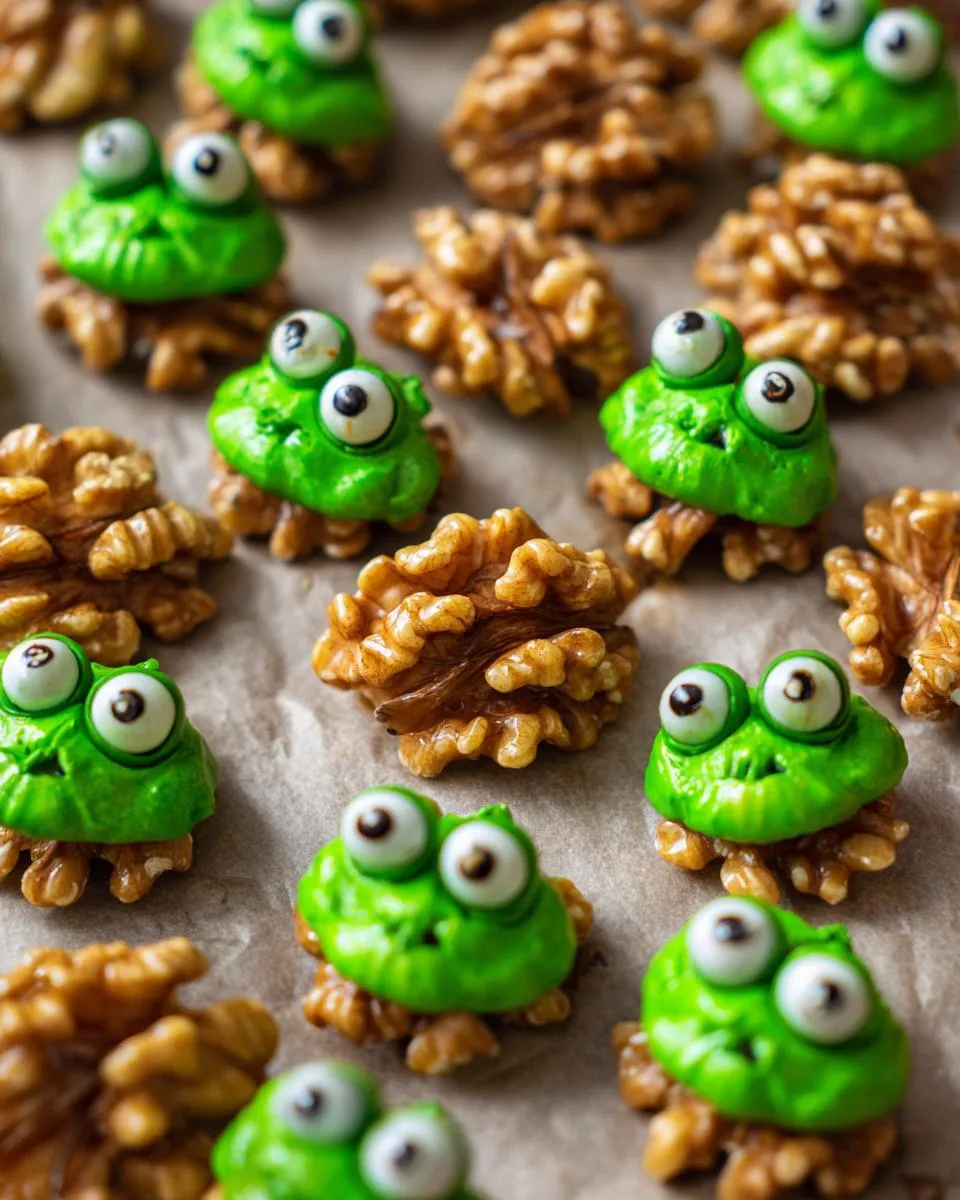
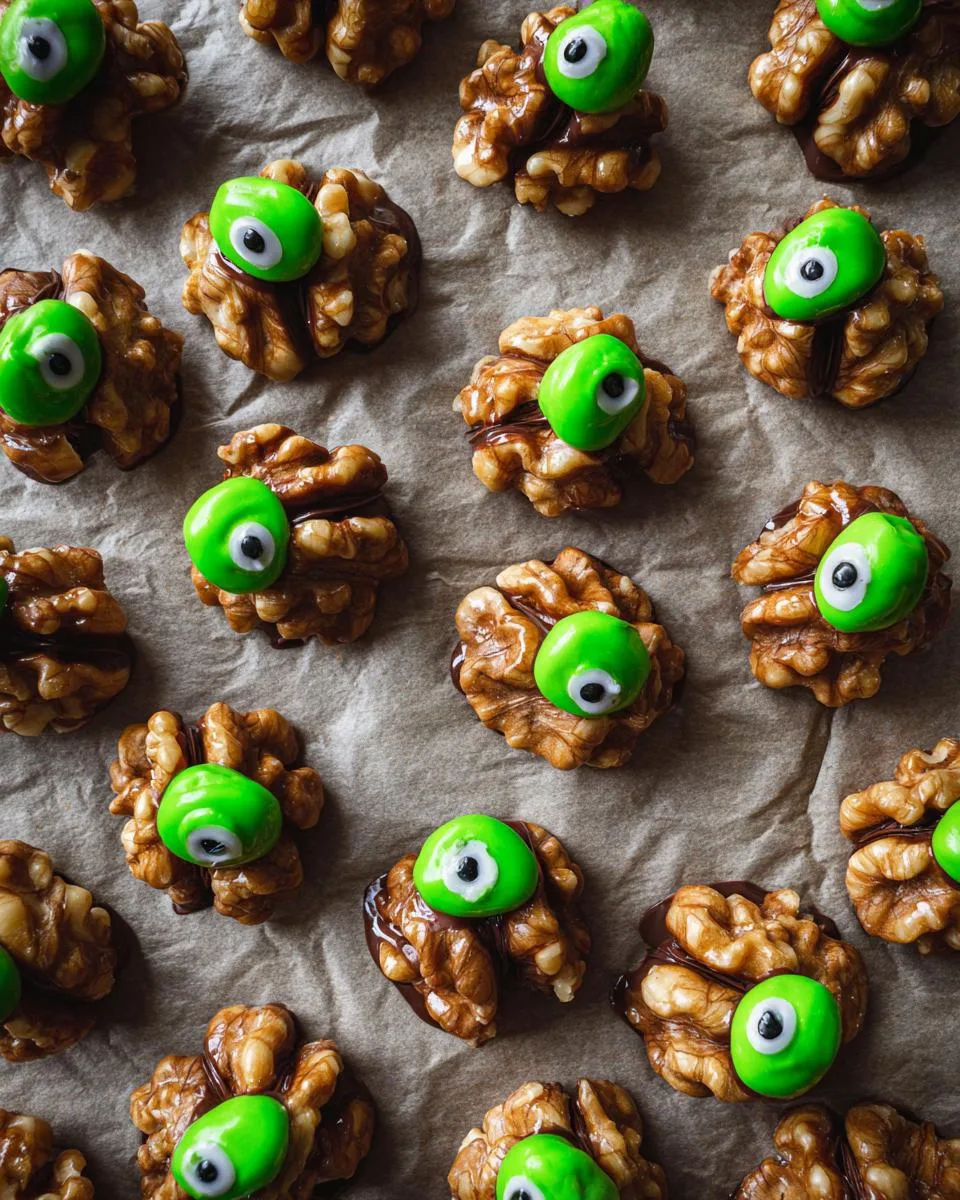
- Dip each walnut half into the melted candy, using a fork to flip it and coat evenly. Tap off the excess—this keeps the details crisp.
- Place them flat-side down on the parchment paper and immediately add two candy eyes while the coating is still wet. Press gently so they stick.
- Chill for 5 minutes to set. This is the perfect time to sneak a few M&M’s from the pumpkin supplies… I mean, to prep for the next step!
Making the Pumpkin Walnuts
Now, let’s turn some walnuts into tiny pumpkins:
- Cluster your goblins together to make space—they’ve already made friends, so let them hang out.
- Melt the orange candy melts just like before, stirring until silky smooth.
- Dip more walnut halves, tapping off extra coating, and place them flat-side down.
- Press a mini M&M onto the top of each for a stem. Green ones look like fresh stems; brown ones give a dried-vine vibe.
- Chill again for 5 minutes. Maybe take a Halloween selfie with your creations while you wait!
Making the Mummy Walnuts
Last but not least—the mummies! These might be my favorite because of their silly bandaged look:
- Shift your pumpkins over—they’re cool with sharing the sheet pan.
- Melt the white candy melts until perfectly drippy.
- Dip the remaining walnuts, but this time, place them flat-side up—we want a smooth surface for the mummy wraps.
- Transfer the melted white candy to a piping bag or ziplock bag with a tiny corner snipped off. Pipe zigzag lines across each walnut to look like bandages.
- Add two candy eyes peeking through the “wraps.” The more crooked, the better—these mummies have been through a lot!
- Let them set completely before serving. No chilling needed this time—just room temp does the trick.
And there you have it—a whole Halloween squad ready to party! The best part? You can mix and match these steps however you want. Maybe make an all-goblin batch or go wild with rainbow mummies. The walnuts are your spooky canvas!
Print
Spooky 24-Hour Halloween Walnut Goblins for Delicious Fun
- Prep Time: 15 mins
- Cook Time: 0 mins
- Total Time: 15 mins
- Yield: 20–24 pieces 1x
- Category: Dessert
- Method: No-Bake
- Cuisine: American
- Diet: Vegetarian
Description
Fun and creepy Halloween treats made from walnuts dipped in colored candy melts to resemble goblins, pumpkins, and mummies.
Ingredients
- 1 pound shelled walnut halves, divided
- For the goblins:
- 12 ounces green candy melts
- candy eyes
- For the pumpkins:
- 8 ounces orange candy melts
- green or brown mini M&M’s
- For the mummies:
- 10 ounces white candy melts
- candy eyes
Instructions
- Line a sheet pan with parchment paper and set aside.
- Make the goblins:
- Remove all of the broken walnut halves and divide the rest into thirds.
- Melt the green candy melts.
- Dip each walnut into melted chocolate, tap off excess, place flat side down, and add candy eyes.
- Chill for 5 minutes.
- Make the pumpkins:
- Cluster goblins to make space.
- Melt orange candy melts.
- Dip walnuts, tap off excess, place flat side down, and add M&M’s as stems.
- Chill again.
- Make the mummies:
- Cluster pumpkins to make space.
- Melt white candy melts.
- Dip walnuts, tap off excess, place flat side up.
- Pipe zigzag lines and add candy eyes.
- Let set before serving.
Notes
- Use whole walnut halves for best results.
- Tap off excess chocolate to define details.
- Chill between steps for faster setting.
Nutrition
- Serving Size: 1 piece
- Calories: 80
- Sugar: 6g
- Sodium: 10mg
- Fat: 6g
- Saturated Fat: 2g
- Unsaturated Fat: 3g
- Trans Fat: 0g
- Carbohydrates: 7g
- Fiber: 1g
- Protein: 2g
- Cholesterol: 0mg
Tips for Perfect Halloween Walnut Goblins
After making way too many batches of these little guys (some more successful than others), I’ve learned a few tricks to get your Halloween walnut goblins looking their spooky best:
- Tap off that excess chocolate – Seriously, give each dipped walnut a good tap against the bowl’s edge. Less coating means better-defined details and fewer messy drips.
- Chill between steps is key – I know it’s tempting to rush, but those few minutes in the fridge make all the difference in keeping your goblins from smushing together.
- Use whole walnut halves – Broken pieces won’t hold their shape. Save the crumbles for salads and pick the prettiest, most symmetrical ones for your creatures.
- Work with one color at a time – Unless you want tie-dye monsters (which could be fun!), melt and dip each color separately to keep things neat.
- Keep decorations simple – A couple well-placed eyes or an M&M stem makes the character. Too many sprinkles and they start looking like… well, walnuts with sprinkles.
Remember – even the “mess-ups” usually taste great! Some of our family’s favorite creations started as happy accidents.
Variations for Halloween Walnut Goblins
Oh, the possibilities! Once you’ve mastered the basics, it’s time to get wild with your Halloween walnut goblins. Here are some of my favorite ways to mix things up:
- Monster mash-up – Try purple candy melts for Franken-nuts, or black melts with white “stitches” for classic monsters.
- Edible glitter – A quick dusting makes your goblins sparkle like magic (or radioactive waste—your call!).
- Mini decorations – Tiny witch hats, bat wings, or candy corn teeth take these from cute to spooktacular.
- Team colors – School spirit meets Halloween with orange-and-black or purple-and-green combos.
The best part? There’s no wrong way to decorate these little guys. Let your Halloween imagination run nuts!
Serving and Storing Halloween Walnut Goblins
Once your Halloween walnut goblins are set, they’re ready to steal the show at any spooky gathering. Serve them on a creepy platter or mix them into a Halloween snack mix for extra fun. To keep them fresh, store them in an airtight container at room temperature—they’ll stay crunchy and delicious for up to a week. Just don’t forget to hide a few for yourself before they disappear!
Halloween Walnut Goblins FAQs
I get so many questions about these little spooky treats every year! Here are the answers to everything you might be wondering about Halloween walnut goblins:
Can I use other nuts instead of walnuts?
Absolutely! While walnuts give that perfect goblin-head shape, you can try pecans or almonds for different characters. Just make sure they’re whole halves – nobody wants a lopsided monster. My kids once made “acorn ghosts” with pecan halves that were adorable!
How long do these Halloween treats last?
If they last more than a day at your house (mine never do), they’ll stay fresh in an airtight container for about a week. The candy coating helps keep the walnuts crisp. Pro tip: Layer them between parchment paper so they don’t stick together.
Are these allergy-friendly?
This one’s tricky – walnuts are tree nuts, and candy melts often contain milk. For nut-free versions, try sunflower seed halves with allergy-safe chocolate. Always check candy labels if you’re serving them at parties. I learned this the hard way when a friend’s kiddo couldn’t eat our first batch!
Can I use regular chocolate instead of candy melts?
You can, but candy melts set firmer and hold decorations better. If using chocolate, temper it properly so it doesn’t stay sticky. And work fast – chocolate sets quicker than candy melts. My first chocolate batch looked more like walnut blobs than goblins!
What if I can’t find candy eyes?
No worries! Pipe tiny dots with black icing, use mini chocolate chips pointy-side down, or even edible markers on white chocolate. One year we used mini Oreo bits for eyes – the cream filling made them look extra creepy!
Nutritional Information
Okay, let’s be real—these Halloween walnut goblins are treats, not health food! But since you’re curious, here’s the scoop:
The nutritional info depends entirely on your ingredients—different candy melt brands and walnut sizes will change things. Generally, each little monster contains:
- A good dose of “fun” vitamins (essential for Halloween spirit)
- Some healthy fats from the walnuts
- A definite sugar rush from the candy coating
If you’re tracking specifics, remember:
- Values vary wildly by brand—always check your packages
- Serving sizes differ based on how big your walnuts are
- Extra decorations add more sugar (but also more joy!)
My philosophy? Everything in moderation—even spooky snacks. These make perfect bite-sized treats so everyone can enjoy without overdoing it. Unless they’re really delicious… then all bets are off!
For More recipes Follow me on Facebook!