There’s something magical about baking during Halloween—it’s when spooky turns sweet, and desserts become the stars of the night. These Halloween Witch Finger Cookies are more than just treats; they’re edible decorations that bring frightful fun to your table.
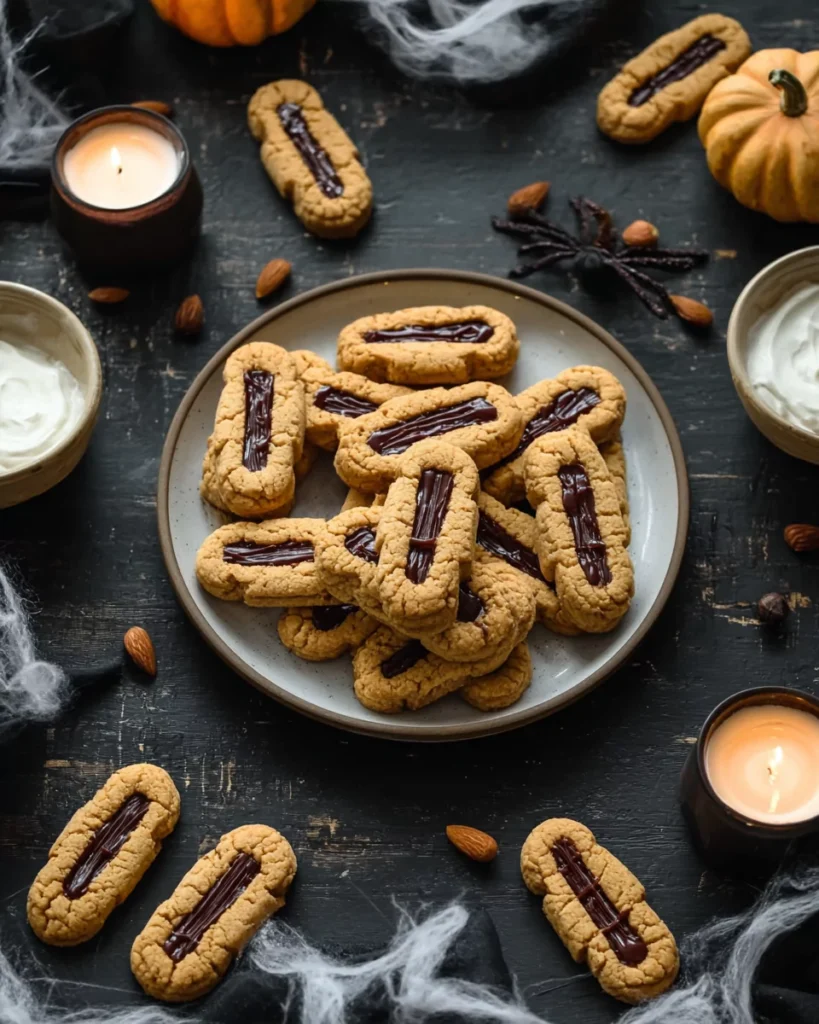
Table of Contents
Table of Contents
Why You’ll Love Halloween Witch Finger Cookies
A Spooky Cookie That Steals the Show
When I first made Halloween Witch Finger Cookies, I remember the giggles from my little one when we placed the almond “nails” on top of each cookie finger. It was spooky enough to thrill the kids, yet tasty enough for the adults to keep reaching for more. These cookies strike that balance between creepy and delicious, making them the ultimate Halloween party centerpiece. If you’ve tried baking Halloween Sugar Cookies before, you’ll love how these witch fingers add a next-level twist to your dessert spread with their eerie look and tender bite. They aren’t just cookies—they’re conversation starters.
My Family’s Halloween Tradition
Growing up, Halloween was always about playful food. My mom would craft themed snacks, but nothing captured my imagination quite like cookies shaped into witch fingers. Now, as a mom myself, I love carrying on that tradition. Every year, we set aside an afternoon to roll the dough, carve knuckle lines, and press in almond nails. It’s a hands-on project the kids can actually help with, and the results are always rewarding. Last year, we paired them with a tray of Spooky Mummy Brownies, and the combination made our dessert table a true haunted hit. These witch finger cookies bring family, laughter, and just the right dose of spookiness into the kitchen.
Print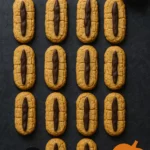
Halloween Witch Finger Cookies – Spooky, Fun & Easy
- Prep Time: 15 minutes
- Cook Time: 15 minutes
- Total Time: 30 minutes
- Yield: 20–24 cookies 1x
- Category: Dessert
- Method: Baking
- Cuisine: Halloween Treats
Description
Spooky Halloween Witch Finger Cookies made with almond flour, butter, and almonds for nails. A fun, keto-friendly Halloween dessert.
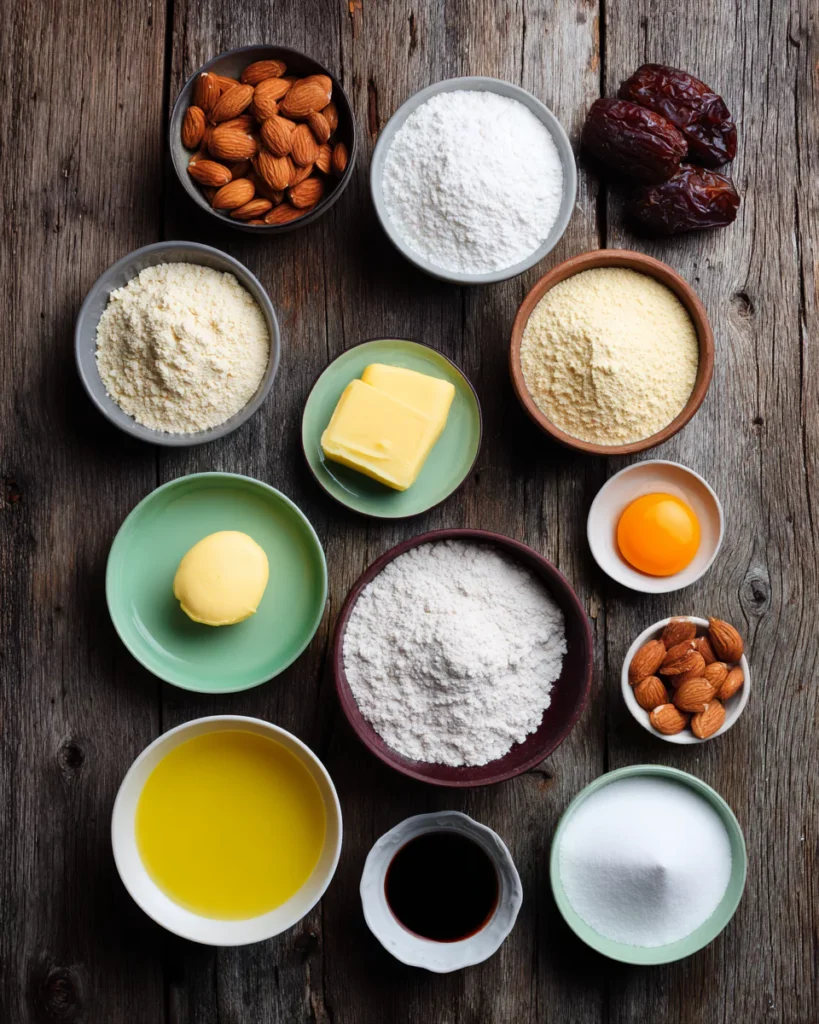
Ingredients
1 cup almond flour
1/4 cup coconut flour
1/2 cup powdered erythritol
1/2 teaspoon baking powder
1/4 teaspoon xanthan gum
1/4 teaspoon salt
1/2 cup unsalted butter, softened
1 large egg
1 teaspoon vanilla extract
Whole almonds (for fingernails)
Red gel food coloring (optional)
Instructions
1. Preheat oven to 350°F (175°C). Line baking sheet with parchment.
2. Mix almond flour, coconut flour, erythritol, baking powder, xanthan gum, and salt.
3. In a bowl, beat butter until fluffy. Add egg and vanilla.
4. Slowly add dry mix to wet mix until dough forms.
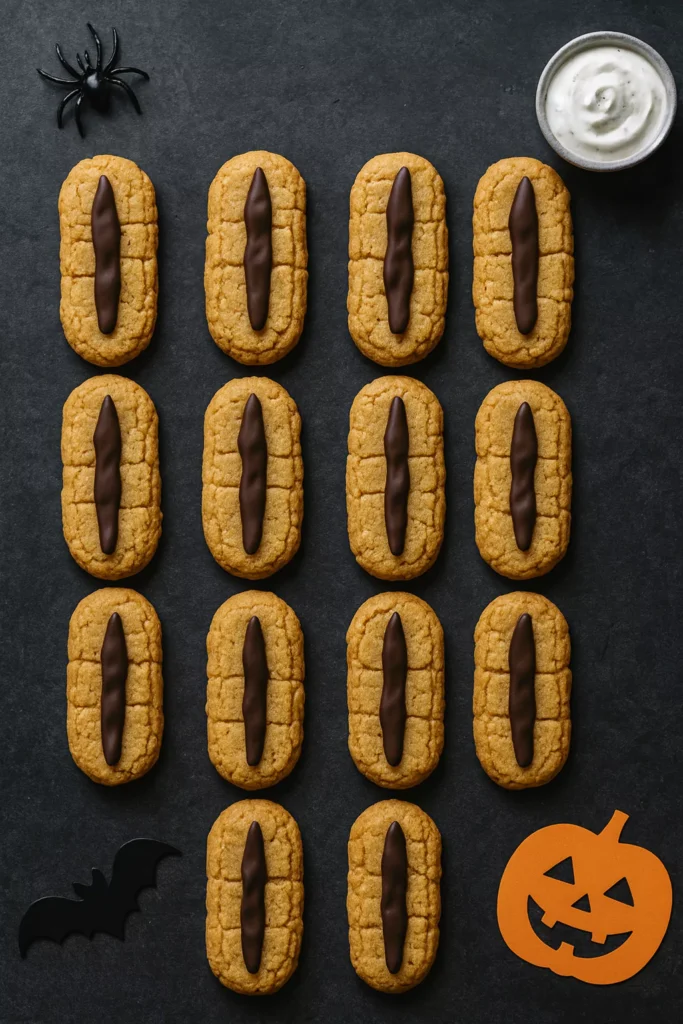
5. Divide dough into 20–24 pieces, shape into fingers, add almond nails, and carve knuckles.
6. Bake 12–15 minutes until golden. Add red gel at the base if desired. Cool before serving.
Notes
Chill dough slightly for easier shaping.
Use candy or seeds instead of almonds for nut-free versions.
Store in airtight container up to 5 days or freeze for 1 month.
Nutrition
- Serving Size: 1 cookie
- Calories: 90
- Sugar: 1g
- Sodium: 60mg
- Fat: 8g
- Saturated Fat: 4g
- Unsaturated Fat: 3g
- Trans Fat: 0g
- Carbohydrates: 3g
- Fiber: 1g
- Protein: 2g
- Cholesterol: 20mg
Ingredients & Baking Tips for Perfect Witch Fingers
Every delicious recipe starts with the right foundation, and these Halloween Witch Finger Cookies are no exception. The key ingredients not only shape the spooky look but also deliver the buttery, melt-in-your-mouth texture that makes them unforgettable.
Key Ingredients Explained
The blend of almond flour and coconut flour gives these cookies a tender yet slightly crisp bite, perfect for creating realistic “fingers.” A touch of powdered erythritol keeps them sweet without being heavy, making them ideal for anyone following a low-carb lifestyle. Almonds are the showpiece here, pressed into the dough to form creepy fingernails that complete the look. If you enjoy creative cookie bases, you’ll also love trying Maple Pumpkin Cookies—another seasonal recipe that balances warmth and sweetness beautifully.
Tips for Shape, Texture, and Flavor
The trick to shaping these cookies is working with slightly chilled dough—it’s firm enough to hold the finger shape without sticking to your hands. Use a small knife to gently carve out knuckle lines for added detail, and don’t be afraid to exaggerate the shapes; the more uneven they look, the scarier they turn out. For flavor, vanilla adds warmth, while butter keeps them rich and satisfying. To keep the Halloween theme going, you can even pair them with Wicked Witch Cupcakes—the perfect duo for a party table that’s as magical as it is spooky.
Step-by-Step Guide to Baking Witch Finger Cookies
Making Halloween Witch Finger Cookies is a fun process that blends simple baking with a little spooky creativity. With just a few easy steps, you’ll have cookies that look chillingly real yet taste buttery and tender.
How to Shape Realistic Witch Fingers
Start by rolling small portions of dough into finger-length logs. Press one end slightly flat and place a whole almond to serve as the fingernail. Use a knife to carve three gentle grooves in the middle for knuckles, which give the cookies their eerie, lifelike look. If you’ve enjoyed crafting themed desserts like Eyeball Brownies, you’ll find shaping these cookies just as rewarding. The secret is embracing the imperfections—crooked, bumpy fingers make them look even more authentic.
Baking & Decorating Like a Pro
Arrange the shaped dough evenly on a parchment-lined baking sheet, leaving room for them to spread slightly. Bake for 12 to 15 minutes at 350°F, or until the edges are just beginning to turn brown. Let them cool completely before adding optional red gel food coloring at the base for a bloody effect. It’s a quick touch that transforms simple cookies into show-stopping Halloween treats. For extra inspiration on decorating, you can check out Halloween Cream Cheese Swirl Brownies, which show how easy details can elevate spooky desserts. The result? Witch fingers that are crisp on the outside, soft inside, and unforgettable on any Halloween table.
Serving, Storing & Fun Variations
Halloween Witch Finger Cookies aren’t just a spooky bake—they double as edible décor that thrills both kids and adults. With the right serving ideas and a few storage tricks, these cookies stay festive, fresh, and frightfully fun.
Creative Ways to Serve Witch Finger Cookies
For maximum impact, display the cookies on a dark platter scattered with gummy worms or candy eyeballs. Their lifelike shape makes them a natural conversation starter, especially at Halloween parties. One year, we set them alongside Harry Potter Cupcakes, and the combination enchanted kids and adults alike. You can also stand them upright in mason jars for a witch’s “finger collection,” which makes a spooky centerpiece. No matter how you present them, Halloween Witch Finger Cookies always bring a playful chill to the dessert table.
Storing & Making Ahead for Parties
The best part about Halloween Witch Finger Cookies is how well they store without losing flavor or shape. Keep them in an airtight container at room temperature for up to five days, or freeze them for longer storage. To save time before a party, bake the fingers in advance and add the almond “nails” or red gel accents right before serving. Pairing them with Red Velvet Cake Pops creates a hauntingly colorful dessert tray that wows guests. Whether enjoyed fresh or prepped ahead, these cookies keep their spooky charm intact.
Frequently Asked Questions About Halloween Witch Finger Cookies
How do you make Halloween Witch Finger Cookies look realistic?
The secret to realistic Halloween Witch Finger Cookies is all in the shaping. Roll the dough into uneven “fingers,” press an almond at one end for the nail, and carve three shallow grooves with a knife to mimic knuckles. A drizzle of red gel food coloring at the base gives them that extra creepy touch.
Can I make Witch Finger Cookies ahead of time?
Yes! You can prepare the dough for Halloween Witch Finger Cookies a day in advance and keep it chilled until ready to bake. Once baked, they store well in an airtight container for up to five days or can be frozen for longer. Decorate them the day you plan to serve for the freshest look.
What can I use instead of almonds for the fingernails?
If you’d like to change things up, pumpkin seeds or cashews work well in place of almonds. They still give Halloween Witch Finger Cookies that eerie “nail” effect while keeping the cookie completely edible. For a nut-free option, try pressing in chocolate chips or even candy pieces.
Are Witch Finger Cookies suitable for a keto or low-carb diet?
Absolutely! Since these Halloween Witch Finger Cookies use almond flour, coconut flour, and a sugar-free sweetener, they’re naturally keto-friendly and lower in carbs compared to traditional cookies. They’re a festive way to enjoy Halloween without breaking your low-carb goals.
Conclusion
Halloween Witch Finger Cookies aren’t just treats—they’re memories baked into every spooky detail. From shaping knuckles to pressing almond nails, these cookies bring out the laughter and creativity that make Halloween so special. Whether you’re planning a party, baking with kids, or simply craving something festive, this recipe guarantees both fun and flavor. Pair them with other haunting desserts, serve them as edible décor, and watch the smiles spread. Halloween is about moments that stick with us, and these Halloween Witch Finger Cookies are sure to become a tradition your family looks forward to year after year.
For More recipes, Follow me on Facebook!


