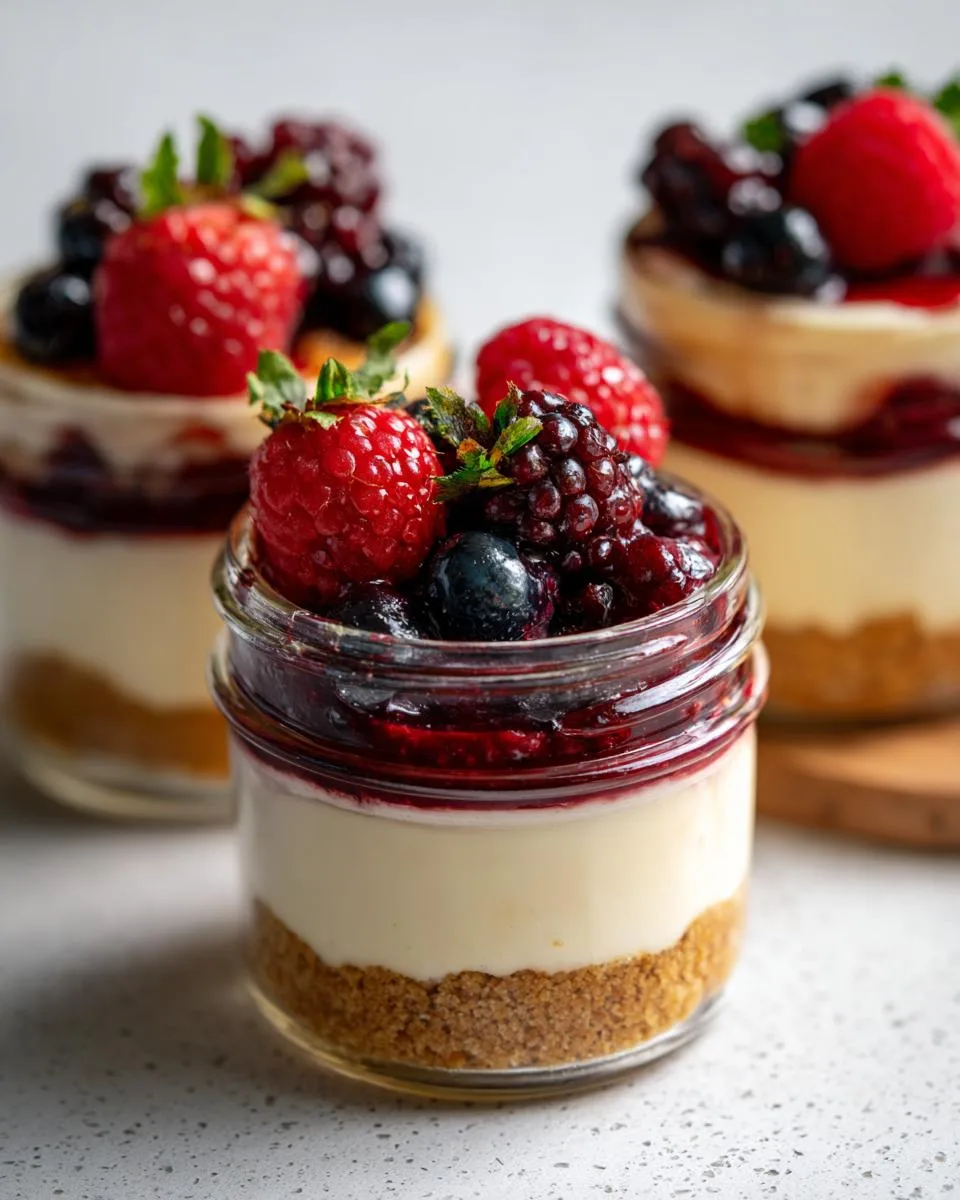
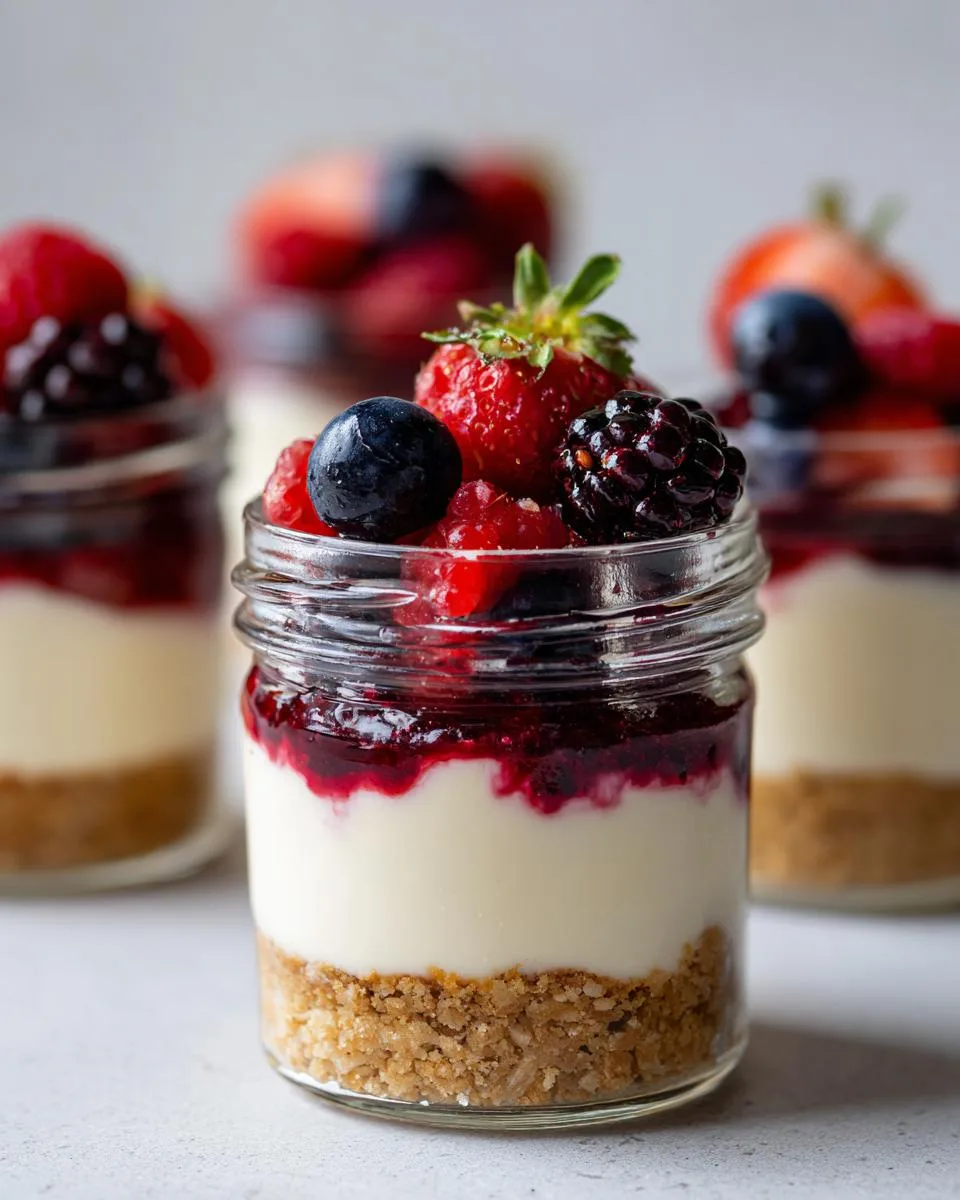
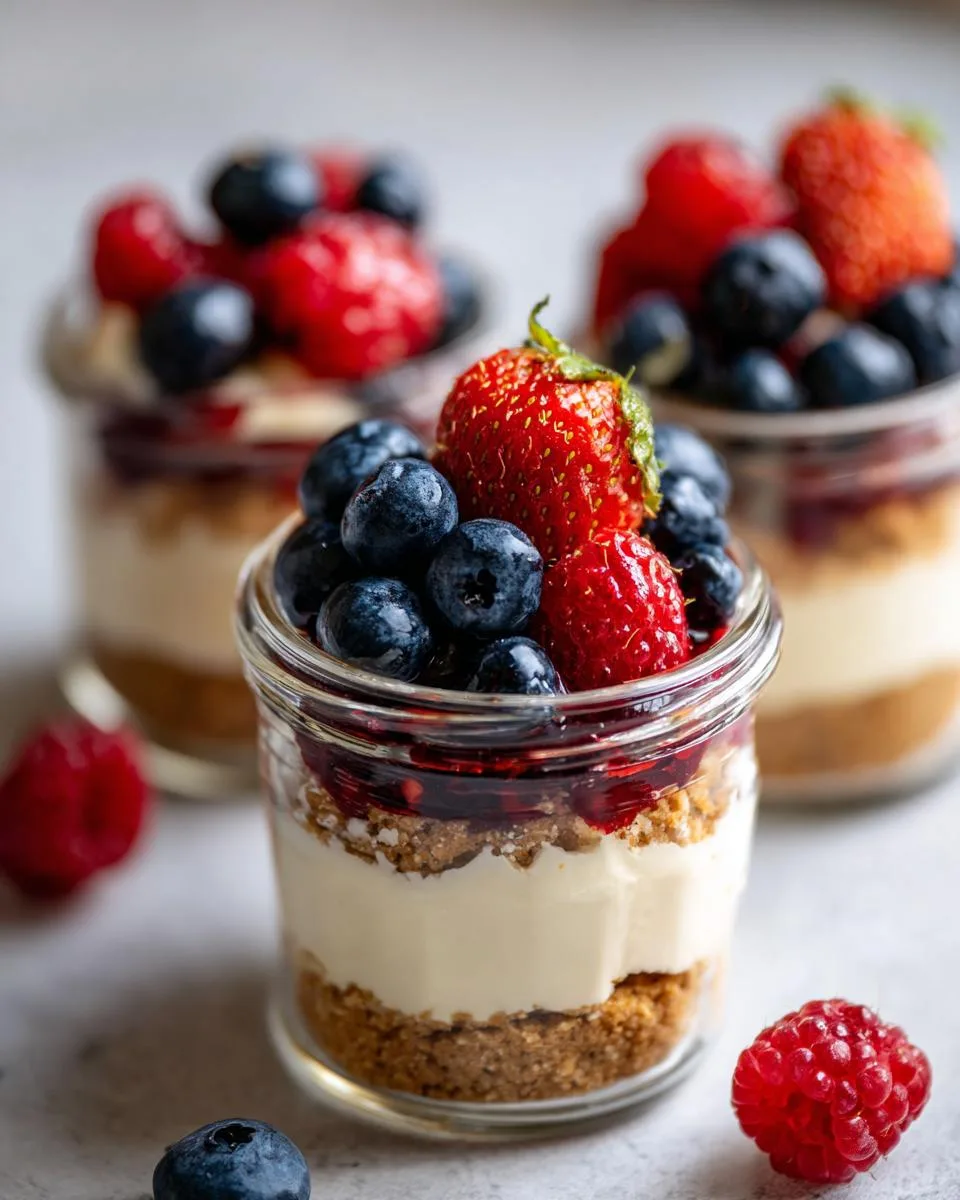
Oh my goodness, you’re going to fall head over heels for these no bake berry dessert cups – I just know it! Picture this: layers of buttery graham cracker crumbs, dreamy cheesecake filling so light it practically floats, and a crown of juicy fresh berries… all coming together in minutes without ever turning on your oven. When summer hits and my kitchen feels like a sauna, these little jars become my go-to lifesaver.
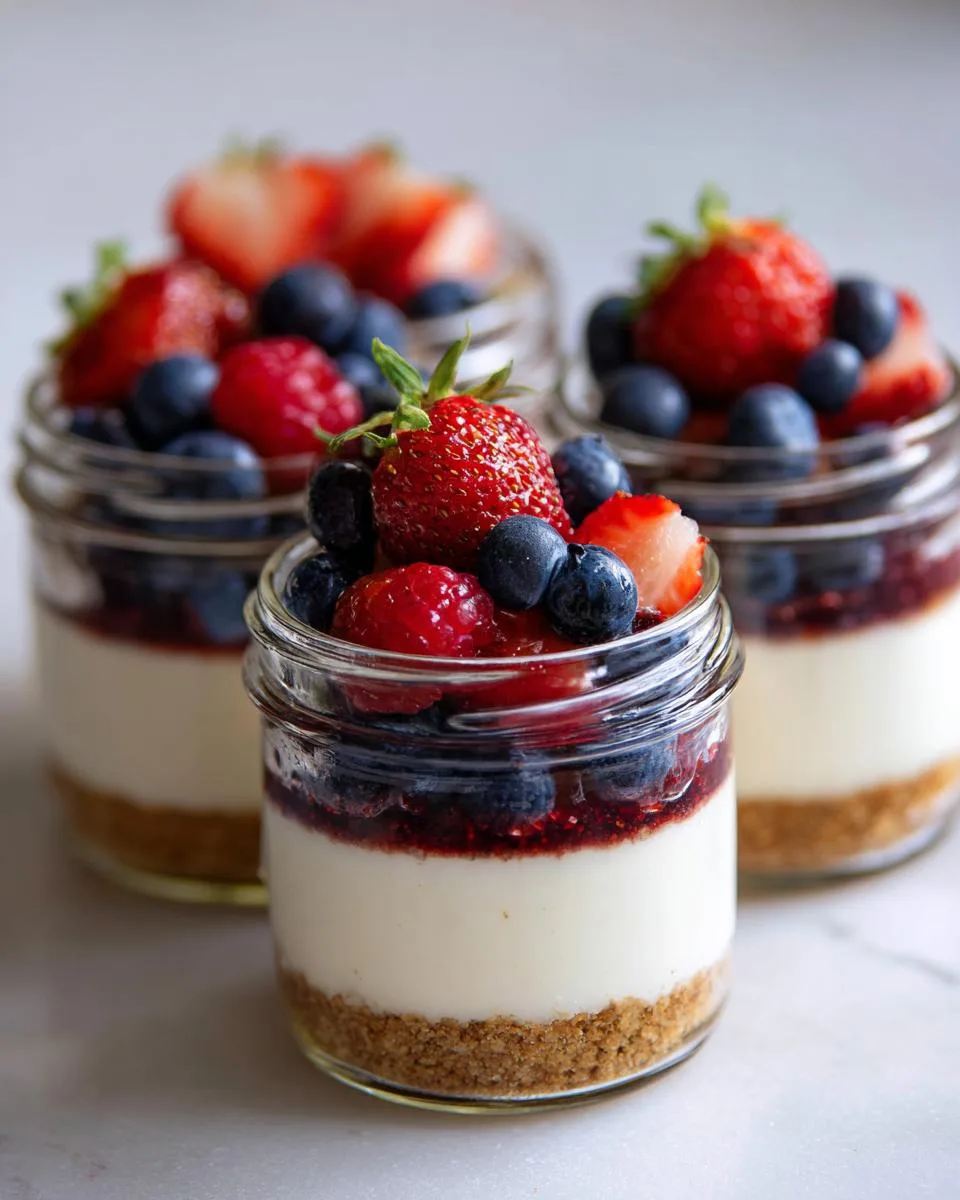
Table of Contents
Table of Contents
Why You’ll Love These No Bake Berry Dessert Cups
I first whipped up a batch years ago when unexpected guests showed up hungry (story of my life). Twenty minutes later, they thought I’d spent hours baking! The magic? Just a few simple ingredients you probably have right now. Whether you need a quick weeknight treat or something impressive for parties, these cups never let me down – and they’re about to become your new secret weapon too.
Let me count the ways these little jars Melissa-save-the-day desserts rock:
- Speed demon – Done in 20 minutes flat (yes, even with my distracted kitchen dancing)
- No oven required – Perfect for when your AC’s losing the summer battle
- Customizable magic – Swap berries for whatever’s ripe or your freezer’s hiding
- Crowd pleaser – Individual servings mean zero fighting over who got more whipped cream
- Make-ahead dream – My secret for looking like I’ve got my life together at potlucks
Honestly? The hardest part is not eating all the filling with a spoon before it hits the jars.
Ingredients for No Bake Berry Dessert Cups
Here’s the beautiful part – you likely have most of this in your kitchen right now! But let me tell you exactly what makes these cups sing:
- Graham cracker crumbs – 1 cup (that’s about 8 full sheets crushed to oblivion)
- Melted butter – 2 tablespoons (I use unsalted so I control the saltiness)
- Heavy cream – 1 cup, ice cold (trust me, temperature makes all the difference)
- Cream cheese – 8 oz brick, softened (not that spreadable tub stuff!)
- Granulated sugar – 1/3 cup (I’ve tried less… regretted it)
- Sour cream – 2 tablespoons, room temp (this is the secret silky-maker)
- Lemon juice & vanilla – Just a splash of each to brighten everything up
Pro tip: Leave your cream cheese out for a good hour – lumpy filling is nobody’s friend. And measure those crumbs packed tight – we want that crust to hold its shape!
Equipment You’ll Need
Now don’t go thinking you need fancy gadgets for these dessert cups! Here’s what I grab from my slightly chaotic kitchen:
- Mixing bowls – One for crust, one for filling (or wash one in between if you’re like me)
- Electric mixer – A hand mixer works perfectly for whipping cream and smoothing cheese
- Jars or cups – 6-8 ounce sizes are ideal (I’ve used everything from mason jars to pretty dessert glasses)
- Measuring tools – Spoons for small stuff, cups for dry/liquid
- Spatula – For scraping every last bit of that delicious filling
That’s it! No special equipment needed – just basics most home cooks already have on hand.
How to Make No Bake Berry Dessert Cups
Alright, let’s get to the fun part – bringing these beauties to life! I promise it’s easier than remembering where you left your car keys (though I can’t help you with that one).
Preparing the Graham Cracker Crust
First things first – that glorious buttery crust! Grab your crumbs and melted butter (it should be warm, not hot – we’re making dessert, not croutons). Mix them together until it looks like wet sand that holds together when you pinch it. For 8-ounce jars, spoon in 2 tablespoons of this magic; for 6-ounce jars, go with 1.5 tablespoons. Press gently with your fingers or the back of a spoon – we want it compact but not concrete-hard.
Making the Cheesecake Filling
Now for the star of the show! Beat your softened cream cheese until it’s smooth as a jazz tune – no lumps allowed. Add sugar, sour cream, lemon juice and vanilla, mixing until it’s silky perfection. In another bowl, whip that cold heavy cream to stiff peaks (tip: chill your bowl first for better volume). Here’s the crucial part: fold the whipped cream into the cheese mixture gently, like you’re tucking in a baby. Overmixing will deflate all that air we worked so hard for!
Assembling the Dessert Cups
Time to build our edible skyscrapers! Spoon or pipe about 1/4 to 1/3 cup filling into 8-ounce jars, or 3 tablespoons for 6-ounce jars. Smooth the tops with a spoon dipped in hot water (my grandma’s trick). Now the hard part – waiting! You can serve immediately, but chilling for 30 minutes firms them up beautifully. For make-ahead magic, they keep 3 days covered in the fridge – just add fresh berries right before serving so they don’t get soggy.
Print
20-Minute No Bake Berry Dessert Cups – Irresistible Delight
- Prep Time: 20 minutes
- Cook Time: 0 minutes
- Total Time: 20 minutes (plus optional chilling)
- Yield: 6–10 servings 1x
- Category: Dessert
- Method: No-Bake
- Cuisine: American
- Diet: Vegetarian
Description
Easy no-bake berry dessert cups with a graham cracker crust, creamy cheesecake filling, and fresh berry toppings.
Ingredients
- 2 Tablespoons (28g) unsalted butter, melted
- 1 cup (100g) graham cracker crumbs (about 8 graham crackers)
- 1 cup (240ml) heavy cream or heavy whipping cream, cold
- 8 ounces (226g) full-fat brick cream cheese, softened to room temperature
- 1/3 cup (65g) granulated sugar
- 2 Tablespoons (30g) sour cream, at room temperature
- 1 teaspoon lemon juice
- 1/2 teaspoon pure vanilla extract
- toppings & garnishes
Instructions
- Prepare jars (6 8-ounce or 10 6-ounce jars).
- Make crust by mixing melted butter with graham cracker crumbs. Spoon into jars (2 Tbsp for 8-oz, 1.5 Tbsp for 6-oz).
- Whip cold heavy cream to stiff peaks. Set aside.
- Beat cream cheese, sugar, sour cream, lemon juice, and vanilla until smooth.
- Fold whipped cream into cheesecake filling gently.
- Layer filling over crust in jars (1/4–1/3 cup for 8-oz, 3 Tbsp for 6-oz).
- Chill if desired (30 min to 3 days). Add toppings just before serving.
Notes
- Add toppings within 2 hours of serving to prevent sogginess
- Store covered in refrigerator up to 5 days
- Works with any fresh berry toppings
Nutrition
- Serving Size: 1 8-oz cup
- Calories: 320
- Sugar: 20g
- Sodium: 180mg
- Fat: 22g
- Saturated Fat: 13g
- Unsaturated Fat: 7g
- Trans Fat: 0.5g
- Carbohydrates: 28g
- Fiber: 1g
- Protein: 4g
- Cholesterol: 65mg
Tips for Perfect No Bake Berry Dessert Cups
After making these more times than I can count (okay fine, I lost count after the third batch last week), here are my hard-earned secrets:
- Temperature is everything – Room temp cream cheese blends smooth, but cold cream whips best. Trust the process!
- Fold like you mean it – Stirring too hard deflates all that airy goodness. Gentle swoops keep it fluffy.
- Chill out – Even 30 minutes in the fridge transforms them from good to “where have you been all my life?”
- Berry timing – Add toppings within 2 hours of serving so they stay perky (just like me after coffee).
- Crumb control – Pack those crumbs tight or you’ll end up with a sandy bottom – and not the beach kind.
Follow these and your cups will be foolproof – promise!
Variations & Topping Ideas
The best part? These cups are a blank canvas for whatever flavors make your heart sing! My family’s constantly coming up with wild combos – here are our favorites:
- Chocoholic’s dream – Melted chocolate drizzle + crushed Oreos instead of grahams
- Tropical twist – Mango chunks + toasted coconut flakes
- PB&J vibes – Swirl grape jelly into filling + crushed peanuts on top
- Winter wonderland – Gingerbread crumbs + pomegranate arils
Honestly? Whatever’s in your fridge or pantry probably works – that’s the beauty! If you’re looking for more dessert inspiration, check out our collection of recipes.
Storing & Serving No Bake Berry Dessert Cups
Here’s my golden rule for these cups: top when ready to pop! The assembled desserts (without berries) keep beautifully in the fridge for up to 5 days – just press plastic wrap directly on the filling to prevent any fridge smells. I always serve them chilled – that slight firmness makes the first spoonful magical. Add your berries, whipped cream, or other toppings right before serving so they stay fresh and vibrant. Pro tip: If you’ve got leftovers (unlikely in my house), store them uncovered so the toppings don’t weep moisture into the creamy layers.
FAQ About No Bake Berry Dessert Cups
I get asked about these little jars all the time – here are the questions that pop up most often in my kitchen (and my honest answers!):
How far ahead can I make these dessert cups?
Oh honey, they’re a dream for planners! The assembled cups (without toppings) keep beautifully in the fridge for up to 5 days. I’ve even frozen them for 2 months – just thaw overnight in the fridge. But here’s my rule: always add fresh berries within 2 hours of serving so they don’t turn your masterpiece into a soggy mess.
Can I use frozen berries instead of fresh?
Absolutely! Just thaw and pat them dry with paper towels first. Frozen berries release more juice, so I often toss them with a teaspoon of cornstarch to soak up excess liquid. My favorite trick? Quick-freeze fresh berries when they’re in season so you’ve got summer flavor all year round.
Why did my filling turn out runny?
Three likely culprits: cream cheese wasn’t room temp, cream wasn’t cold enough when whipped, or (the big one) overmixing when folding. If disaster strikes, pop the filling in the freezer for 15 minutes to firm up – saved many batches this way!
Can I make these dairy-free?
You bet! I’ve had success with coconut cream instead of heavy cream and vegan cream cheese. The texture changes slightly, but still delicious. Just make sure your butter substitute is solid at room temp for the crust.
Nutritional Information
Okay, let’s be real – we’re not eating these berry dessert cups for their vitamin content! But since folks ask, here’s the scoop on nutrition. Keep in mind these are rough estimates – your actual numbers will dance around depending on your exact ingredients and how generous you are with those berry toppings (no judgment here!).
The beauty of these cups is you control portions – smaller jars mean lighter treats. The main players nutritionally are the cream cheese and heavy cream (hello, delicious fats!) balanced by fresh fruit’s natural goodness. I find one 8-ounce cup satisfies my sweet tooth perfectly without leaving me in a sugar coma.
Remember: All nutritional info varies by brands and measurements. For precise numbers, plug your exact ingredients into a calculator. But honestly? Some desserts are meant to be enjoyed first and analyzed… never. For more behind-the-scenes kitchen adventures, follow along on Facebook!