Okay, let me tell you about the moment these Nutella mummy hand pies became my Halloween baking obsession. Picture this: my kitchen covered in flour, kids giggling as they drizzle chocolate “bandages,” and that first bite of flaky, gooey goodness that made everyone cheer. These little guys are seriously magical — vegan, gluten-free, and so easy that even my sugar-hyped eight-year-old could help assemble them between costume changes.
I stumbled onto this recipe during a frantic “need Halloween treats NOW” moment last year when store-bought options either had weird ingredients or cost a fortune. The secret? Using ready-rolled puff pastry (seriously, who has time to make dough from scratch when you’re also untangling fake cobwebs?). The nutty chocolate filling oozes just enough to feel decadent, while the banana slices add this sneaky fruit serving that makes me feel slightly less guilty about eating three in one sitting.
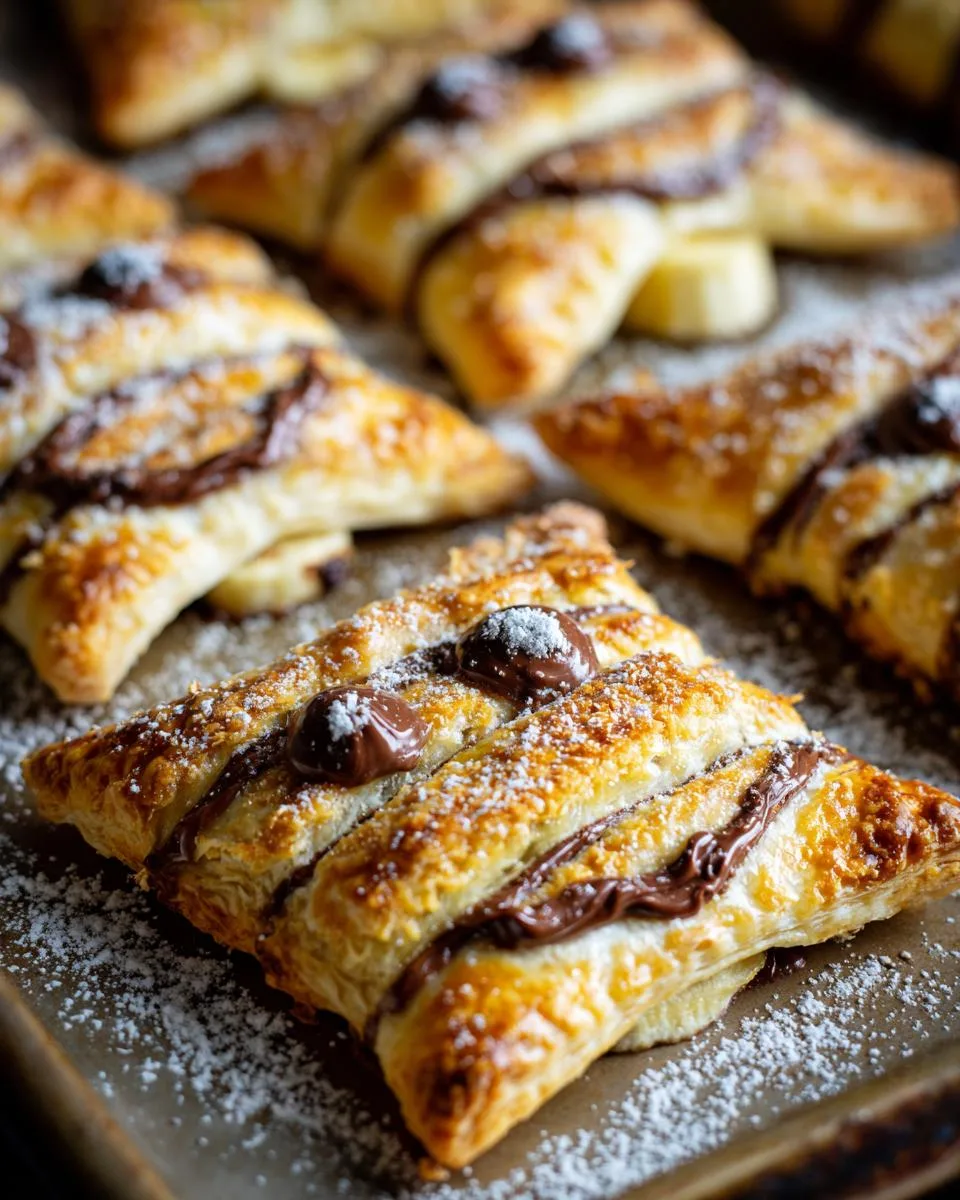
Table of Contents
Table of Contents
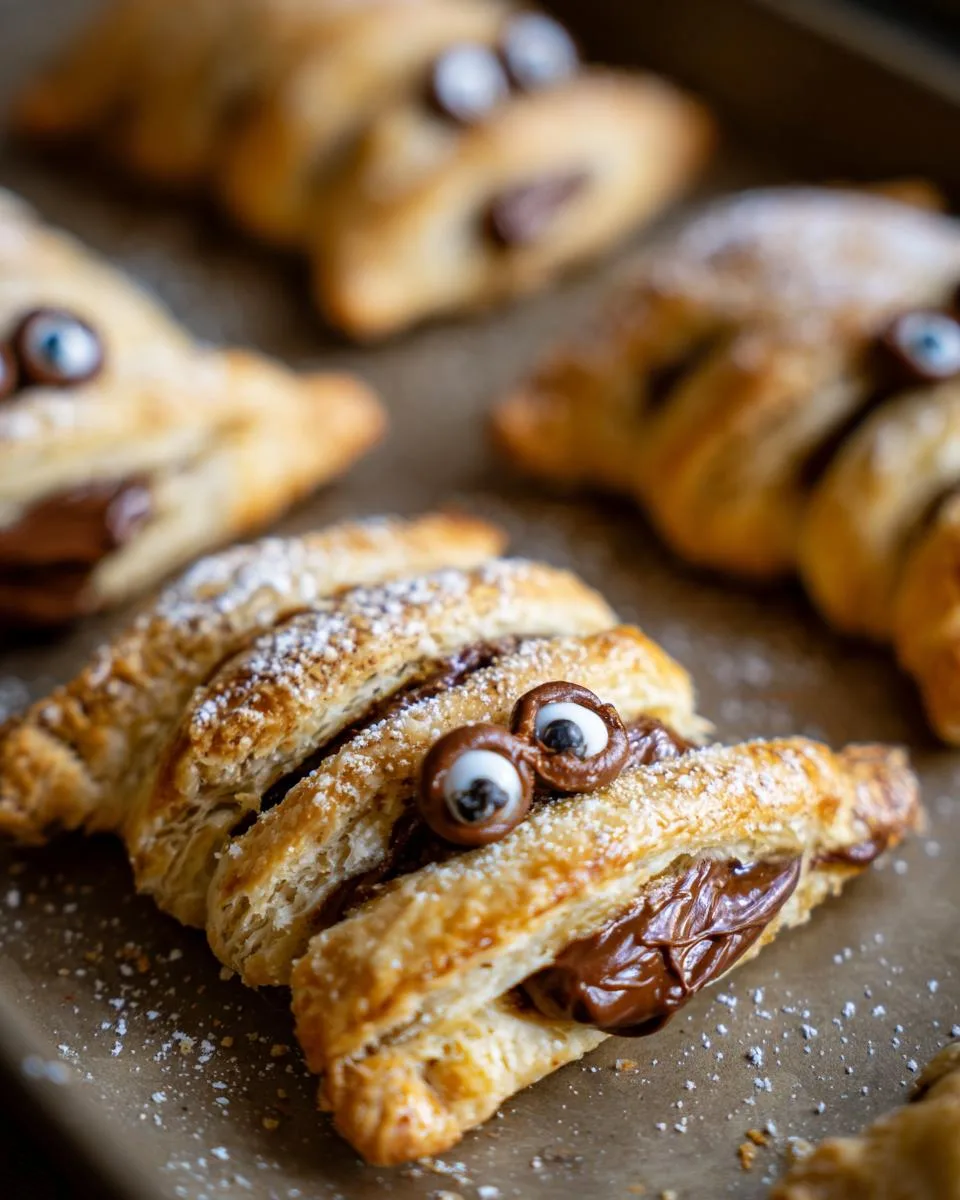
What I love most is how they look impressively spooky with minimal effort — those chocolate button eyes and crisscrossed pastry strips do all the work. Last October, these disappeared so fast at our neighborhood party that I had to hide a few in the microwave just to get photos. Trust me, if you want treats that are equal parts adorable and delicious without turning your kitchen into a horror show of complicated baking fails, these mummies are your new best friends.
Why You’ll Love These Nutella Mummy Hand Pies
Listen, I know a good recipe when I see one—and these little mummies? Total game-changers. Here’s why:
- Crazy easy – Ready-rolled pastry means you’re 10 minutes away from Halloween magic (no dough-stress!)
- Secretly vegan – Dairy-free Nutella + flaky pastry means everyone can grab one, no allergies ruining the fun
- Kid-proof decorating – Messy zigzag “bandages” actually look better when they’re imperfect
- Two-bite delicious – Warm, melty chocolate + banana is the *perfect* sweet-salty-spooky combo
- Party hero – They disappear faster than ghosts at sunrise (bring extras!)
Seriously, these check every box—cute, delicious, and no fancy skills required. Even my “I don’t bake” sister pulls these off!
Ingredients for Nutella Mummy Hand Pies
Gather these simple ingredients – trust me, you probably have half of them already! The magic of this recipe is how ordinary items turn into spooky-cute masterpieces.
-
- 2 sheets ready-roll puff pastry – Make sure it’s vegan & gluten-free (I love the Jus-Rol brand)
- 6 tablespoons vegan Nutella – Room temperature spreads easier but cold prevents leaks
2 medium bananas – Not too ripe or they’ll get mushy when baked
- 3 tablespoons dairy-free milk – Almond or oat milk work great for the “egg” wash
- 2 tablespoons caster sugar – The fine texture melts perfectly for a golden crust
- Chocolate buttons & edible eyes – For decorating your little mummies!
- 2 tablespoons icing sugar – Optional but makes them look freshly “dusty” from the tomb
A quick tip from my messy experience: measure the Nutella first so sticky spoon disasters don’t slow you down. And those bananas? Slice ‘em right before assembling or they’ll turn brown on you – ask me how I know!
Equipment You’ll Need
Don’t worry—you won’t need any fancy gadgets for these mummy pies! Here’s the shortlist:
- Rolling pin – Just to smooth out any pastry wrinkles (or use a wine bottle in a pinch!)
- 2 baking trays – Lined with grease-proof paper to prevent sticky disasters
- Piping bag or spoon – For the Nutella (though fingers work in emergencies)
- Wire rack – Lets them cool without getting soggy bottoms
That’s it! No stand mixers, no special tools—just simple stuff you’ve probably got hiding in a drawer already.
How to Make Nutella Mummy Hand Pies
Alright, let’s get spooky! These mummy pies come together so easily – just follow these simple steps and you’ll have a plate of adorable (and delicious) treats in no time.
Step 1: Prepare the Pastry
First, preheat your oven to 180°C fan – this gives it time to get perfectly toasty while you prep. Unroll your pastry sheets right on their baking paper – no messy counters! Just give them a quick roll with your pin to smooth out any wrinkles from the packaging. Now, here’s my trick: use a pizza cutter to slice one and a half sheets into rectangles (about 4×2.5 inches works great), then cut the remaining half into thin strips for the mummy “bandages.” Pop them in the fridge for 5 minutes – this helps prevent shrinking when baking!
Step 2: Assemble the Pies
Take your chilled rectangles and spoon or pipe about a tablespoon of Nutella in the center of each – but leave a good border! Top with 2-3 banana slices (slice them right before so they don’t brown). Here’s where the magic happens: dip your finger in dairy-free milk and run it around the edges – this helps seal your pies so the filling stays put. Pro tip: don’t overfill or you’ll have Nutella lava eruptions in your oven!
Step 3: Create the Mummy Effect
Now for the fun part! Take those thin pastry strips and layer them in a zig-zag pattern over your filled rectangles. Press the ends firmly onto the milk-brushed edges – no need to be perfect here, messy bandages look more authentic! Leave little gaps so the Nutella “skin” peeks through. Brush the tops lightly with more dairy-free milk and sprinkle with sugar for that perfect golden finish.
Step 4: Bake and Decorate
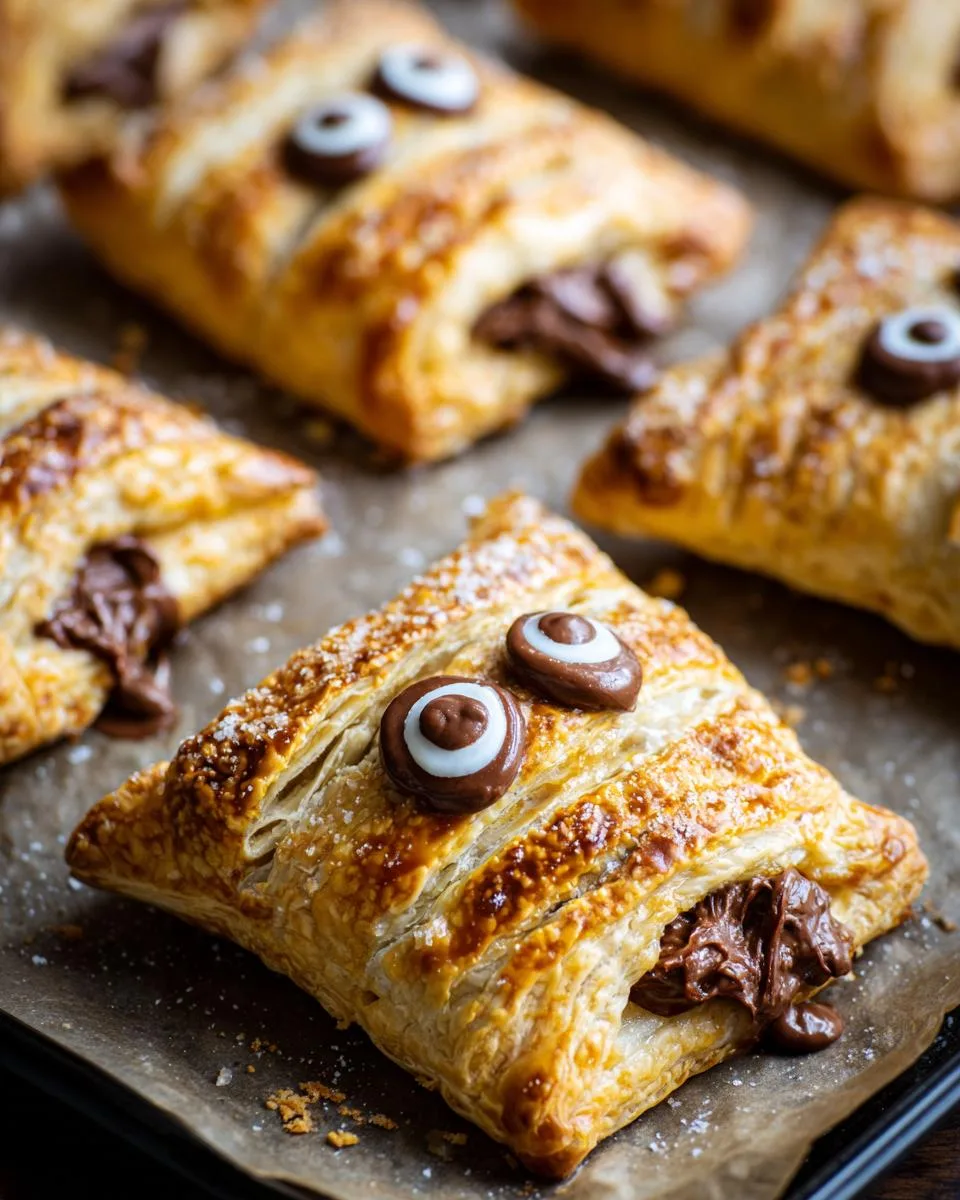
Bake one tray at a time (trust me, overcrowding leads to uneven baking) for 15-18 minutes until they’re beautifully golden. Let them cool slightly on the tray – they’ll firm up as they sit. While still warm but not hot, press on your chocolate button eyes (melt a tiny dot of Nutella as “glue” if needed). The final touch? A light dusting of icing sugar for that freshly-unwrapped-from-the-tomb look! Serve warm for melty goodness or at room temp – either way, they’ll disappear fast!
Print
Nutella Mummy Hand Pies: 5 Insanely Easy Halloween Treats
- Prep Time: 20 minutes
- Cook Time: 18 minutes
- Total Time: 38 minutes
- Yield: 12 hand pies 1x
- Category: Dessert
- Method: Baking
- Cuisine: International
- Diet: Vegan
Description
Easy-to-make vegan and gluten-free Nutella mummy hand pies, perfect for Halloween or a fun treat. These hand pies feature flaky puff pastry, rich vegan Nutella, and banana slices, decorated with chocolate eyes for a spooky twist.
Ingredients
- 2 sheets of ready roll puff pastry (vegan & gluten-free)
- 6 tablespoons of vegan Nutella
- 2 medium-sized bananas
- 3 tablespoons of dairy-free milk (for the ‘egg wash’)
- 2 tablespoons of caster/granulated sugar
- Googly eyes
- 1 packet of dairy-free white chocolate buttons
- 2 tablespoons of icing sugar (for dusting)
Instructions
- Preheat oven to 180°C fan and line 2 baking trays with grease-proof paper.
- Unroll the pastry sheets, leaving them on the baking paper. Use a rolling pin to flatten any wrinkles.
- Cut one and a half pastry sheets into rectangles (about 4×2.5 inches). Cut the remaining half into thin strips. Roll out scraps for extra shapes.
- Chill the pastry rectangles in the refrigerator for 5 minutes.
- Pipe or spoon vegan Nutella onto each rectangle, then top with banana slices.
- Brush dairy-free milk around the pastry edges to help seal.
- Layer pastry strips in a zig-zag pattern for a ‘mummy’ effect, pressing them down firmly.
- Brush with dairy-free milk and sprinkle with sugar for browning.
- Bake one tray at a time (6 pies per tray) for 15-18 minutes, until golden and flaky.
- Cool slightly on the tray, then transfer to a wire rack to cool completely.
- Cut white chocolate buttons into smaller circles if needed.
- Pipe Nutella dots for pupils, then attach eyes once pies are cool.
- Dust with icing sugar before serving at room temperature or warm.
Notes
- Don’t overfill to prevent leaking while baking.
- Use cold filling to prevent melted chocolate eyes.
- Store in an airtight container for up to 2 days.
Nutrition
- Serving Size: 1 hand pie
- Calories: 180
- Sugar: 12g
- Sodium: 80mg
- Fat: 9g
- Saturated Fat: 3g
- Unsaturated Fat: 5g
- Trans Fat: 0g
- Carbohydrates: 22g
- Fiber: 2g
- Protein: 2g
- Cholesterol: 0mg
Tips for Perfect Nutella Mummy Hand Pies
After making these little mummies more times than I can count (and learning from all my delicious mistakes), here are my best tips to guarantee spooky success:
- Chill your filling! – Cold Nutella and bananas help prevent oozy explosions in the oven. I pop mine in the fridge for 10 minutes before assembling.
- Less is more with filling – That tablespoon measurement isn’t a suggestion! Overstuffed pies burst their “bandages” (still tasty, just messy).
- Wait to add eyes – Press chocolate buttons on when pies are warm but not hot, or they’ll melt into zombie tears. If they slip, a dot of Nutella works as edible glue.
- Bake on parchment – Even vegan butter can stick, and scraping up mummy casualties is heartbreaking. Greaseproof paper is your best friend.
- Dust sugar last – That ghostly icing sugar coating disappears if you add it before decorating. I wait until right before serving.
- Make extras – These freeze beautifully! Just reheat at 160°C for 5 minutes to revive that fresh-baked crispness.
Last pro tip? Hide a few for yourself before serving – I’ve learned the hard way that these mummies have a way of vanishing mysteriously!
Storage and Reheating
Okay, here’s the deal with these mummy pies – they’re best fresh, but I get it, sometimes you need to make them ahead (or hide a stash from the kids!). Here’s how to keep them tasting amazing:
- Airtight is key – Store cooled pies in a container with a tight lid at room temp for up to 2 days. The pastry stays surprisingly crisp this way!
- Freeze for future scares – Arrange unbaked pies on a tray, freeze solid, then transfer to a bag. Bake straight from frozen – just add 2-3 extra minutes.
- Revive the crunch – Day-old pies? Pop them in a 160°C oven for 5 minutes to bring back that fresh-from-the-oven crispness.
A word of warning – if you refrigerate them, the pastry can get soggy. And those chocolate eyes? They’ll “sweat” if sealed up warm, so always let them cool completely before storing. Happy haunting… I mean, baking!
Nutella Mummy Hand Pies Variations
Listen, the classic version is perfection, but sometimes you wanna mix it up! Here are my favorite ways to play with this recipe when I’m feeling creative (or just using what’s in my pantry):
- Berry boo-tiful – Swap bananas for sliced strawberries or raspberries. The tartness cuts through the sweetness so nicely!
- Dark side drizzle – Melt some dairy-free dark chocolate and zigzag it over the baked pies for extra drama (and chocolate!)
- Nutty mummies – Add chopped hazelnuts or almonds to the filling for crunch. My husband loves this grown-up twist.
- Pumpkin spice surprise – Mix a pinch of pumpkin pie spice into the Nutella for cozy autumn vibes.
- Monster mash-up – Use orange icing and candy eyeballs to turn them into little Frankensteins instead!
The beauty of these pies? They’re like a blank (edible) mummy canvas. Just keep the pastry-to-filling ratio the same, and your spooky creativity can run wild!
Nutritional Information
Okay, let’s be real – we’re not eating mummy pies for their health benefits! But since folks ask, here’s the scoop on what’s inside these little guys (based on my recipe testing):
- Calories: About 180 per pie – totally reasonable for a Halloween treat!
- Sugar: 12g (mostly from the banana and Nutella – nature’s candy plus chocolate magic)
- Fat: 9g (that flaky pastry does its buttery thing)
- Protein: 2g (surprise! Those bananas and hazelnuts pitch in)
- Fiber: 2g (thank you, banana slices!)
Important note: These values are estimates based on the exact ingredients I use – your numbers might dance around a bit depending on your pastry brand or how generously you fill ’em! Personally, I figure any treat that lets me sneak fruit into my kids gets bonus points.
For my gluten-free friends: Using GF pastry adds about 10 extra calories but keeps everything else pretty much the same. The real nutrition win? Seeing everyone’s faces light up when these spooky cuties hit the table!
Frequently Asked Questions
I’ve gotten so many questions about these little mummy pies over the years – here are the ones that pop up most often (along with my tried-and-true answers!):
How do I keep my hand pies from getting soggy?
Ugh, nothing worse than a sad, soggy mummy! My two golden rules: 1) Let them cool completely on a wire rack before storing – trapping steam is the enemy. 2) That dairy-free “egg” wash creates a magical barrier – don’t skip brushing those edges!
Can I make these ahead for a party?
Absolutely! I often assemble them the night before and keep the unbaked pies in the fridge (covered with cling film). Just add 2 extra minutes to the bake time since they’re going in cold. The pastry actually puffs up even better this way!
Are Nutella hand pies shelf-stable?
They’ll stay perfect at room temp for about 2 days in an airtight container – any longer and the bananas start to protest. For longer storage, freeze them (unbaked or baked) and they’ll keep their spooky charm for up to a month!
Help! My chocolate eyes keep melting – what gives?
Been there! The trick is to let the pies cool until just warm (not hot) before adding decorations. If I’m in a rush, I’ll even pop the chocolate buttons in the freezer for 5 minutes first. And remember – drippy “zombie tears” can be a fun Halloween effect too!
Can I use homemade puff pastry instead?
Sure, if you’ve got the time and patience (which I usually don’t during Halloween chaos!). Just roll it to about 1/4 inch thickness. Fair warning – the flakiness might make your mummy bandages extra crispy, so I actually prefer store-bought for this recipe.
Share Your Creations
Nothing makes me happier than seeing the adorable (and sometimes terrifying!) mummy pies you all create! Every Halloween I get giddy checking my phone for photos – from perfect pastry bandages to hilarious “mummy fails” that still taste incredible. One reader even sent me a pic of her pies dressed up with tiny edible scarabs – pure genius!
Your creative twists inspire me to try new things each year. Last October, a grandma from Texas shared how she uses this recipe for her grandkids’ “mummy-making station” – flour everywhere, chocolate fingerprints on the table, and the best kind of childhood memories in the making. That’s exactly why I love baking these little guys!
So whether you nailed the perfect crisscross or your mummies look more like they lost a fight with a pyramid (been there!), I’d love to hear about your baking adventures. Your comments and photos keep this recipe alive – just like any good mummy should be!
For More recipes Follow me on Facebook!


