If you’ve ever wanted a dessert that feels festive, easy, and bite-sized, Red Velvet Cake Pops are the answer. They’re the perfect mix of soft cake, creamy frosting, and a chocolatey shell that makes every bite satisfying.
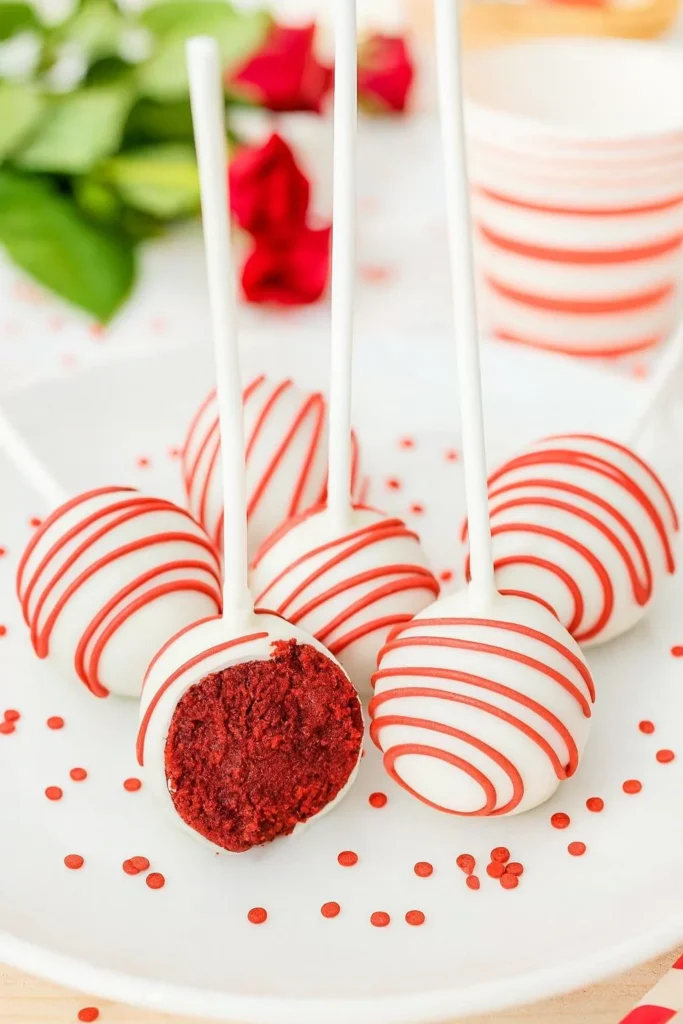
Table of Contents
Table of Contents
Why You’ll Love Red Velvet Cake Pops
A Sweet Story Behind Red Velvet Cake Pops
I still remember the first time I made Red Velvet Cake Pops for a holiday party. My daughter’s eyes lit up at the sight of those bright red pops dipped in shiny chocolate—suddenly, dessert became the star of the table. They remind me a lot of the joy that comes with baking seasonal favorites like Pumpkin Oatmeal Muffins or Pumpkin Ginger Walnut Bread. But unlike a full cake, cake pops are less messy, perfectly portioned, and ideal for busy moms who want something quick but impressive.
Perfect for Any Occasion
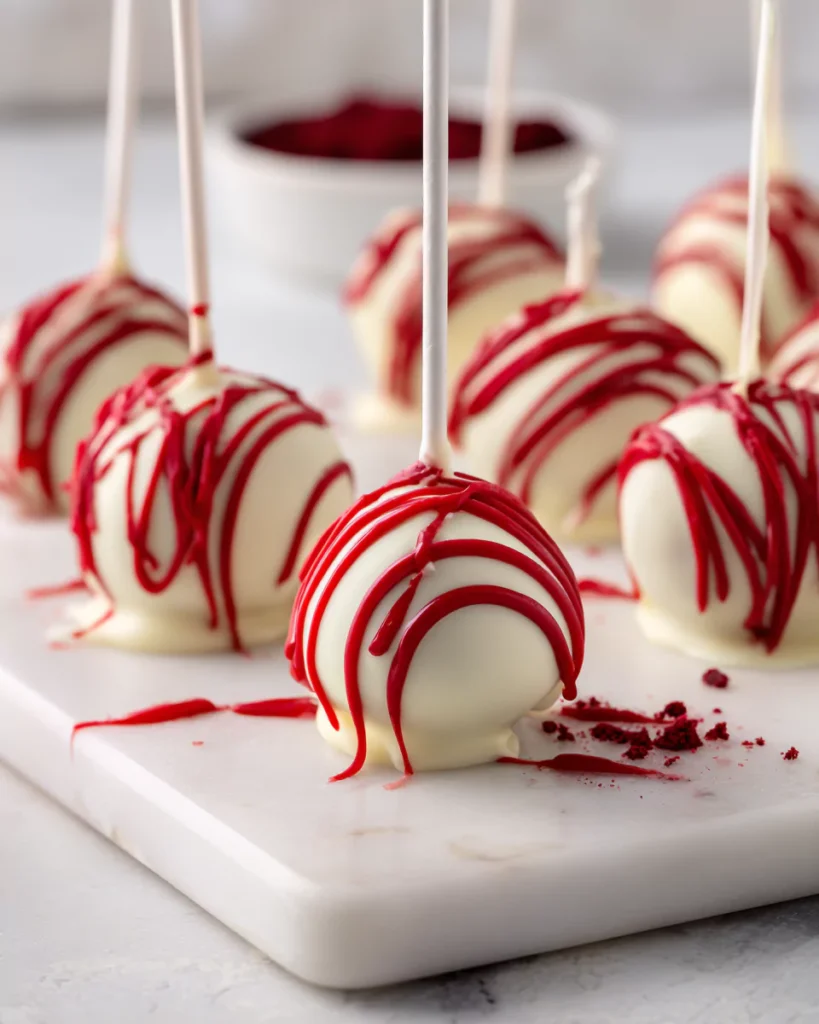
Whether it’s a birthday, Valentine’s Day, or even Halloween, Red Velvet Cake Pops fit right in. Their vibrant color makes them festive, and the smooth candy coating keeps them looking bakery-worthy. Plus, they’re easy to customize—drizzle with red melts for a romantic dinner, add sprinkles for kids’ parties, or style them with fun toppers like you’d do with themed desserts such as Halloween Sugar Cookies or Harry Potter Cupcakes. No matter the season, Red Velvet Cake Pops bring a touch of fun and elegance to the dessert table.
Print
Red Velvet Cake Pops – Amazing Easy Recipe You’ll Love
- Prep Time: 20 mins
- Cook Time: 25 mins
- Total Time: 45 mins
- Yield: 20 cake pops 1x
- Category: Dessert
- Method: Baking
- Cuisine: American
- Diet: Vegetarian
Description
These Red Velvet Cake Pops are festive, bite-sized desserts made with boxed cake mix, frosting, and candy melts for an easy, bakery-style treat.
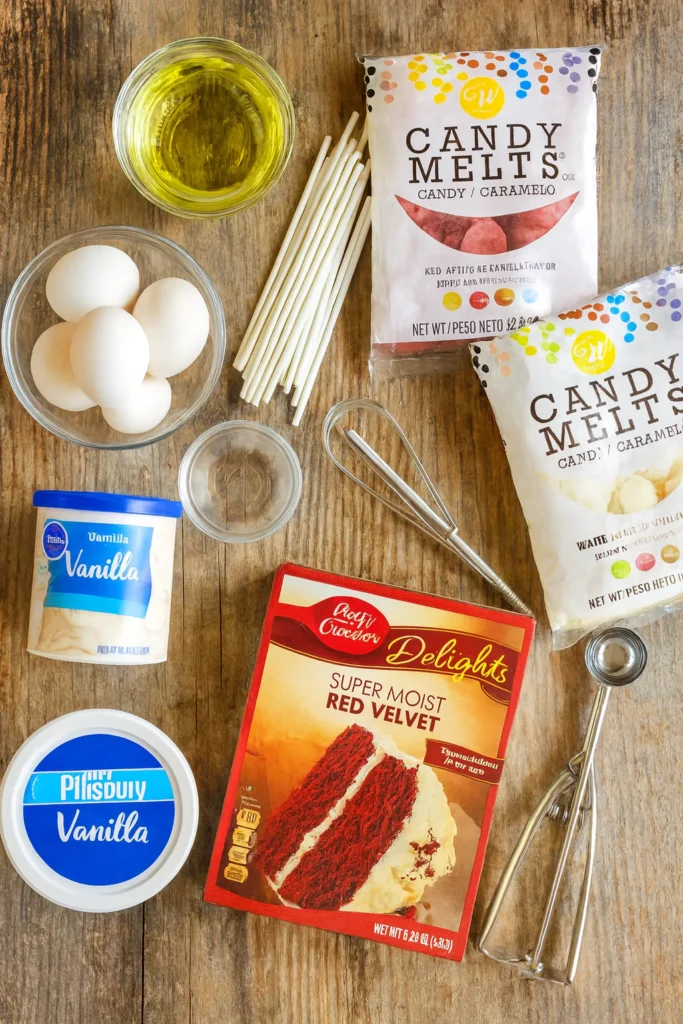
Ingredients
1/3 cup vegetable oil
3 eggs
1 1/4 cup water
1 15 oz box red velvet cake mix
2 tbsp vanilla frosting
1 12 oz bag Wilton candy melts
1 Tbsp melting aid
20 cake pop sticks
Cake pop former 1 1/4 inch diameter
Styrofoam
Instructions
1. Combine cake mix, oil, eggs, and water, then bake according to package instructions. Cool completely.
2. Trim outer edges of cake, crumble cake into a bowl, and mix with frosting until dough-like.
3. Shape mixture into balls using cake pop former or hands. Freeze for 15 minutes.
4. Melt a small portion of candy melts, dip sticks, and insert into cake balls. Freeze again briefly.
5. Dip pops into melted candy melts, tap off excess, and stand in styrofoam block to dry.
6. Decorate with drizzle or sprinkles, then serve.
Notes
Chill before dipping to avoid cracks.
Wrap individually for freezing.
Experiment with flavors by using dark or white chocolate coatings.
Nutrition
- Serving Size: 1 cake pop
- Calories: 160
- Sugar: 14g
- Sodium: 120mg
- Fat: 8g
- Saturated Fat: 3g
- Unsaturated Fat: 4g
- Trans Fat: 0g
- Carbohydrates: 21g
- Fiber: 1g
- Protein: 2g
- Cholesterol: 20mg
Ingredients and Step-by-Step Guide for Red Velvet Cake Pops
The Essential Ingredients for Red Velvet Cake Pops
The beauty of Red Velvet Cake Pops is that they use simple pantry staples and a boxed mix, making the process approachable for any home baker. To start, you’ll need a box of red velvet cake mix, eggs, vegetable oil, and water—just like baking a standard cake. Once baked and cooled, the real fun begins. You’ll crumble the cake, mix in a spoonful or two of creamy vanilla frosting, and shape it into perfect little balls. Candy melts and cake pop sticks bring everything together, giving that signature bakery-style finish. If you’ve ever made other quick treats like Pumpkin Mini Muffins or Maple Pumpkin Cookies, you’ll find this recipe just as easy and rewarding.
Here’s a quick look at what you’ll need:
| Ingredient | Amount |
|---|---|
| Red velvet cake mix | 15 oz box |
| Vegetable oil | 1/3 cup |
| Eggs | 3 |
| Water | 1 1/4 cups |
| Vanilla frosting | 2 tbsp |
| Wilton candy melts | 12 oz bag |
Step-by-Step: Making the Perfect Red Velvet Cake Pops
Start by baking the cake mix according to package instructions, then let it cool completely. Trim off the edges (they can be too dry), crumble the cake into a bowl, and mix in the frosting until the mixture feels like dough. Shape the dough into balls using a cake pop former or your hands, then freeze them briefly so they hold their shape. Next, dip each cake pop stick into melted candy, insert it into a ball, and return to the freezer. Once set, dip each ball into smooth candy melts, gently tapping off the excess for a glossy finish. Place them in a styrofoam block to dry, then drizzle with extra candy melts or sprinkles for flair. The process is straightforward—similar in fun to making festive bakes like Pumpkin Cream Cheese Muffins—and the results are guaranteed to impress.
Tips, Tricks, and Storage for Red Velvet Cake Pops
Even though Red Velvet Cake Pops are simple to make, a few smart tricks can make all the difference. From keeping the cake balls firm to achieving a smooth candy coating, these details help turn homemade pops into a professional-looking treat.
Pro Tips for the Best Red Velvet Cake Pops
The first key is moisture balance. Add frosting gradually—you want the mixture to hold together without becoming mushy. Chilling the shaped balls before dipping helps them stay secure on the sticks, preventing them from sliding off. For the candy melts, always heat in short intervals and stir well; this keeps the coating silky and easy to work with. A tall, narrow cup works better for dipping than a wide bowl, giving the cake pops an even finish. If you love experimenting with seasonal desserts, you’ll find these tips as useful here as when making Wicked Witch Cupcakes or Pumpkin Chai Muffins, where presentation is just as important as taste.
How to Store and Freeze Cake Pops Without Losing Flavor
Proper storage keeps your Red Velvet Cake Pops tasting fresh. If serving within two days, keep them in an airtight container at room temperature. For longer storage, place them in the fridge for up to a week. To freeze, wrap each pop tightly in plastic wrap, then store in a freezer bag for up to a month. Thaw at room temperature before serving to keep the coating from cracking. These methods help preserve flavor and texture, so you can prepare pops ahead of parties, holidays, or school events without stress.
Serving Ideas and Fun Variations for Red Velvet Cake Pops
Red Velvet Cake Pops aren’t just delicious—they’re also incredibly versatile. With a little creativity, you can transform them into festive desserts that fit any celebration or theme.
Creative Ways to Decorate Red Velvet Cake Pops
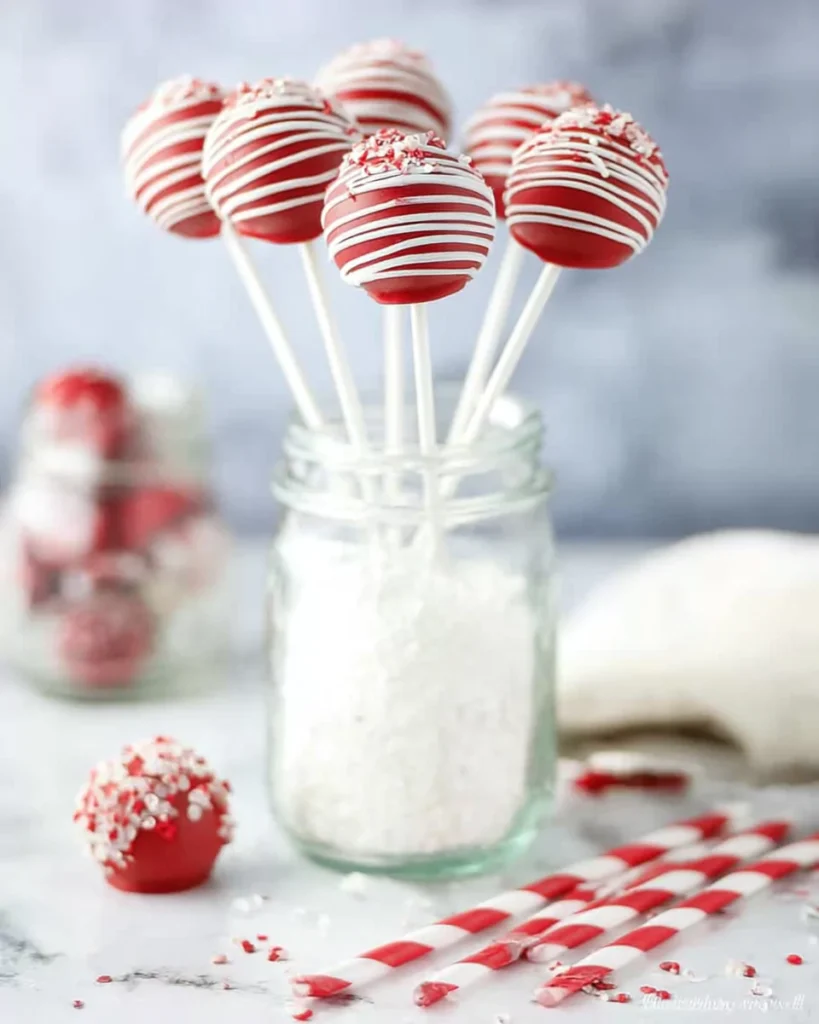
The best part about Red Velvet Cake Pops is how easily they can be dressed up. A drizzle of contrasting candy melts instantly gives them a bakery-style finish. For birthdays, add colorful sprinkles; for Valentine’s Day, decorate with heart-shaped candies; and for Halloween, style them with spooky designs similar to Halloween Sugar Cookies. You can even add edible glitter for a touch of sparkle that makes them party-ready. Pair them with themed desserts like Pumpkin Cornbread to create a fun seasonal spread.
Fun Variations Beyond Classic Red Velvet Cake Pops
While the traditional version is timeless, experimenting with flavors can be just as exciting. Try dipping them in dark chocolate for a richer taste or white chocolate for a sweeter finish. You can also stuff the centers with cream cheese frosting, caramel, or even mini chocolate chips for a surprise bite. For the adventurous baker, why not make holiday variations with peppermint, pumpkin spice, or cinnamon sugar? Each version brings a unique twist, proving that Red Velvet Cake Pops can adapt to any event or flavor craving.
FAQ About Red Velvet Cake Pops
How do you keep cake pops from falling apart?
The trick is balance. Add frosting slowly until the crumbled cake holds together but isn’t sticky. Always chill the shaped balls before dipping so they stay firm on the sticks.
Do you freeze or refrigerate cake pops before dipping?
A short chill in the freezer—about 15 minutes—works best. This helps them set without getting too hard, which can cause cracks in the candy coating.
Can you make cake pops a day before an event?
Absolutely. Store them in an airtight container at room temperature for up to two days or refrigerate for longer freshness. They’ll still taste just as good when served.
What is the best chocolate to dip cake pops in?
Candy melts are the easiest option for smooth coating, but high-quality white or dark chocolate works beautifully too. Just be sure to add a little melting aid for the perfect texture.
Conclusion
These red velvet cake pops are proof that you don’t need complicated recipes to create something beautiful and delicious. They’re versatile, festive, and easy to prepare, making them a reliable go-to for birthdays, holidays, or simple family treats. With just a few ingredients and some creative decorations, you can bring bakery-style joy to your table—without the stress.
For More recipes, Follow me on Facebook!


