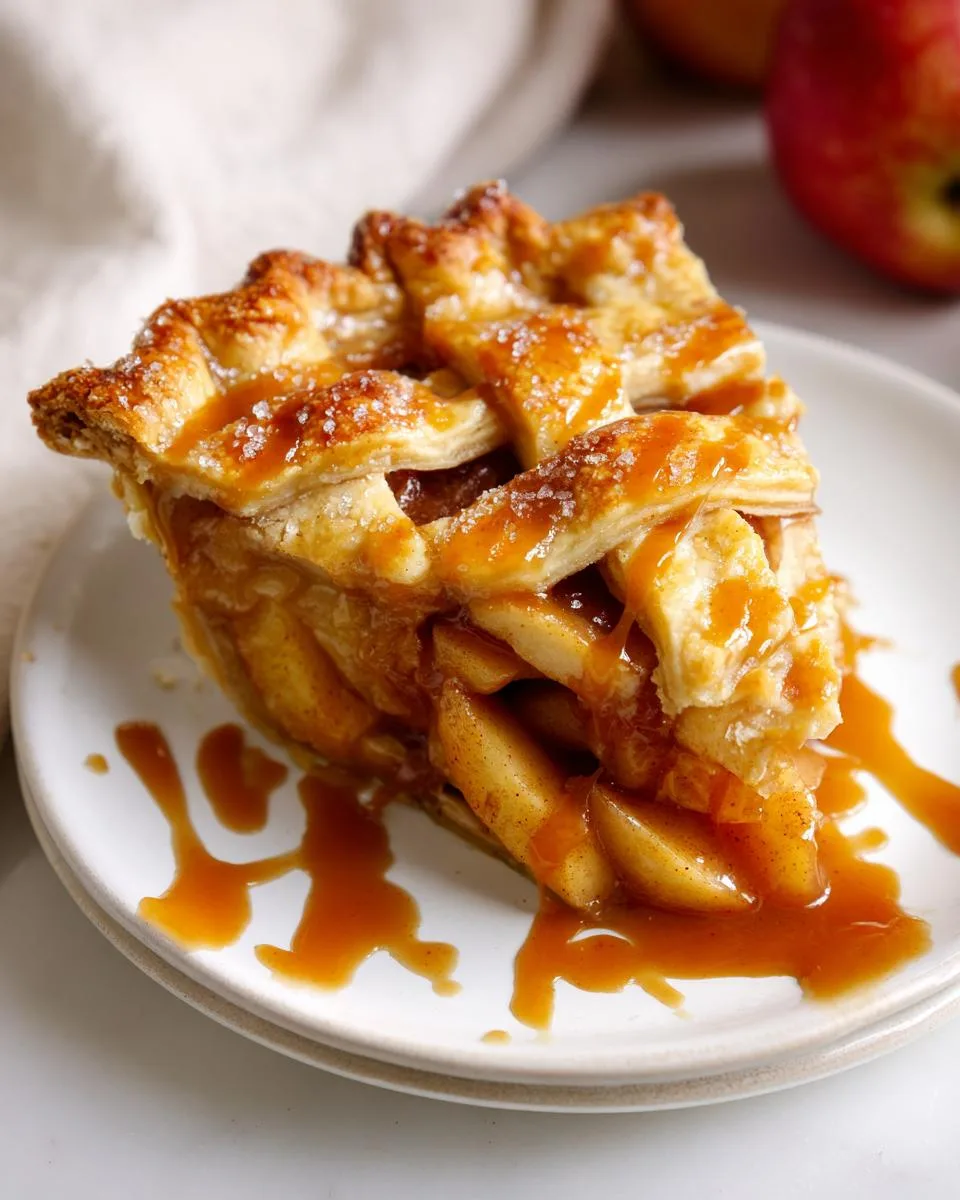
I’ll never forget the first time I made a salted caramel apple pie—it was pure magic. The way the sweet-tart apples mingled with that rich, buttery caramel, all tucked into a flaky crust? I was hooked. Now, it’s my go-to dessert for cozy fall gatherings, holiday feasts, or just because. There’s something about that first slice, with caramel dripping down the sides, that feels like a warm hug. Trust me, once you try this recipe, you’ll understand why my family begs for it every year. The secret? A homemade crust that shatters just right and that luscious salted caramel sauce—no shortcuts here!
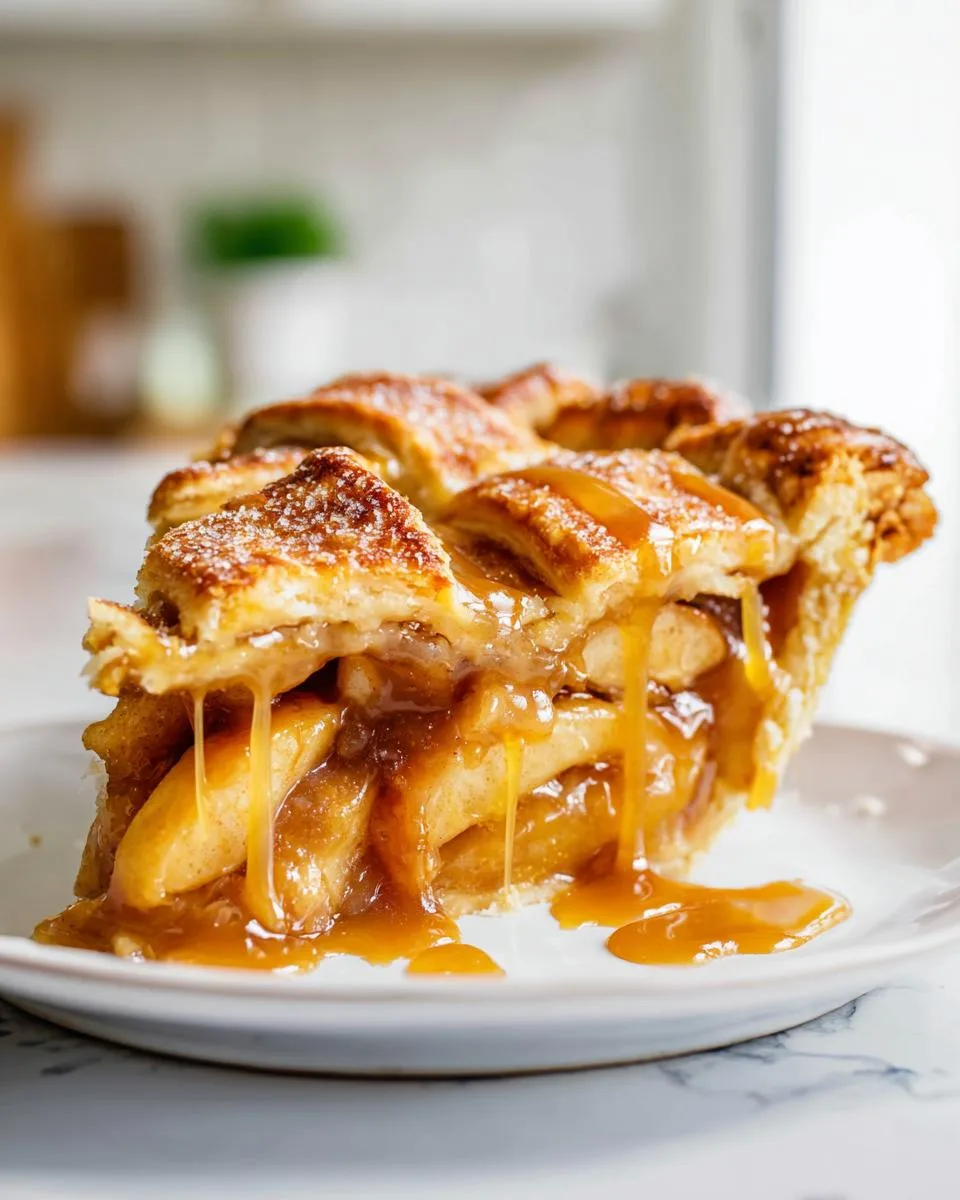
Table of Contents
Table of Contents
Why You’ll Love This Salted Caramel Apple Pie
This pie is a game-changer, and here’s why:
- Flavor explosion – The perfect balance of sweet, tart, and salty. The caramel takes it to a whole new level.
- Incredible texture – Flaky crust, tender apples, and that gooey caramel sauce? Yes, please!
- Ease of preparation – No fancy skills needed—just follow the steps, and you’ll wow everyone.
It’s the kind of dessert that makes people ask for seconds—and the recipe.
Ingredients for Salted Caramel Apple Pie
Okay, let’s talk ingredients—this is where the magic starts! I’m a stickler for quality here, because trust me, it makes ALL the difference. Here’s exactly what you’ll need to make this showstopper pie (and yes, I’ve included my little notes because I’ve learned the hard way!):
- Homemade Pie Crust or All Butter Pie Crust (both recipes make 2 crusts—1 for bottom, 1 for top). Pro tip: I always keep one disc of dough in the fridge while working with the other—cold dough = flaky crust!
- 1 cup (290g) salted caramel sauce, divided (homemade or store-bought, but if you’re making it, do this first so it can cool slightly). That “divided” is key—you’ll use half in the filling, half for drizzling later.
- 10 cups (1250g) 1/4-inch-thick apple slices (about 8 large peeled and cored apples). I use a mix of Granny Smith and Honeycrisp for that perfect sweet-tart balance. And slice them thin—no one wants chunky, undercooked apples!
- 1/2 cup (100g) granulated sugar – Just enough to sweeten without overpowering the apples.
- 1 Tablespoon (15ml) fresh lemon juice – Non-negotiable! It keeps the apples from browning and adds a bright note.
- 1/4 cup (31g) all-purpose flour (spooned & leveled) – This thickens the juices so you don’t end up with a soupy mess.
- 1 and 1/2 teaspoons ground cinnamon – The cozy spice backbone.
- 1/4 teaspoon ground allspice OR ground cloves – Your call! I love allspice for warmth, but cloves add a deeper kick.
- 1/4 teaspoon ground nutmeg – Just a whisper—it makes the other spices sing.
- Egg wash: 1 large egg beaten with 1 Tablespoon (15ml) milk – For that gorgeous golden sheen.
- Optional: coarse sugar for sprinkling on crust – For crunch and sparkle. I use turbinado sugar because it doesn’t melt away.
See? Nothing too crazy, but every item has a purpose. Now let’s make some pie magic!
Equipment You’ll Need
Listen, I’m all for kitchen gadgets, but when it comes to pie-making, simplicity wins. Here’s the short list of tools you absolutely need (plus a couple of “nice-to-haves” that make life easier):
- 9-inch pie dish (1.5 to 2 inches deep) – Glass or ceramic is my go-to—they bake evenly and let you see the bottom crust browning.
- Rolling pin – That trusty wooden one from Grandma’s kitchen? Perfect. No fancy marble required.
- Pastry brush – For that golden egg wash. (A clean paintbrush in a pinch? Been there!)
- Large mixing bowl – Big enough to toss all those apple slices without spillage.
- Sharp knife or mandoline – For uniform apple slices. (Careful with those fingers!)
- Pie crust shield or foil – To save those edges from over-browning. (I’ve burned enough crusts to learn this lesson.)
Nice extras if you have them: A pastry wheel for clean lattice cuts, a bench scraper for transferring dough, and a rimmed baking sheet to catch drips (because caramel will bubble over—it’s science).
That’s it! No single-use gadgets cluttering your drawers. Now let’s get rolling—literally.
How to Make Salted Caramel Apple Pie
Alright, let’s dive into the good stuff—the step-by-step magic that turns these simple ingredients into a showstopping pie. I’ve made this recipe more times than I can count, and I’ll walk you through every trick I’ve learned (including how to avoid the mistakes I made the first few tries!).
Preparing the Pie Crust
First things first—that flaky, buttery crust. If you’re using homemade dough (and you should!), it needs to be cold. I can’t stress this enough—cold dough = flaky layers. Here’s how I do it:
- Take one disc of dough from the fridge and let it sit for 5 minutes—just enough to soften slightly so it doesn’t crack when rolling.
- Flour your surface and rolling pin lightly. Roll from the center outward, turning the dough a quarter turn every few rolls to keep it even. Aim for a 12-inch circle—about 1/8-inch thick.
- Gently fold the dough in half, then in half again to transfer it to your pie dish. Unfold and press it in, leaving about a 1-inch overhang. Pop it back in the fridge while you prep the filling. (Keep that second disc chilled too—we’ll use it soon!)
Pro tip: If the dough gets too soft while rolling, slide it onto a baking sheet and chill for 10 minutes. Better to pause than fight sticky dough!
Making the Apple Filling
Now for the star of the show—those spiced, caramel-kissed apples. Here’s where precision matters:
- Peel and slice your apples 1/4-inch thick—no thicker, or they won’t soften properly. I use my trusty mandoline for speed, but a sharp knife works too (watch those thumbs!).
- Toss the slices in a big bowl with sugar, lemon juice, flour, and spices. Get in there with your hands—you want every slice coated evenly. The flour is key—it’ll thicken those apple juices so you don’t end up with a soggy bottom.
- Let the mixture sit for 10 minutes. You’ll see liquid start to pool—that’s good! It means the sugar is drawing out the apples’ natural juices.
Watch out: Don’t skip the lemon juice! It prevents browning and balances the sweetness. I learned this the hard way when my first pie filling turned an unappetizing gray.
Assembling the Pie
Time to bring it all together—this is where the magic happens!
- Pull your chilled crust from the fridge. Pile in the apple mixture—it’ll seem like too much, but pack it in tightly. Those apples will shrink as they bake.
- Drizzle 1/2 cup of caramel sauce evenly over the apples. Don’t pour it all in one spot—use a spoon to distribute those golden ribbons throughout.
- Now for the lattice: Roll out your second dough disc just like the first. Cut it into 1/2-inch to 3/4-inch strips with a sharp knife or pastry wheel. Weave them over and under—start with the center strip first, then work outward. It’s easier than it looks, I promise! (If the dough gets too soft, chill it for 5 minutes.)
- Trim the edges, tuck them under, and crimp with your fingers or a fork. Brush the top with egg wash and sprinkle with coarse sugar for that bakery-worthy sparkle.
Secret trick: Chill the assembled pie for 20-30 minutes before baking. This keeps the crust from shrinking and gives you those crisp, defined edges.
Baking and Finishing
Almost there! Here’s how to nail the bake:
- Preheat your oven to 400°F (204°C) with a rack in the lower third. Place a rimmed baking sheet on the rack—this catches any caramel drips (and there will be drips!).
- Bake the pie for 25 minutes, then reduce heat to 375°F (190°C). Cover the edges with foil or a pie shield to prevent burning. Bake another 35-40 minutes until the filling bubbles thickly at the edges and the crust is deep golden.
- This is crucial—let the pie cool for at least 3 hours before slicing. I know it’s hard to wait, but cutting into a warm pie means runny filling. The caramel needs time to set!
- Right before serving, drizzle with the remaining caramel sauce. That glossy finish makes it irresistible.
Golden rule: If your crust browns too fast but the filling isn’t bubbling yet, tent the whole pie with foil. Better a pale pie than a burnt one!
Print
40-Minute Salted Caramel Apple Pie That Melts Hearts
- Prep Time: 30 minutes
- Cook Time: 65 minutes
- Total Time: 95 minutes
- Yield: 1 pie (8 servings) 1x
- Category: Dessert
- Method: Baking
- Cuisine: American
- Diet: Vegetarian
Description
A delicious salted caramel apple pie with a homemade crust and rich caramel sauce.
Ingredients
- Homemade Pie Crust or All Butter Pie Crust (both recipes make 2 crusts, 1 for bottom and 1 for top)
- 1 cup (290g) salted caramel sauce, divided
- 10 cups (1250g) 1/4-inch-thick apple slices (about 8 large peeled and cored apples)
- 1/2 cup (100g) granulated sugar
- 1 Tablespoon (15ml) fresh lemon juice
- 1/4 cup (31g) all-purpose flour (spooned & leveled)
- 1 and 1/2 teaspoons ground cinnamon
- 1/4 teaspoon ground allspice OR ground cloves (either is fine)
- 1/4 teaspoon ground nutmeg
- egg wash: 1 large egg beaten with 1 Tablespoon (15ml) milk
- optional: coarse sugar for sprinkling on crust
Instructions
- Prepare either pie crust recipe through step 5. The pie dough needs to chill in the refrigerator for at least 2 hours before using.
- If you are not using store-bought salted caramel sauce, make the homemade version. You’ll want to make it now so it can cool.
- Make the filling: In a large bowl, stir the apple slices, sugar, lemon juice, flour, cinnamon, allspice/cloves, and nutmeg together until thoroughly combined. Set aside.
- Roll out the chilled pie dough: On a floured work surface, roll out one of the discs of chilled dough (keep the other one in the refrigerator). Turn the dough about a quarter turn after every few rolls until you have a circle 12 inches in diameter. Carefully place the dough into a 9-inch pie dish that’s 1.5 to 2 inches deep. Tuck the dough in with your fingers, making sure it is smooth.
- Spoon the filling into the crust. It will seem like a lot of apples; that’s ok. Pile them high, and tightly together. Drizzle evenly with 1/2 cup (145g) of the caramel sauce. It’s ok if the caramel sauce is still a little warm.
- Finish assembling: Remove the other disc of chilled pie dough from the refrigerator. Roll the dough into a circle that is 12 to 14 inches diameter. Using a pastry wheel, sharp knife, or pizza cutter, cut strips of dough; in the pictured pie, I cut 18 1/2-inch to 3/4-inch wide strips. Carefully thread the strips over and under one another, pulling back strips as necessary to weave.
- Use a small paring knife or kitchen shears to trim off excess dough. Fold the overhang back towards the center of the pie, and pinch the edges to adhere the top and bottom crusts together. Crimp or flute the pie crust edges to seal.
- Using a pastry brush, lightly brush the top and edges of the pie crust with egg wash. Sprinkle the top with coarse sugar, if using. Place the pie in the refrigerator for 20–30 minutes while your oven preheats.
- Preheat oven to 400°F (204°C).
- Place the pie onto a large baking sheet and bake for 25 minutes. Then, keeping the pie in the oven, reduce the oven temperature to 375°F (190°C). Place a pie crust shield on the edges to prevent them from over-browning. Continue baking the pie until the caramel apple filling is bubbling around the edges, 35–40 more minutes.
- Remove pie from the oven, place on a cooling rack, and cool for at least 3 hours before slicing and serving. Filling will be too juicy if the pie is warm when you slice it. Drizzle the entire pie or each slice with remaining salted caramel.
- Cover and store leftover pie at room temperature for up to 1 day or in the refrigerator for up to 5 days.
Notes
- Does a caramel apple pie need to be refrigerated?
- How long will salted caramel keep?
- How long will caramel apples keep?
- How long can apple pie be left unrefrigerated?
Nutrition
- Serving Size: 1 slice
- Calories: 350
- Sugar: 25g
- Sodium: 200mg
- Fat: 12g
- Saturated Fat: 6g
- Unsaturated Fat: 4g
- Trans Fat: 0g
- Carbohydrates: 55g
- Fiber: 3g
- Protein: 3g
- Cholesterol: 30mg
Tips for the Best Salted Caramel Apple Pie
After making this pie more times than I can count (and yes, learning from my fair share of flops), here are my absolute must-know tips to guarantee pie perfection every time:
- Keep everything COLD – I’m talking butter in the crust, the dough discs, even the apples after slicing. Cold ingredients prevent a gummy crust and keep those butter pockets intact for maximum flakiness. If your kitchen is warm, pop the prepared pie in the freezer for 10 minutes before baking.
- Fight the soggy bottom – Two tricks: First, sprinkle a thin layer of crushed graham crackers or breadcrumbs on the bottom crust before adding filling (it soaks up excess juices). Second, bake on the lower oven rack – the direct heat helps crisp up that base.
- Slice apples uniformly – Uneven slices mean some stay crunchy while others turn mushy. I aim for 1/4-inch thickness – thin enough to soften completely but thick enough to hold their shape. A mandoline makes this foolproof (watch those fingers!).
- Don’t skimp on cooling time – I know it’s torture to wait, but that 3-hour rest lets the caramel thicken and the filling set. Cutting too soon? You’ll have a delicious but soupy mess. Pro tip: Bake in the morning for dessert that night!
One last thing – if your lattice tears or your crimping isn’t perfect? Who cares! Rustic is charming, and I promise no one will notice once they taste that first caramel-drenched bite.
FAQ About Salted Caramel Apple Pie
Got questions about this pie? I’ve got answers! Here are the most common things people ask me whenever I make this showstopper dessert. (Trust me, I’ve been there with all the “what ifs” and “how longs”!)
Does a caramel apple pie need to be refrigerated?
Yes, but not right away! After baking, let it cool completely at room temperature. Once it’s cooled, you can cover it loosely and store it in the fridge for up to 5 days. The caramel and apples stay fresher that way. Just bring it to room temp or warm it slightly before serving.
How long will salted caramel keep?
Homemade salted caramel will keep in the fridge for up to 2 weeks in an airtight container. Just reheat it gently in the microwave or on the stovetop before drizzling it over your pie. Store-bought caramel usually lasts even longer—just check the label!
How long will caramel apples keep?
If you’re making caramel apples (a fun twist on this pie!), they’ll keep for about 2 days at room temperature. After that, the caramel can start to weep. For longer storage, refrigerate them for up to a week, but let them come to room temp before eating for the best texture.
How long can apple pie be left unrefrigerated?
Apple pie can sit out at room temperature for up to 2 days, but I’d recommend refrigerating it after the first day—especially if it’s warm in your kitchen. The caramel and apples can spoil faster than you’d think, and no one wants a soggy crust!
Still have a burning question? Drop it in the comments—I’m here to help!
Serving and Storing Salted Caramel Apple Pie
Okay, let’s talk about the best part—eating this glorious pie! But first, some real talk: how you serve and store it makes ALL the difference between a good pie and a mind-blowing one. Here’s exactly how I do it:
Serving Your Masterpiece
Timing is everything. That 3-hour cooling wait? Worth it—the filling sets perfectly. But right before serving, I warm each slice just slightly (10 seconds in the microwave) to make that caramel sauce ooze beautifully. Top it with:
- Vanilla ice cream – The classic pairing. The cold creaminess melts into the warm caramel—heaven!
- Fresh whipped cream – For a lighter touch. Add a pinch of cinnamon to the cream for extra magic.
- Extra caramel drizzle – Because why not? I warm the reserved sauce until it’s pourable but not hot.
Pro tip: Use a sharp, thin-bladed knife dipped in hot water for clean slices. Wipe between cuts to keep those layers picture-perfect.
Storing Like a Pro
Leftovers? (As if!) But just in case:
- Room temperature: Fine for up to 8 hours if covered loosely with foil. Beyond that, refrigerate.
- Refrigerator: Cover tightly with plastic wrap or foil. It’ll keep for 5 days. Before serving, let it sit at room temp for 30 minutes or warm slightly.
- Freezing: Yes, you can! Freeze whole or sliced. Wrap tightly in plastic, then foil. Thaw overnight in the fridge, then reheat at 300°F (149°C) for 15 minutes.
Watch out: Never store pie in the pan—transfer slices to an airtight container after day one to prevent soggy crust. And always add fresh caramel drizzle after reheating!
Follow these steps, and your pie will taste just as incredible on day three as it did fresh from the oven. Now go enjoy every last crumb—you’ve earned it!
Nutritional Information
Now, let’s talk numbers—because I know some of you are curious (or maybe just want to plan your workout accordingly after that second slice!). Here’s the scoop on what’s in this glorious pie, but remember: Nutrition varies based on ingredients/brands. These are estimates per serving (that’s 1/8th of the pie, if you can stop at just one slice!):
- Calories: 350 – Consider it fuel for happiness!
- Fat: 12g (6g saturated) – That’s the butter and caramel working their magic.
- Carbs: 55g – Mostly from those sweet apples and that flaky crust.
- Sugar: 25g – A combo of natural fruit sugars and that irresistible caramel.
- Fiber: 3g – Thank you, apple skins!
- Protein: 3g – Just enough to keep things interesting.
Quick note: Using store-bought caramel or different apple varieties will tweak these numbers slightly. And hey—if you’re watching your intake, pairing a smaller slice with a big scoop of vanilla yogurt instead of ice cream is my favorite “lighter” trick!
Share Your Salted Caramel Apple Pie
Alright, pie pals—now it’s your turn! I wanna see your gorgeous, caramel-drizzled masterpieces. Did your lattice turn out perfectly? Did you add a twist like toasted pecans or a dash of bourbon? Snap a pic and share it in the comments below—I geek out over every single one! And if you tried this recipe, leave a quick rating to let others know how it turned out. Trust me, your notes help fellow bakers avoid pitfalls (like that time I forgot to shield the crust edges—oops!). Can’t wait to hear your pie stories!
For more delicious recipes and baking inspiration, check out our recipes section. You can also find us on Facebook for daily updates and tips!