Oh, Halloween – the one time of year when it’s totally acceptable (and encouraged!) to serve creepy, crawly treats that look like they belong in a witch’s pantry. I’ve been making witch finger pretzels for years, ever since my daughter’s first grade Halloween party when I needed something spooky but easy enough for little hands to help with. Let me tell you, nothing gets kids more excited than snacks that look like they might actually wiggle on the plate!
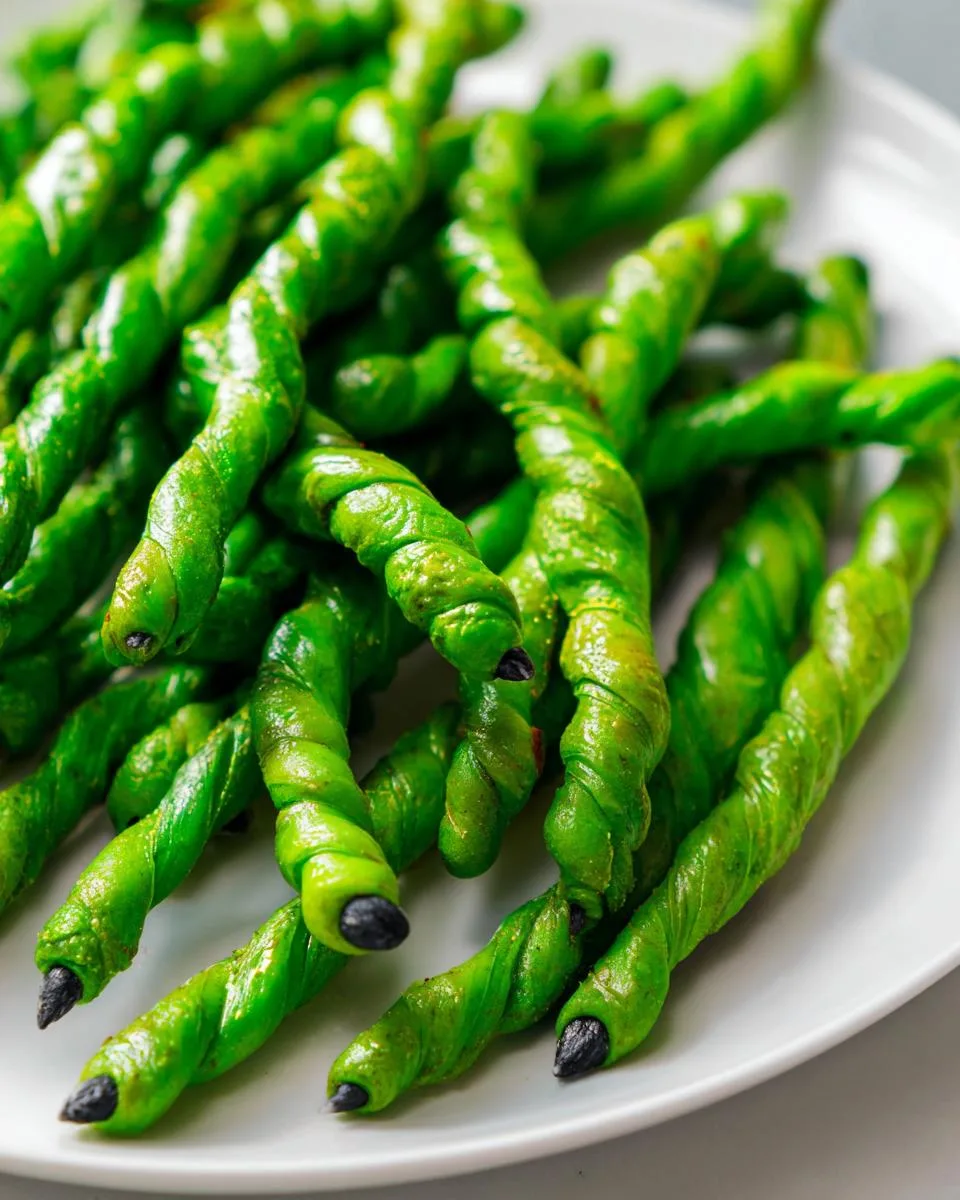
Table of Contents
Table of Contents
Why You’ll Love These Witch Finger Pretzels
These witch finger pretzels have become my go-to Halloween treat because they’re ridiculously simple to make but look impressively gross (in the best possible way). I still remember the shrieks of delight when I first brought them to our neighborhood Halloween potluck – adults were just as amused as the kids! What I love most is how you can customize them with different colored coatings – I’ve done everything from zombie-green to vampire-purple over the years.
The best part? You probably have most of what you need already in your pantry. Just pretzels, candy coating, almonds, and some black food coloring transform into these delightfully creepy fingers that are perfect for Halloween parties, classroom treats, or just a fun afternoon activity with kids. Trust me, once you make these once, they’ll become your Halloween tradition too!
Listen, these witch finger pretzels aren’t just another Halloween recipe – they’re the kind of treat that makes people do a double-take before bursting into giggles. Here’s why they’ve become my must-make spooky snack every October:
- So easy a zombie could make them – Seriously, if you can melt candy and stick almonds on pretzels, you’re golden
- Party showstoppers – They look way fancier than the 20 minutes of work they actually take
- Kid-approved craft – My littles love helping paint the “nails” and create wrinkly knuckles
- Endless color options – Go classic green, eerie purple, or even glow-in-the-dark!
Honestly? The witch finger pretzels disappear faster than ghosts at sunrise whenever I serve them. Just try not eating three while you “quality test” your batch!
Print
28 Spooky Witch Finger Pretzels That Will Haunt Your Taste Buds
- Prep Time: 20 minutes
- Cook Time: 5 minutes
- Total Time: 35 minutes
- Yield: 28 witch fingers 1x
- Category: Dessert
- Method: No-Bake
- Cuisine: American
- Diet: Vegetarian
Description
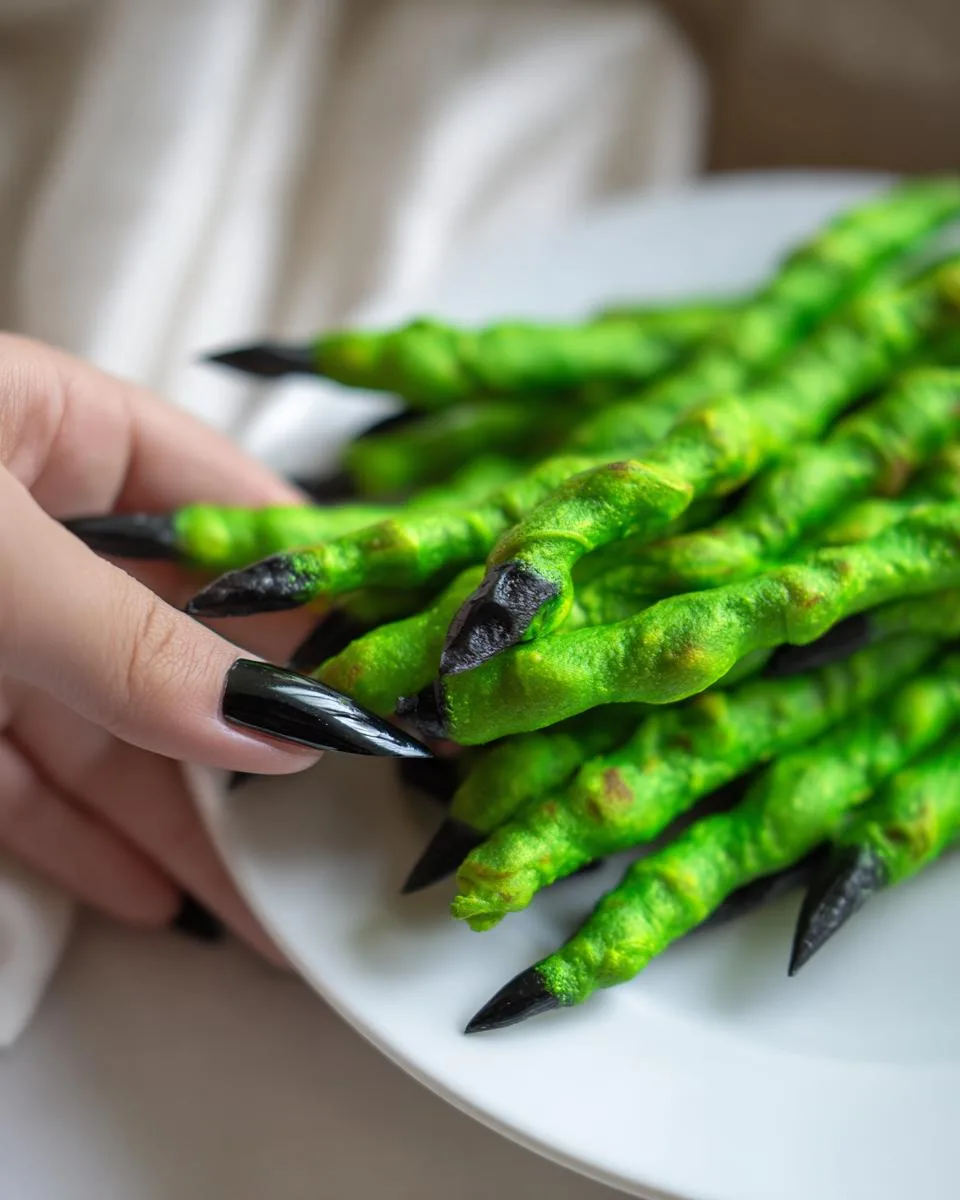
Witch Finger Pretzels are a fun and spooky Halloween treat. These creepy snacks look like witch fingers with green candy coating and almond fingernails.
Ingredients
- 28 blanched almonds
- 1 tube black gel food coloring
- 14 large pretzel rods
- 12 ounces bright-green candy coating
Instructions
- Paint the top of each almond with black gel food coloring. Set aside to dry.
- Break or cut each pretzel rod in half.
- Melt the green candy coating in the microwave, stirring every 30 seconds until smooth.
- Dip each pretzel rod in the melted coating, leaving a 1/2-inch section undipped.
- Place the dipped pretzel on a lined baking sheet and press an almond onto the tip.
- Use a toothpick to add wrinkles for knuckles while the coating is still slightly soft.
- Refrigerate for 10 minutes to set the coating completely.
Notes
- Wear food-safe gloves to avoid staining your fingers with black food coloring.
- Store the pretzels in an airtight container at room temperature.
- These treats are best served within 3 days of making.
Nutrition
- Serving Size: 1 witch finger
- Calories: 80
- Sugar: 5g
- Sodium: 120mg
- Fat: 3g
- Saturated Fat: 2g
- Unsaturated Fat: 1g
- Trans Fat: 0g
- Carbohydrates: 12g
- Fiber: 1g
- Protein: 1g
- Cholesterol: 0mg
Witch Finger Pretzels Ingredients
Okay, let’s talk ingredients – and I mean exact ingredients, because trust me, substitutions can turn these from delightfully creepy to just plain sad. After making these witch finger pretzels for years, I’ve learned the hard way what works and what doesn’t!
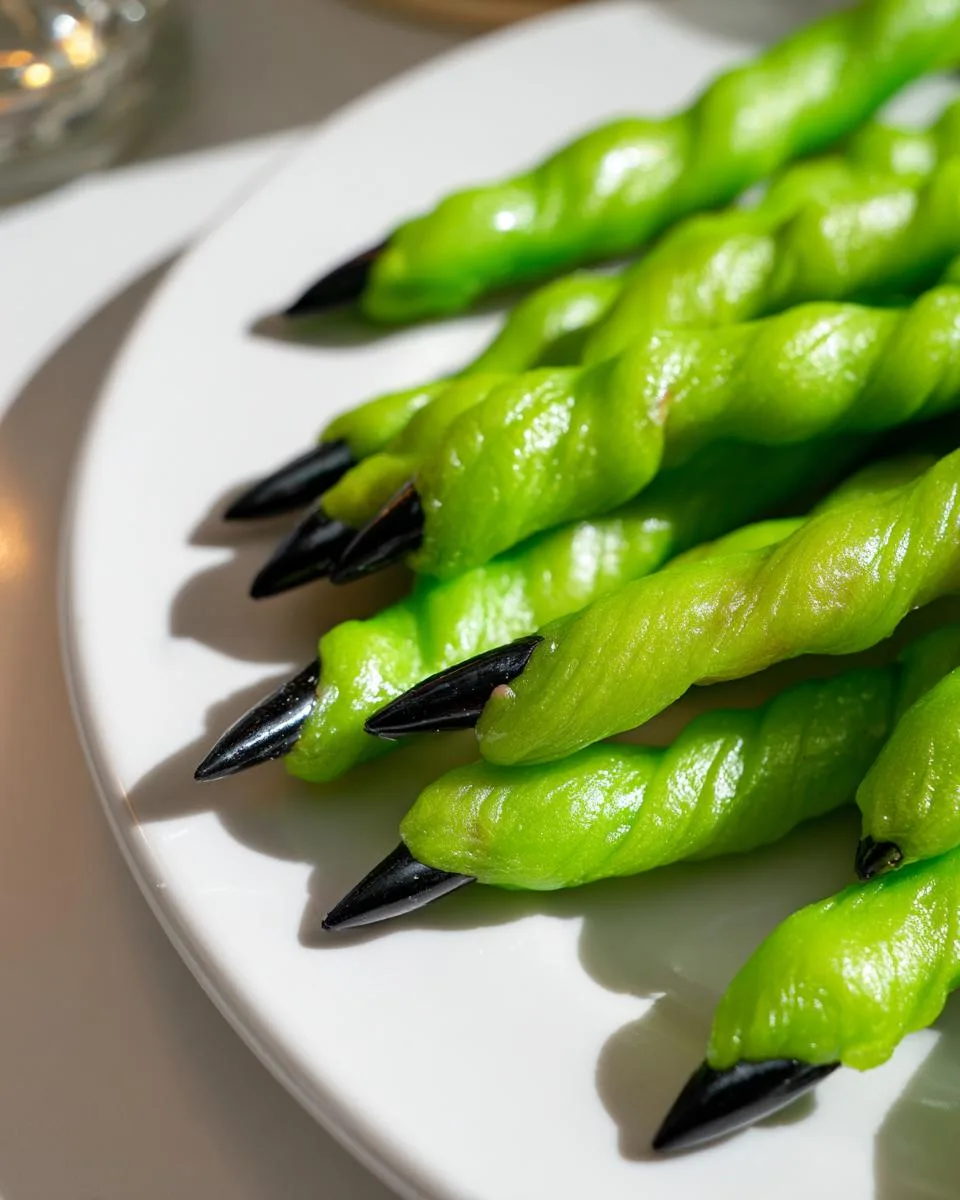
- 28 whole blanched almonds – These become our witch fingernails, and blanched is key because the smooth white surface takes the black food coloring perfectly
- 1 tube black gel food coloring – Not liquid! Gel gives that opaque, creepy nail polish look without running everywhere
- 14 large pretzel rods (standard 6-inch size) – Break these in half to make 28 fingers – the ridges already look like knuckles!
- 12 ounces bright-green candy coating – I prefer candy melts or almond bark for easy melting and smooth coverage
A quick note about the almonds – I once tried using sliced almonds in a pinch and ended up with witch fingers that looked like they had weird flat nails. Whole blanched almonds give that perfect curved nail shape that makes people go “eww!” in the best way. And don’t even get me started on trying to use liquid food coloring – let’s just say my kitchen looked like a crime scene!
Equipment You’ll Need for Witch Finger Pretzels
Now, let’s talk tools – because while these witch finger pretzels are simple to make, having the right equipment makes all the difference between smooth sailing and a sticky mess. Here’s what I always grab from my kitchen before starting:
- Microwave-safe bowl – For melting that candy coating without any scary explosions
- Parchment paper – Your best friend for keeping those creepy fingers from sticking to everything
- Baking sheet – Any flat surface will do, but I like using a quarter sheet pan for easy fridge storage
- Toothpicks – Essential for creating those gross-but-awesome knuckle wrinkles
- Food-safe gloves – Unless you want black-stained fingers for days (learned that the hard way!)
That’s it! No fancy gadgets needed – just basic kitchen stuff you probably already have. Though I will say, after making dozens of batches, I’ve upgraded to silicone baking mats instead of parchment because they’re reusable and make cleanup a breeze. But regular parchment works perfectly fine too!
How to Make Witch Finger Pretzels
Alright, let’s get our hands dirty (well, maybe just a little green) and make these delightfully creepy witch finger pretzels! I’ve broken it down into two simple phases – first we’ll create those spooky almond nails, then we’ll assemble our fingers. Trust me, it’s easier than it looks!
Preparing the Almond Nails
This is where the magic starts – turning innocent almonds into wicked witch nails. First, grab your tube of black gel food coloring (I cannot stress enough how much better gel works than liquid here). Put on those food-safe gloves unless you want Halloween-themed fingers for a week!
Lay out your blanched almonds on a piece of parchment paper. Using a small paintbrush or even a toothpick, carefully paint just the rounded top of each almond black. You want that perfect half-moon nail look – too much coverage and it loses the creepy realism. Let them dry for about 15 minutes while you prep the rest. The gel dries to a nice matte finish that looks just like chipped nail polish!
Assembling the Witch Finger Pretzels
Now for the fun part! Break each pretzel rod in half cleanly – I find twisting works better than snapping to avoid crumbs. Next, melt your green candy coating in 30-second bursts in the microwave, stirring between each until it’s perfectly smooth.
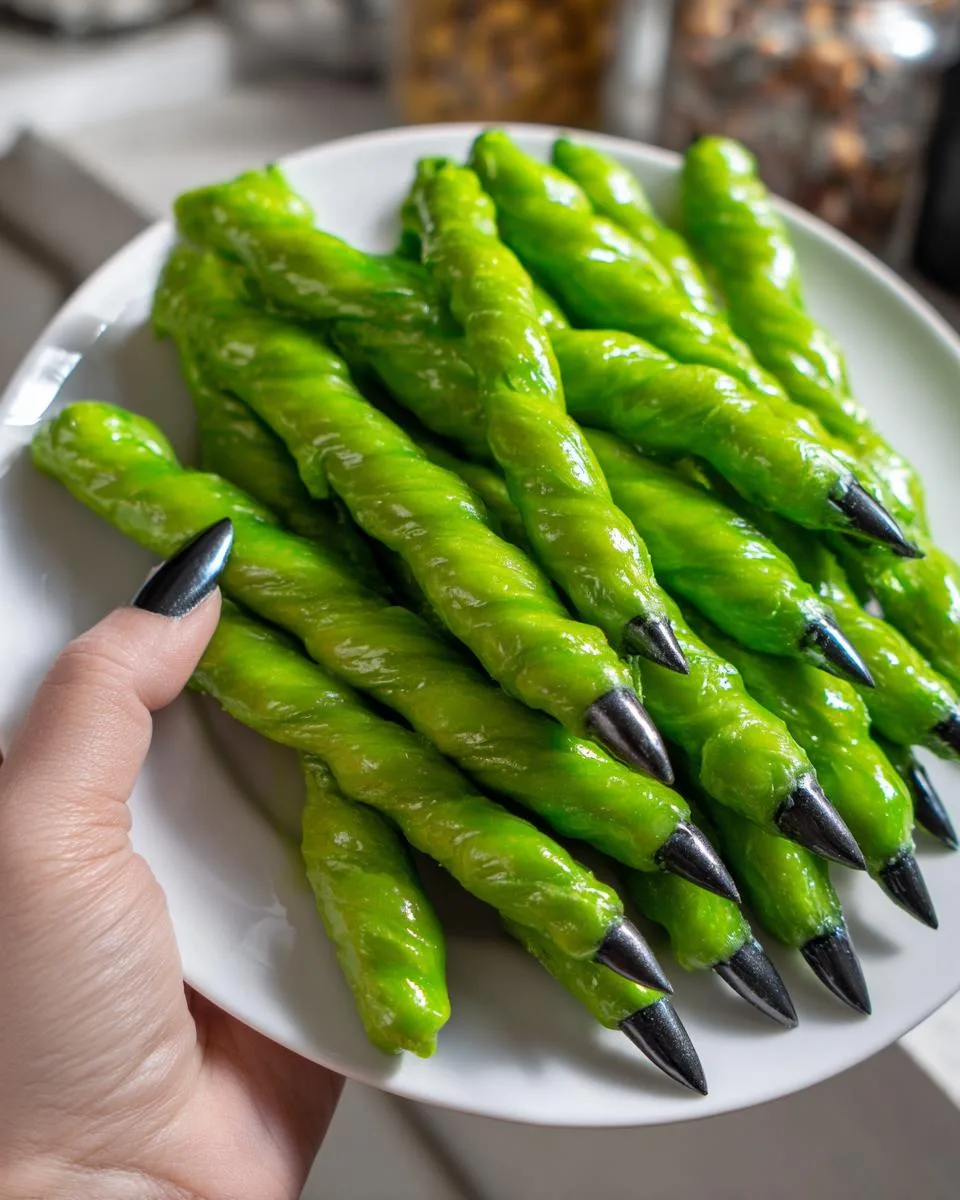
Here’s my pro tip: dip each pretzel piece about three-quarters of the way, leaving that undipped end to look like the finger’s “cuticle.” Lay them on parchment-lined baking sheets and immediately press a painted almond onto the tip at a slight angle – this makes them look like they’re naturally growing from the finger.
While the coating is still slightly soft, use a toothpick to gently create wrinkles about halfway down each pretzel. Just drag the toothpick horizontally to make little indentations – these will be your knuckles! Pop them in the fridge for about 10 minutes to set completely, and voila – you’ve got a batch of witch fingers that look like they crawled right out of a cauldron!
The first time I made these, I was shocked at how realistic they turned out. Just wait until you see people’s reactions when you serve them – the combination of the green coating, those black nails, and the knuckle wrinkles is seriously spooky!
Witch Finger Pretzels Tips for Success
After making countless batches of these witch finger pretzels (some more successful than others!), I’ve picked up some tricks that’ll guarantee your creepy creations turn out perfectly every time:
- Move fast! That candy coating starts setting quickly – I work in small batches of about 10 pretzels at a time so I can add the almond nails and knuckle wrinkles before it hardens.
- Parchment is your BFF – Skip the wax paper; I learned the hard way that candy coating sticks to it like, well, a witch to her broomstick!
- Chill out – A quick 10-minute fridge visit helps everything set properly, but don’t leave them in too long or they might get sweaty.
Bonus tip: If your coating gets too thick while working, just zap it for 5-10 seconds to loosen it back up!
Storing Your Witch Finger Pretzels
Okay, let’s talk storage – because nothing’s sadder than opening your container the day before Halloween to find your witch finger pretzels have turned into sad, soggy sticks! Here’s how I keep mine fresh and creepy-perfect:
The secret is an airtight container at room temperature. I use a plastic container with a tight lid or even a gallon ziplock bag with all the air squeezed out. Whatever you do, don’t refrigerate them long-term – the moisture makes the pretzels lose their crunch!
These witch finger pretzels stay their spookiest for about 3 days after making. After that, the pretzels start to soften and the candy coating might get a little dull. If you’re prepping for a party, I recommend making them no more than 2 days ahead.
Watch out for humidity! One year I left mine out on the counter uncovered during a rainy spell, and by morning they’d turned into limp witch fingers – not the look we’re going for! If your kitchen tends to be damp, toss a silica packet in your storage container to absorb extra moisture.
Pro tip: If you absolutely need to store them longer, you can freeze witch finger pretzels for up to a month in an airtight freezer bag. Just thaw at room temperature for an hour before serving – the texture stays surprisingly good!
Witch Finger Pretzels Variations
Once you’ve mastered the classic green witch fingers, the spooky fun really begins! My kids and I love experimenting with different colors – purple candy coating turns them into vampire fingers that look straight out of Transylvania. For extra gore, try red coating with a little extra black food coloring smeared at the tips for a “bloody” effect. My personal favorite? White coating with black nails for skeleton fingers that are perfect for Day of the Dead celebrations too!
The beauty of these witch finger pretzels is how easily you can customize them. Last year we even did glow-in-the-dark fingers for a blacklight party – just mix some edible glow powder into your candy coating. Whatever color you choose, those creepy almond nails and knuckle wrinkles make them instantly recognizable (and deliciously unsettling)!
Witch Finger Pretzels Nutrition Information
Alright, let’s talk nutrition – but let’s be real, we’re not making witch finger pretzels because they’re health food! These creepy snacks are pure Halloween fun, but here’s the scoop on what you’re biting into:
Nutrition can vary quite a bit based on the specific brands of pretzels and candy coating you use, but generally speaking, each witch finger pretzel contains about:
- 80 calories – Perfect for when you need just a little spooky energy boost
- 5g sugar – That candy coating does its sweet, creepy job well
- 3g fat – Mostly from the almond and candy coating
- 120mg sodium – Thank those salty pretzel “bones”
Remember, these are just estimates – your actual numbers might be slightly different. But hey, it’s Halloween! If there’s ever a time to enjoy a few extra candy-coated treats without overthinking it, this is it. Just maybe don’t eat all 28 fingers by yourself… or do, I won’t judge!
Frequently Asked Questions About Witch Finger Pretzels
I’ve gotten so many questions about these witch finger pretzels over the years – especially around Halloween when everyone’s scrambling for last-minute spooky treats! Here are the answers to the most common head-scratchers:
How long do witch finger pretzels take to dry?
About 10 minutes in the fridge does the trick! The candy coating sets surprisingly fast, especially if your kitchen is cool. I like to check by gently tapping a fingernail – if it doesn’t leave a mark, they’re ready to spook!
What’s the best way to store chocolate-covered witch fingers?
An airtight container at room temperature is key – no refrigeration needed! I’ve had best results with plastic containers or gallon ziplock bags with all the air squeezed out. Just keep them away from heat and humidity, unless you want droopy witch fingers (not a good look!).
How long do these creepy treats stay fresh?
They’re happiest within 3 days of making. After that, the pretzels start to lose their satisfying crunch. Though let’s be honest – mine never last that long! If you must store longer, freezing works surprisingly well for up to a month.
Can I make witch finger pretzels in advance?
Absolutely! Two days ahead is my sweet spot – any earlier and the pretzels might soften. I like to make the almonds and melt the coating the night before, then do the assembly the morning of the party. Fresh is best, but we all know how hectic Halloween can get!
One last pro tip – if your witch fingers develop a little “sweat” from humidity, a quick 5-minute stint in the freezer will make them look fresh again. Happy haunting… I mean, happy baking!


