Halloween baking just isn’t complete without a batch of creepy Witch Finger Cookies stealing the show on your dessert table. I still remember the first time I made these – my niece screamed (the good kind!) when she saw them poking out of a bowl at our family party. These buttery almond-topped cookies look so realistic, you’ll swear they crawled out of a witch’s spellbook!
The magic of Witch Finger Cookies is how simple ingredients transform into something delightfully spooky. That moment when you press the almond “nail” into place? Pure Halloween joy. Over the years, I’ve perfected my technique (with plenty of broken “fingers” along the way – oops!) and now they’re my most-requested October treat.
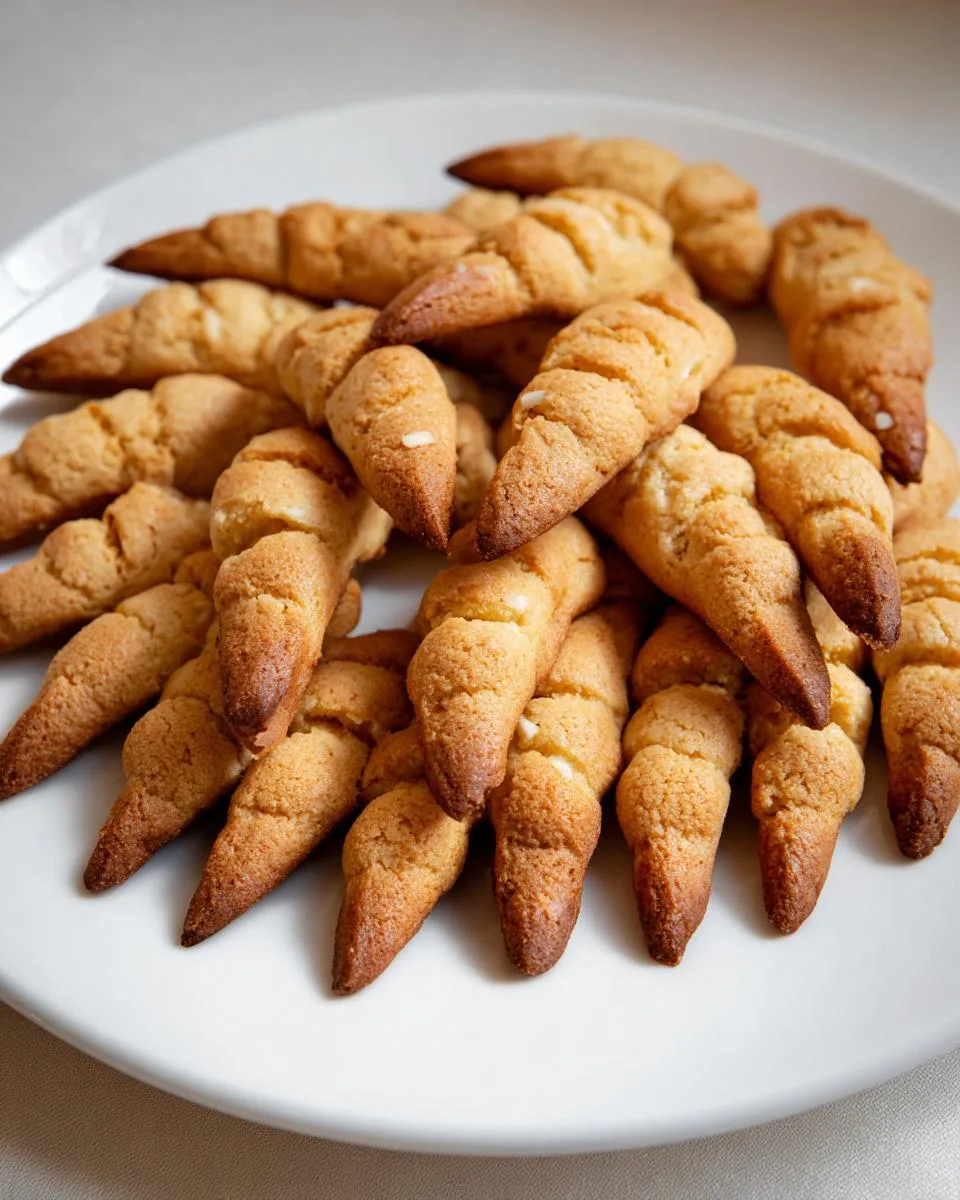
Table of Contents
Table of Contents
What I love most is how these cookies spark imagination. Kids adore them, adults can’t resist picking one up, and they always disappear faster than ghosts at sunrise. Whether you’re hosting a party or just want to surprise your family, these Witch Finger Cookies are guaranteed to cast a tasty spell on everyone.
Why You’ll Love These Witch Finger Cookies
These Witch Finger Cookies aren’t just spooky—they’re downright addictive! Here’s why they’ve become my go-to Halloween treat year after year:
- Easy-peasy: No fancy skills needed—just mix, roll, and press. Even kitchen newbies can pull these off!
- Party superstars: They disappear faster than candy at a haunted house. I always make double batches because guests sneak them by the handful.
- Kid-approved magic: Little witches and wizards go wild for these. My neighbor’s kids now demand I bring them every October.
- Endless fun: Paint the “nails” with food coloring, add red jam “blood,” or make them extra gnarly—your creativity’s the limit!
Seriously, one bite of these buttery, almond-topped fingers and you’ll be hooked. They’re the perfect mix of creepy and delicious!
Witch Finger Cookies Ingredients
Here’s everything you’ll need to bring these creepy cookies to life:
- 3 cups (375g) all-purpose flour
- 1 cup (110g) powdered sugar
- 1 cup (2 sticks/240g) softened unsalted butter
- ½ teaspoon salt
- 20 blanched almonds, split lengthwise
That’s it! Just five simple ingredients for the most delightfully spooky cookies.
Ingredient Notes & Substitutions
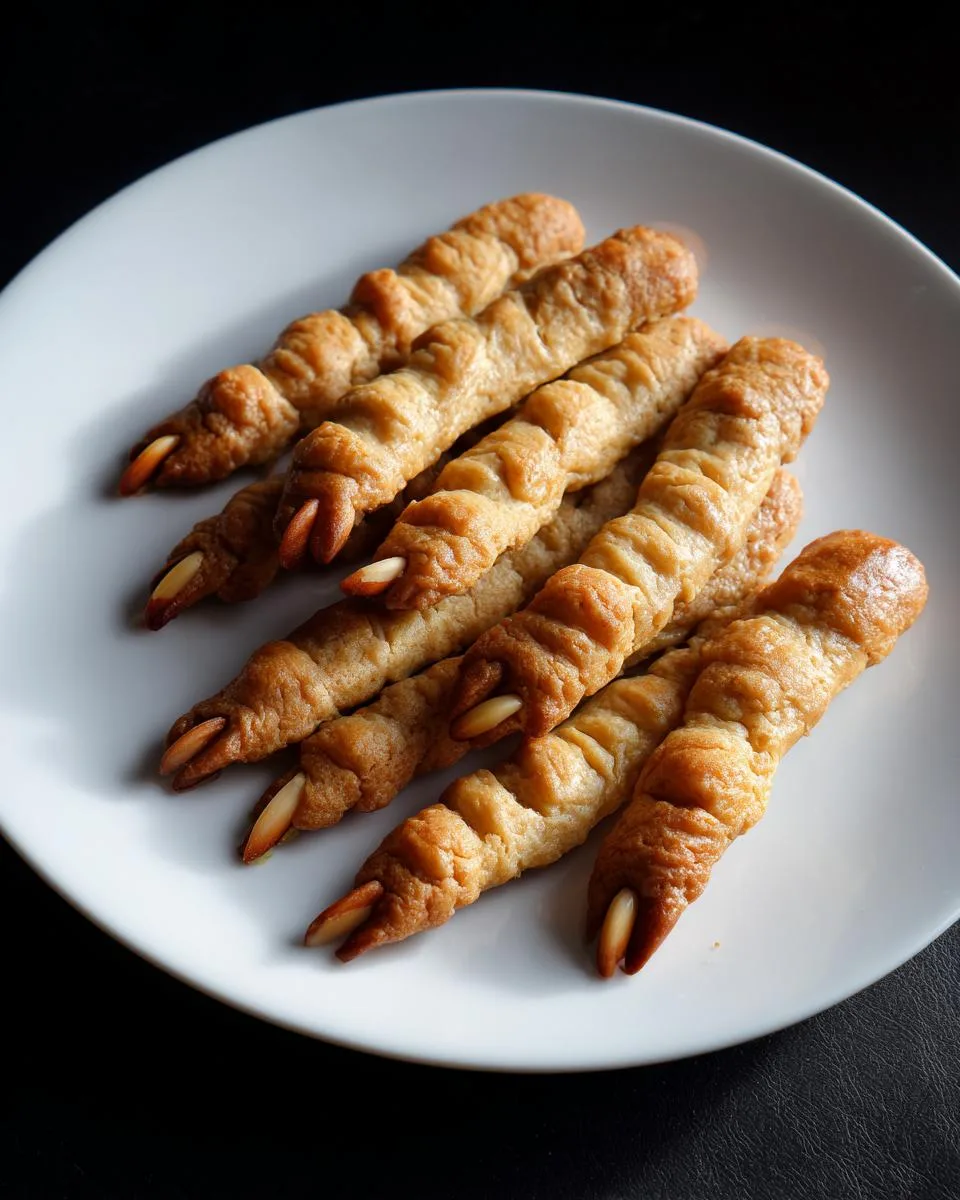
Blanched almonds are key – their smooth, pale surface makes perfect witch fingernails. Regular almonds won’t give that creepy-realistic look (trust me, I learned the hard way!). If you’re in a pinch, white chocolate chips or slivered almonds can work too.
Butter must be softened – not melted! – for easy mixing. For dairy-free, coconut oil works surprisingly well, though the texture changes slightly. And that chill time? Non-negotiable. It stops the dough from sticking to your hands when shaping those ghoulish fingers.
Equipment You’ll Need for Witch Finger Cookies
Grab these basic tools before you start:
- Food processor (or strong arms for hand-mixing)
- 2 baking sheets
- Parchment paper – lifesaver for easy cleanup!
- Sharp knife for almond splitting and knuckle details

That’s it – no fancy gadgets required! Though I sometimes use a ruler to keep my witch fingers eerily uniform.
How to Make Witch Finger Cookies
Ready to create some edible magic? Here’s my foolproof method for perfect Witch Finger Cookies every time:
- Pulse it together: In your food processor, combine flour, powdered sugar, butter, and salt. Process just until the dough starts clumping together – don’t overmix!
- Knead & chill: Turn dough onto a clean surface, gently knead into a smooth ball, then flatten into a disk. Wrap tightly in plastic and refrigerate for 1 hour (this step is crucial!).
- Prep your “nails”: While dough chills, carefully split almonds lengthwise with a sharp knife. Have extras ready – some always break!
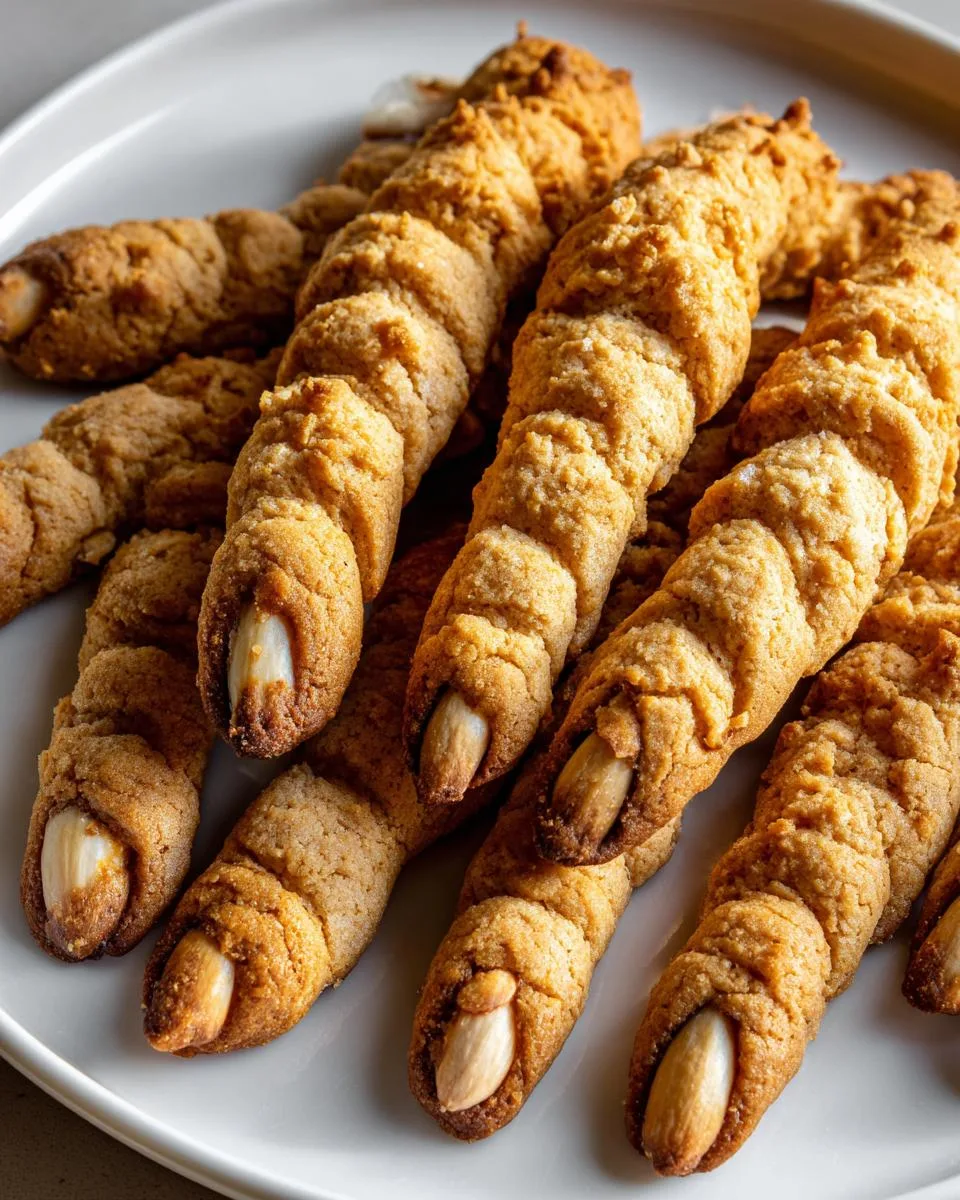
- Shape those fingers: Let dough soften slightly at room temp. Pinch off walnut-sized pieces, roll into 3-inch logs, and taper one end. Press an almond half onto each rounded tip.
- Add creepy details: Use a knife to make three shallow lines near the “nail” and a few more down the “finger” for knuckles. Get creative with bends and wrinkles!
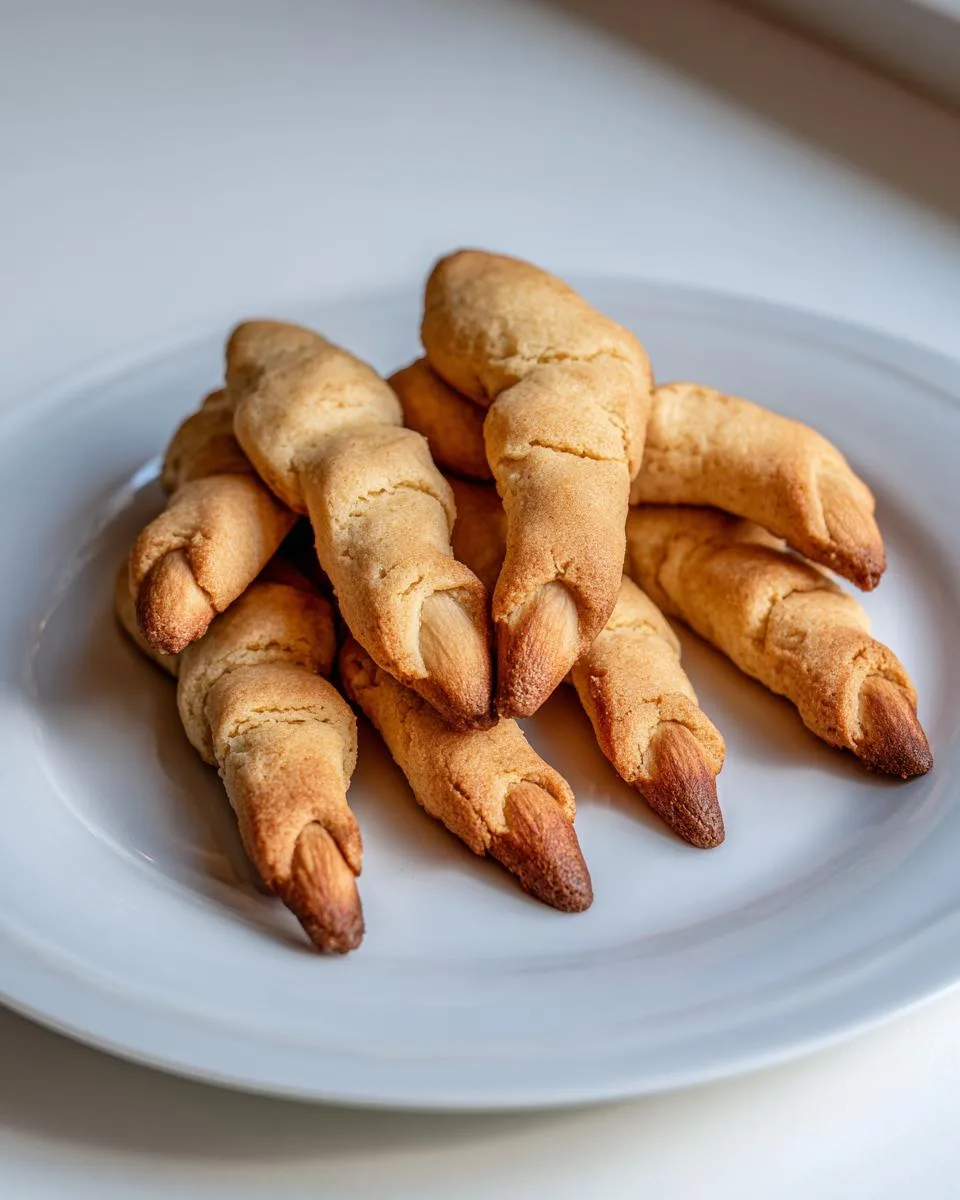
- Bake to perfection: Arrange on parchment-lined sheets and bake at 320°F for 12-15 minutes until just golden at the edges.
Shaping the Witch Finger Cookies
This is where the magic happens! Roll each dough piece between your palms first, then gently elongate into finger shapes. If dough sticks, dust hands lightly with flour. Press almonds firmly enough to stay put, but don’t flatten the tips completely. For extra-creepy fingers, make some bent at the knuckles by gently pressing the middle before baking. If a finger breaks (happens to the best of us!), just smoosh it back together – the cracks add character!
Baking the Witch Finger Cookies
Keep your oven at 320°F – any hotter and the almond “nails” might brown too fast. The cookies are done when they look dry and have the faintest golden hue at the edges. They’ll firm up as they cool, so don’t wait for them to brown! Let them rest on the baking sheet for 5 minutes before transferring to a rack – fresh-from-the-oven witch fingers are fragile little things.
Print
26 Spooky Witch Finger Cookies That Steal the Show
- Prep Time: 1 hour 15 minutes
- Cook Time: 15 minutes
- Total Time: 1 hour 30 minutes
- Yield: 20 cookies 1x
- Category: Dessert
- Method: Baking
- Cuisine: American
- Diet: Vegetarian
Description
Witch Finger Cookies are a spooky and fun treat perfect for Halloween. These buttery, almond-topped cookies look just like creepy fingers.
Ingredients
- 3 cups (375 grams) all purpose flour
- 1 cup (110 grams) powdered sugar
- 1 cup (2 sticks/240 grams) unsalted butter, softened
- ½ teaspoon salt
- 20 blanched almonds for decorating
Instructions
- In a food processor, combine flour, powdered sugar, butter, and salt. Process until it comes together.
- Scrape dough onto a work surface. Knead gently to form a smooth dough.
- Flatten dough into a disk. Wrap in plastic and refrigerate for 1 hour.
- While chilling, use a knife to split almonds in half lengthwise.
- Preheat oven to 320°F/160°C. Line baking sheets with parchment paper.
- Let dough soften slightly before shaping.
- Cut small portions of dough and roll into finger-sized logs.
- Shape one end to be rounded. Press a split almond on the end for a fingernail.
- Use a knife to press three lines near the nail and further down for knuckles.
- Place on baking sheets and bake for 12-15 minutes until lightly colored.
- Cool for 5 minutes on the sheet, then transfer to a wire rack.
Notes
- Have extra almonds on hand in case some split unevenly.
- Chilling the dough makes it easier to handle.
- These cookies store well in an airtight container for up to a week.
Nutrition
- Serving Size: 1 cookie
- Calories: 150
- Sugar: 5g
- Sodium: 60mg
- Fat: 8g
- Saturated Fat: 5g
- Unsaturated Fat: 2g
- Trans Fat: 0g
- Carbohydrates: 18g
- Fiber: 1g
- Protein: 2g
- Cholesterol: 20mg
Tips for Perfect Witch Finger Cookies
After years of making (and occasionally breaking) Witch Finger Cookies, here are my hard-earned secrets for spooky success:
- Almond insurance: Buy extra almonds – about 30% more than you need. Splitting them is tricky, and you’ll want perfect “nails” for all your fingers!
- Chill out: If the dough gets sticky while shaping, pop it back in the fridge for 10 minutes. Cold dough = easier handling and cleaner details.
- Size matters: Use a ruler to keep fingers uniform (about 3 inches). I pinch off dough balls the size of whole walnuts for consistency.
- Bend for realism: Not all fingers are straight! Gently curve some before baking for extra-creepy dimension.
Follow these tips and your Witch Finger Cookies will look professionally terrifying! (In the best way possible, of course.)
Storing and Serving Witch Finger Cookies
These creepy cookies keep beautifully in an airtight container at room temperature for up to a week – if they last that long! For extra freshness, I sometimes slip a slice of bread in the container (sounds weird, but it works!). Serve them poking out of a “graveyard” of crushed Oreos or arranged on a tray with other spooky treats. The dramatic presentation always gets screams of delight!
Witch Finger Cookies Nutrition Information
Just so you know, these nutrition facts are estimates based on my exact ingredients – your Witch Finger Cookies might vary slightly! Per delightfully creepy cookie:
- 150 calories
- 5g sugar
- 8g fat (5g saturated)
- 18g carbs
- 1g fiber
- 2g protein
Not bad for such a fun treat! The almonds add protein, while the butter gives that irresistible melt-in-your-mouth texture. Moderation is key… unless it’s Halloween, then all bets are off!
Witch Finger Cookies FAQs
Can I use different nuts instead of almonds?
Absolutely! While blanched almonds give the classic look, you could use slivered almonds, whole cashews, or even white chocolate chips for the “nails.” Just keep in mind – the creep factor changes with each option! I once used pistachio shells for a zombie version (messy but awesome).
Can I make Witch Finger Cookies ahead of time?
You bet! The dough keeps wrapped in the fridge for 3 days, or freeze shaped-but-unbaked fingers for up to a month. Thaw before baking. Baked cookies stay fresh in an airtight container for a week. Pro tip: Add the almonds right before serving if making days ahead – they stay crisper!
How can I make these vegan?
Easy swap! Use plant-based butter and check your powdered sugar isn’t processed with bone char. The texture changes slightly, but they’re still deliciously creepy. For egg-free “glue” to attach nut nails, a dab of corn syrup works in a pinch.
Help! My witch fingers broke – can I fix them?
Don’t panic! Use melted white chocolate as “glue” for snapped fingers. Or lean into it – broken cookies look extra gruesome! I once arranged fragments to look like skeletal hands and called it a feature, not a flaw.
Final Thoughts on Witch Finger Cookies
There you have it – everything you need to create the spookiest, tastiest Witch Finger Cookies this Halloween! I can’t wait for you to try this recipe and see those shocked (then delighted) faces when you serve them. Snap a photo of your creepy creations and tag me – I love seeing all the creative twists bakers come up with! Now go forth and make some edible magic.
For More recipes Follow me on Facebook


