Picture this: a dark, stormy Halloween night, the smell of freshly baked chocolate cake filling the air, and a coven of spooky witch legs peeking out from your dessert table—that’s exactly what you’ll get with this Witches Brew Halloween Cake! I first made this showstopper for my niece’s Halloween party last year, and let me tell you, the kids went absolutely wild. The adults weren’t far behind either—apparently, boozy witches and chocolate cake make for an irresistible combination at any age.
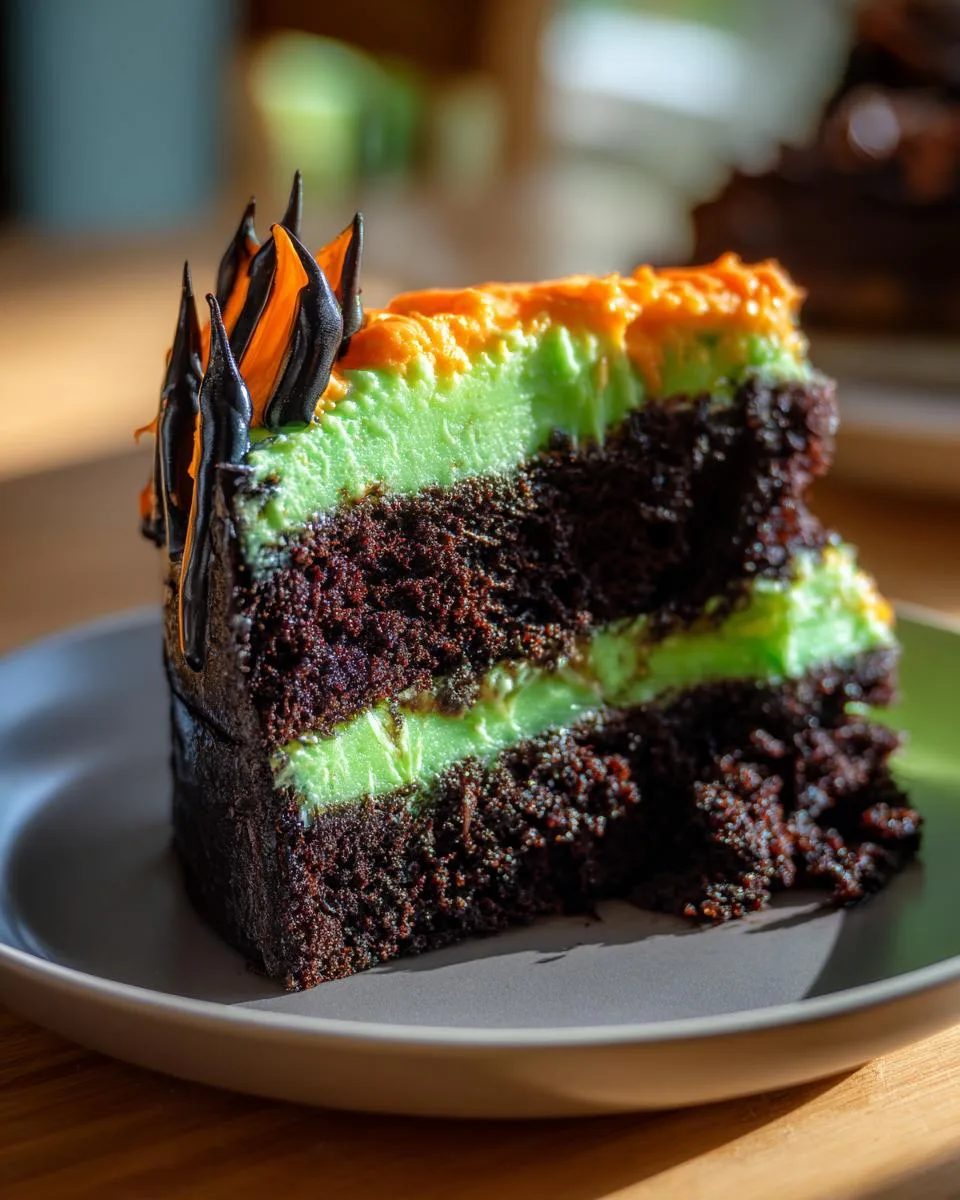
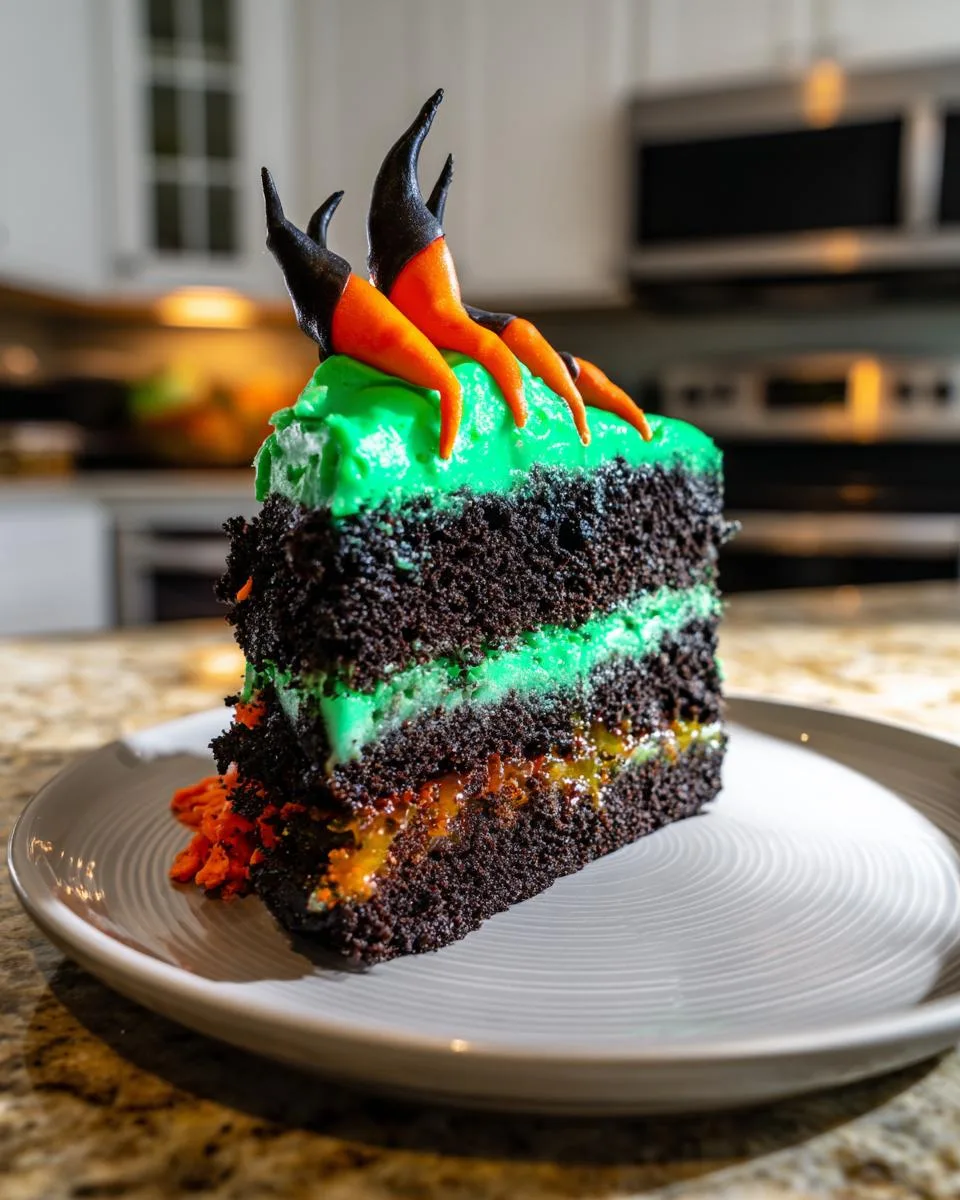
What makes this cake so special? Imagine the richest, moistest chocolate cake you’ve ever tasted—thanks to that perfect mix of black cocoa powder and six whole eggs—served in individual jars topped with electric green frosting that glows under blacklight. But the real magic? Those creepy-cute witch legs made from orange and black fondant that look like they’re bursting right out of the cake!
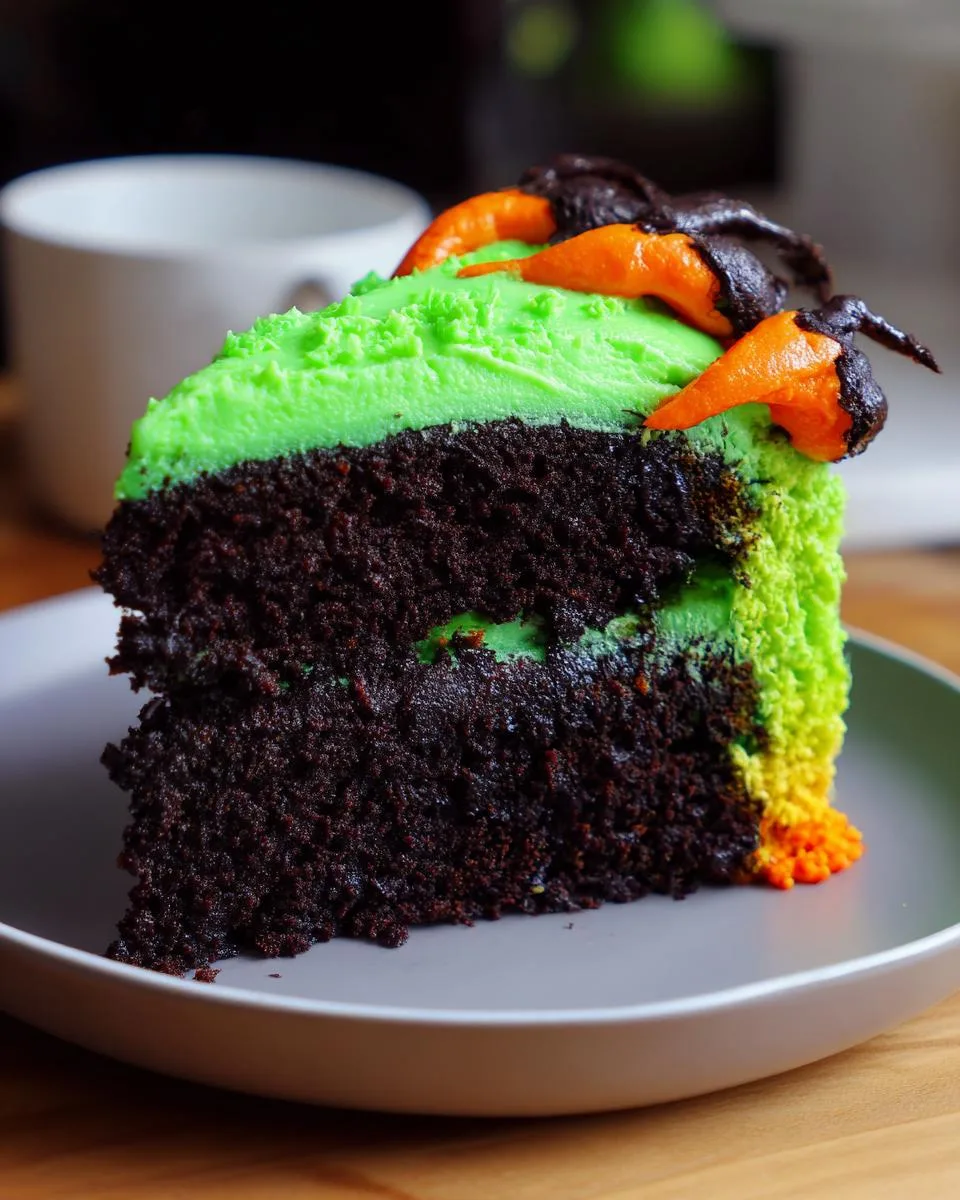
Table of Contents
Table of Contents
I’ll never forget the gasp when I unveiled this dessert at the party. My cousin’s five-year-old actually screamed (the good kind of scream) when she saw the first witch leg poking out. That’s when I knew this recipe was a keeper. Whether you’re hosting a full-blown Halloween bash or just want to surprise your coworkers with something fun, this cake brings the perfect mix of spooky and delicious to any celebration.
Why You’ll Love This Witches Brew Halloween Cake
Oh, where do I even start? This cake is like Halloween magic in edible form – trust me, once you make it, you’ll understand why it’s become my go-to party showstopper. Here’s why you’re gonna fall head over witchy heels for it:
- Fondant is easier than you think! Those spooky legs look impressive, but shaping them is seriously simple – like adult Play-Doh. The fondant holds its shape beautifully, and if you mess up? Just squish it and start again!
- That deep, dark chocolate flavor from the black cocoa powder makes this cake taste as mysterious as it looks. My neighbor still swears I added “magic dust” to the batter.
- Perfect make-ahead dessert – the legs can dry overnight while you sleep, and the cake stays moist for days. No last-minute panic before your party!
- Instant Halloween vibes – the witch legs poking out always get screams (the good kind). Last year, one guest actually jumped when she saw them – best reaction ever!
Bottom line? This cake combines the best of both worlds: insanely tasty chocolate cake that’s actually easy to make, with decorations that’ll make you look like a pastry wizard. What’s not to love?
Ingredients for Witches Brew Halloween Cake
Alright, let’s gather our magical ingredients – this is where the real witch’s brew begins! I’ve learned through trial and error (and a few cake disasters) that quality and preparation make all the difference here. Trust me, you’ll want everything measured and ready before you start chanting… I mean, baking!
For the Spooky Chocolate Cake:
- 330 g self-raising flour – sifted (no lumps allowed in our cauldron!)
- 360 g granulated sugar – the sweet foundation of any good spell
- 360 g unsalted butter – softened (leave it out for 30 minutes – it should dent when poked)
- 6 large eggs – room temperature (cold eggs are the enemy of fluffy cakes)
- 30 g unsweetened black cocoa powder – this gives that deep, dark magical color
- 1½ teaspoon baking powder – our rising potion
- ½ teaspoon salt – to balance all that sweetness
- 90 ml whole milk – the richer, the better
- 2 teaspoons vanilla extract – pure, never imitation!
For the Electric Green Frosting:
- 400 g salted butter – softened (salted gives the perfect sweet-salty balance)
- 800 g powdered sugar (icing sugar) – sifted to avoid lumps
- 1¼ teaspoon vanilla extract
- 2 tablespoons milk or cream (optional – only if your frosting needs loosening)
- Electric green food coloring – gel works best for vibrant color
For the Witch Legs Decoration:
- 250 g orange fondant – kneaded until soft and pliable
- 200 g black fondant – for those classic witch stockings
- 1 tablespoon CMC powder – this helps the fondant hold its shape
- Sprinkles – because every witch needs a little sparkle!
Pro tip from my kitchen disasters: Measure everything before starting! There’s nothing worse than realizing you’re short an egg mid-bake. And please, for the love of all things spooky, use room temperature ingredients – they blend so much better. Now, let’s get brewing!
Equipment You’ll Need
Before we start our witchy baking adventure, let’s gather our magical tools! You probably have most of these already – I know my kitchen drawers seem to breed baking pans somehow. Here’s what you’ll need:
- 9-inch square cake tin – greased and floured (or use my favorite cake goop!)
- Electric mixer – stand or hand-held, your arms will thank you
- Fondant rolling pin – or a clean wine bottle in a pinch
- Airtight container – to keep those fondant legs from drying out
- Skewer – the ultimate cake doneness tester
- Sharp knife – for leveling cake layers
- Silicone spatulas – because scraping bowls clean is sacred
See? Nothing too crazy – just your basic baking arsenal with a few specialty items. Now grab your witch’s hat (optional but highly recommended!), and let’s get cooking!
How to Make Witches Brew Halloween Cake
Alright, witches and warlocks – let’s brew up some magic! This cake comes together in three spooktacular acts: crafting the legs, baking the cake, and assembling our creepy creation. Follow these steps closely – I’ve learned all the tricks (and fixed all the mistakes) so you don’t have to!
Preparing the Witch Legs Fondant
First, let’s make those showstopping legs – trust me, they’re easier than they look! Knead the CMC powder into your orange fondant until it’s completely incorporated – this is like giving your fondant superpowers to hold its shape. Roll it into thick ropes about the length of your hand, then gently taper one end for the foot. Now the fun part – cut thin strips of black fondant and lightly brush the orange legs with water (just a dab!) before pressing the stripes on. Smooth them gently with your fingers – they should look like wicked witch stockings! Shape little black shoes for the tapered ends and let these beauties dry overnight. Pro tip: Store them in an airtight container so they don’t turn into actual witch jerky!
Baking the Chocolate Cake
Preheat your oven to 170°C – this low-and-slow approach gives us that perfect moist texture. Now, let’s cream that butter and sugar together until it’s pale and fluffy – about 3-4 minutes with a mixer. This step is crucial – don’t rush it! Add eggs one at a time, mixing well after each. In another bowl, whisk together your dry ingredients – flour, cocoa powder (that magical black stuff!), baking powder, and salt. Alternate adding the dry mix and milk to your butter mixture, starting and ending with dry. Fold gently – we want airy, not tough! Pour into your prepared pan and bake for 45-50 minutes. Do the skewer test – it should come out with moist crumbs, not wet batter. Let it cool completely before slicing – I know it’s tempting, but warm cake crumbles like a haunted house!
Assembling the Witches Brew Cake
The grand finale! Slice your cooled cake into cubes – rustic is totally fine here, we’re going for “cauldron-stirred” vibes. Now layer those chunks into clear jars or glasses with alternating spoonfuls of your electric green frosting and sprinkles – the messier it looks, the better! Leave about an inch at the top, then dramatically angle those fondant legs into the cake so they peek over the rim like a witch taking a dip. Stand back and admire your masterpiece – you’ve just created edible Halloween magic! The contrast of the dark cake against that neon frosting with the legs crawling out always gets gasps at parties. Just try not to cackle too loudly when everyone freaks out!
Print
Spooky Witches Brew Halloween Cake in 6 Easy Steps
- Prep Time: 1 hour
- Cook Time: 50 minutes
- Total Time: 1 hour 50 minutes (plus drying time for fondant)
- Yield: 9 cake jars 1x
- Category: Dessert
- Method: Baking
- Cuisine: American
- Diet: Vegetarian
Description
A spooky Halloween-themed cake featuring black and orange witch legs, perfect for a festive treat.
Ingredients
- 330 g self-raising flour
- 360 g granulated sugar
- 360 g butter
- 6 eggs
- 30 g unsweetened black cocoa powder
- 1½ teaspoon baking powder
- ½ teaspoon salt
- 90 ml milk
- 2 teaspoon vanilla extract
- 400 g salted butter (for frosting)
- 800 g powdered sugar (icing sugar)
- 1¼ teaspoon vanilla extract
- 2 tablespoon milk or cream (optional)
- Electric green food coloring (a few drops)
- 250 g orange fondant
- 200 g black fondant
- 1 tablespoon CMC powder
- Sprinkles
Instructions
- Knead CMC into orange fondant, roll into strips for legs, and keep covered.
- Roll black fondant into thin stripes, attach to dampened orange legs, and smooth.
- Shape black fondant into shoes, attach to legs, and let dry overnight.
- Preheat oven to 170°C. Grease and flour a 9-inch square cake tin.
- Cream butter and sugar, add eggs, then fold in dry ingredients and milk.
- Bake for 45-50 minutes, cool, then slice into layers.
- Whip butter, powdered sugar, vanilla, and food coloring for frosting.
- Assemble cake layers in jars with sprinkles and buttercream.
- Insert witch legs into the cake jars for decoration.
Notes
- Store fondant legs in an airtight container to prevent drying.
- Adjust frosting consistency with milk or cream if too stiff.
- Use a skewer to test cake doneness before removing from oven.
Nutrition
- Serving Size: 1 cake jar
- Calories: 650
- Sugar: 75 g
- Sodium: 400 mg
- Fat: 35 g
- Saturated Fat: 22 g
- Unsaturated Fat: 10 g
- Trans Fat: 1 g
- Carbohydrates: 80 g
- Fiber: 2 g
- Protein: 6 g
- Cholesterol: 180 mg
Tips for the Perfect Witches Brew Halloween Cake
Listen, I’ve made this cake more times than I can count (and survived a few fondant disasters!), so here are my hard-earned secrets for witchy baking success: First, store those fondant legs in an airtight container the second they’re shaped – nothing ruins the magic faster than dried-out witch limbs! If your frosting feels stiff as a broomstick, add milk one teaspoon at a time until it’s spreadable but still holds peaks. And please – use gel food coloring for that electric green frosting! Liquid coloring makes it runny and pale, while gel gives you that perfect neon glow. Oh, and when attaching the black stripes, just dampen the fondant slightly – too much water turns your witch stockings into a melted mess!
Witches Brew Halloween Cake Variations
Want to put your own spooky spin on this cake? Try swapping the orange fondant for purple – instant wicked witch vibes! Or mix up the sprinkles with black and orange bats instead of the classic colors. For extra magic, dust the legs with edible glitter – nothing says “enchanted” like sparkly witch stockings! Last Halloween, I added tiny fondant spiders crawling up the legs – the kids went nuts (in the best way). The beauty of this recipe? It’s like a costume for your cake – dress it up however you like!
Storing and Serving Witches Brew Halloween Cake
Pop those cake jars in the fridge if you’re not serving them right away – the frosting and fondant will stay happy for up to 3 days. Just remember to let them sit at room temperature for about 20 minutes before serving – cold buttercream tastes like regret! And whatever you do, don’t try to microwave these – fondant and heat are mortal enemies. Trust me, I learned that lesson the hard way when my witch legs melted into a horror show!
FAQs About Witches Brew Halloween Cake
Got questions about your witchy baking adventure? I’ve got answers – learned from all my own kitchen experiments (and yes, a few hilarious fails). Here’s what people ask me most about this spooktacular cake:
Can I skip the fondant for the witch legs?
Absolutely! If fondant feels too fussy, try modeling chocolate instead – it’s way more forgiving. Or go simple with pre-made cookie sticks dipped in orange and black candy melts. Not quite as dramatic, but still totally festive!
How far ahead can I make this cake?
The fondant legs can chill in their airtight container for up to 3 days before baking day. Bake the cake 1 day ahead – it actually gets more moist! Just assemble everything the morning of your party so those legs stay perfectly perky.
Help! My frosting is too runny!
Been there! Pop it in the fridge for 15 minutes to firm up, then beat in more powdered sugar a tablespoon at a time. If it’s too stiff? A teaspoon of milk or cream will save the day.
Can I make this in a regular cake pan?
You bet! Skip the jars and bake in two 8-inch rounds. Frost all over, then plant those witch legs right into the top – instant haunted cake! Just note the baking time might be 5 minutes shorter.
What’s the best way to transport these?
Line a baking sheet with non-slip shelf liner, then nestle your jars in. The legs travel best if you insert them after arriving – bring them in their container and do the final assembly on-site for maximum “wow” factor!
Witches Brew Halloween Cake Nutritional Information
Okay, let’s be real – this is Halloween dessert, not health food! But in case you’re curious (or keeping track), here’s the scoop per cake jar: about 650 calories, 75g sugar (hey, witches need energy!), and 35g fat. Important: These are estimates – actual numbers depend on your specific ingredients and how generously you frost those jars! Now go enjoy your spooky treat – witches don’t count calories on Halloween!
For More recipes Follow me on Facebook!


