Is there anything more fun than a brunch that looks as good as it tastes? I still remember the first time I threw together a red white blue brunch board for a Fourth of July gathering – my friends went wild snapping photos before they even took a bite! That’s the magic of these colorful spreads – they’re practically guaranteed to stop guests in their tracks.
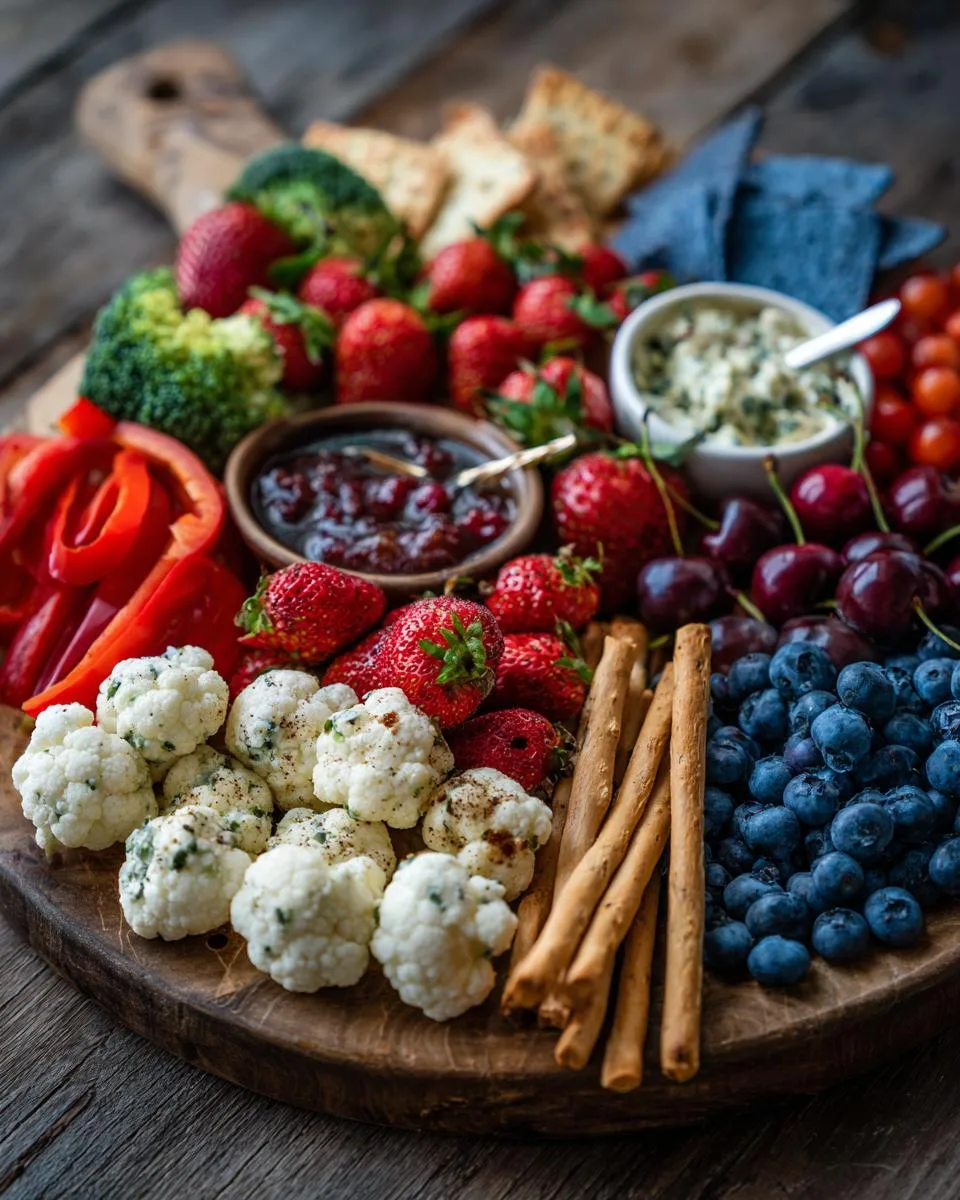
Table of Contents
Table of Contents
Why You’ll Love This Red White Blue Brunch Board
What I love most is how shockingly easy it is to pull off. You’re basically just arranging gorgeous ingredients – no cooking required! Fresh strawberries, plump blueberries, creamy mozzarella balls, and crunchy veggies do all the work for you. The patriotic color scheme happens naturally when you let seasonal produce shine.
Trust me, this Bismarck brunch board has become my secret weapon for summer entertaining. Whether it’s Memorial Day, Labor Day, or just a casual Sunday with friends, this spread always disappears fast. The best part? You can customize it based on what’s at the farmers market or what率先 your crowd prefers. Picky eaters, vegetarians, kids – everyone finds something to love on this vibrant board.
Last weekend, I threw one together in under 20 minutes when surprise guests arrived. As I set it down with a flourish (okay, maybe I did a little twirl), the oohs and aahs made me grin. That’s the power of good food presented beautifully!
- Zero cooking required – I’m all about that no-heat kitchen life in summer!
- Instagram-worthy presentation that makes guests gasp (then immediately grab their phones)
- Works for any group size – just double the ingredients for big crowds
- Customizable for diets – gluten-free? Swap in more fruit. Vegan? Skip the cheese. So easy!
- Perfect make-ahead party trick – prep everything morning-of while still in pajamas
- Colorful edible centerpiece that frees up your hands to sip mimosas
- Kid-friendly but still chic – my niece calls it the “fireworks plate”
Ingredients for Your Red White Blue Brunch Board
Okay, let’s dive into the star players for this showstopping board! I always shop the day before so everything’s fresh and crisp. Here’s exactly what you’ll need (and yes, I’ve learned these quantities the hard way through many trial runs!):
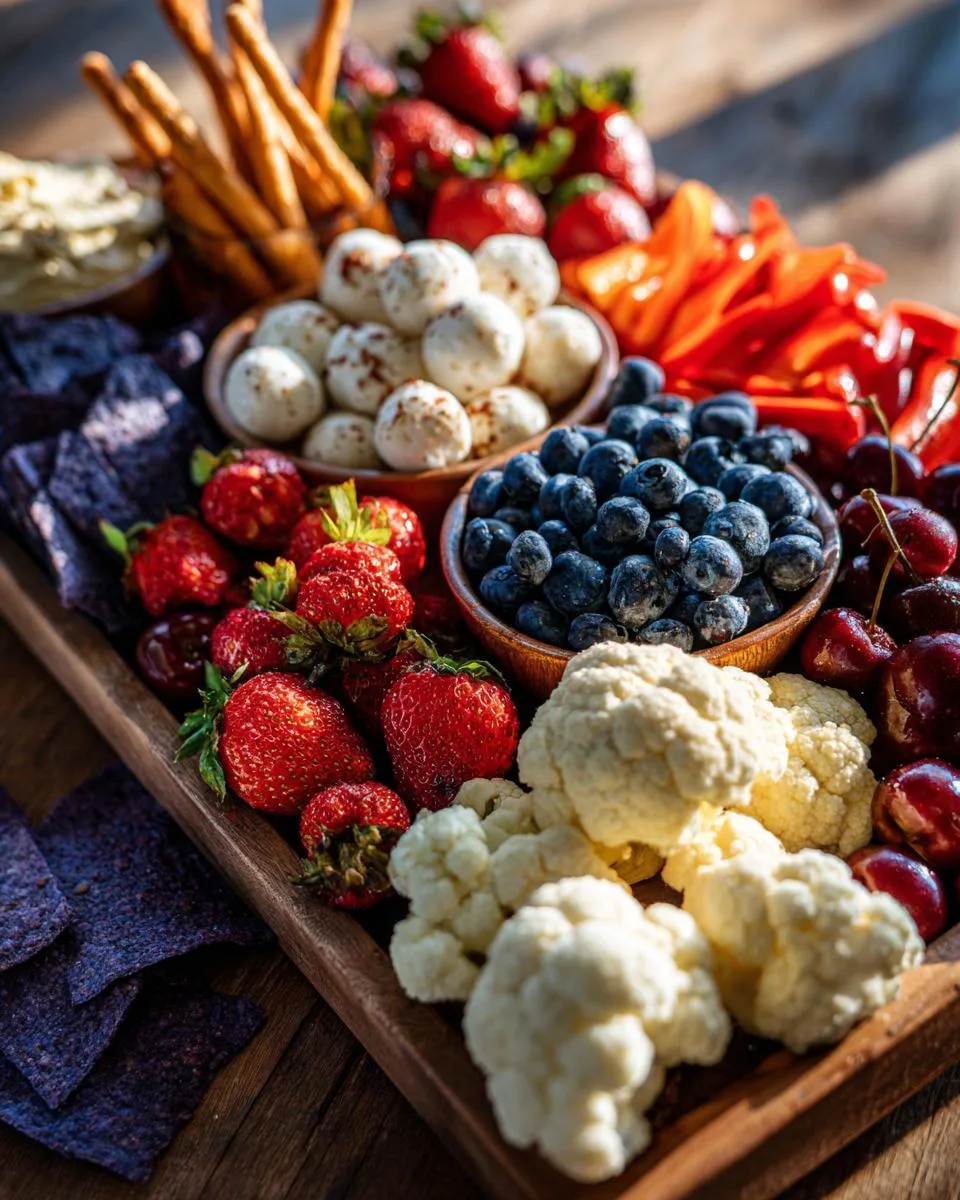
- Red team: 16 oz strawberries (hulled and halved), 16 oz cherries (pitted if you’re fancy), 1 red pepper (thinly sliced), 1 bunch radishes (trimmed and halved), 1 cup pico de gallo or your favorite salsa
- White squad: 12 oz cauliflower florets, 8 oz marinated mozzarella balls (drained), 4 oz white cheddar or goat cheese (cubed), 1 cup hummus (I sprinkle mine with feta!), yogurt-covered pretzels
- Blue crew: 1 pint blueberries (12 oz, washed and patted dry), blue corn tortilla chips (trust me, they make the board pop!)
A little pro tip from my many brunch board experiments: prep your cheeses differently for visual interest. Cube the cheddar but leave mozzarella balls whole – the round shapes contrast beautifully with sliced veggies. And don’t skip drying those blueberries thoroughly! Nothing worse than berry juice bleeding onto your gorgeous white cheeses.
Want to know my favorite last-minute addition? Toss a handful of fresh mint leaves over everything right before serving. That pop of green makes all the colors sing!
Equipment Needed
Okay, confession time – I once tried assembling one of these boards directly on my countertop when I couldn’t find a big enough surface. Let’s just say it turned into more of a “red white blue brunch puddle” than a board! Here’s what you’ll actually need to make this look effortlessly gorgeous:
- Large cutting board or baking sheet – My go-to is an 18×24 inch wood board, but a rimmed baking sheet works great too (plus it’s easier to carry outside!)
- Small bowls or ramekins – About 3-4 for dips like hummus and salsa – trust me, nobody wants dip rivers running through their cheese
- Serving utensils – Tiny spoons for dips, a small knife for cheese, and maybe some tongs if you’re fancy
That’s seriously it! No special gadgets required. Though I will say, having parchment paper on hand makes cleanup about 100 times easier when you’re dealing with juicy berries and sticky cheeses.
How to Assemble Your Red White Blue Brunch Board
Okay, let’s get to the fun part – arranging this edible masterpiece! I’ve made this board so many times I could probably do it in my sleep, but here’s my foolproof method that always gets compliments:
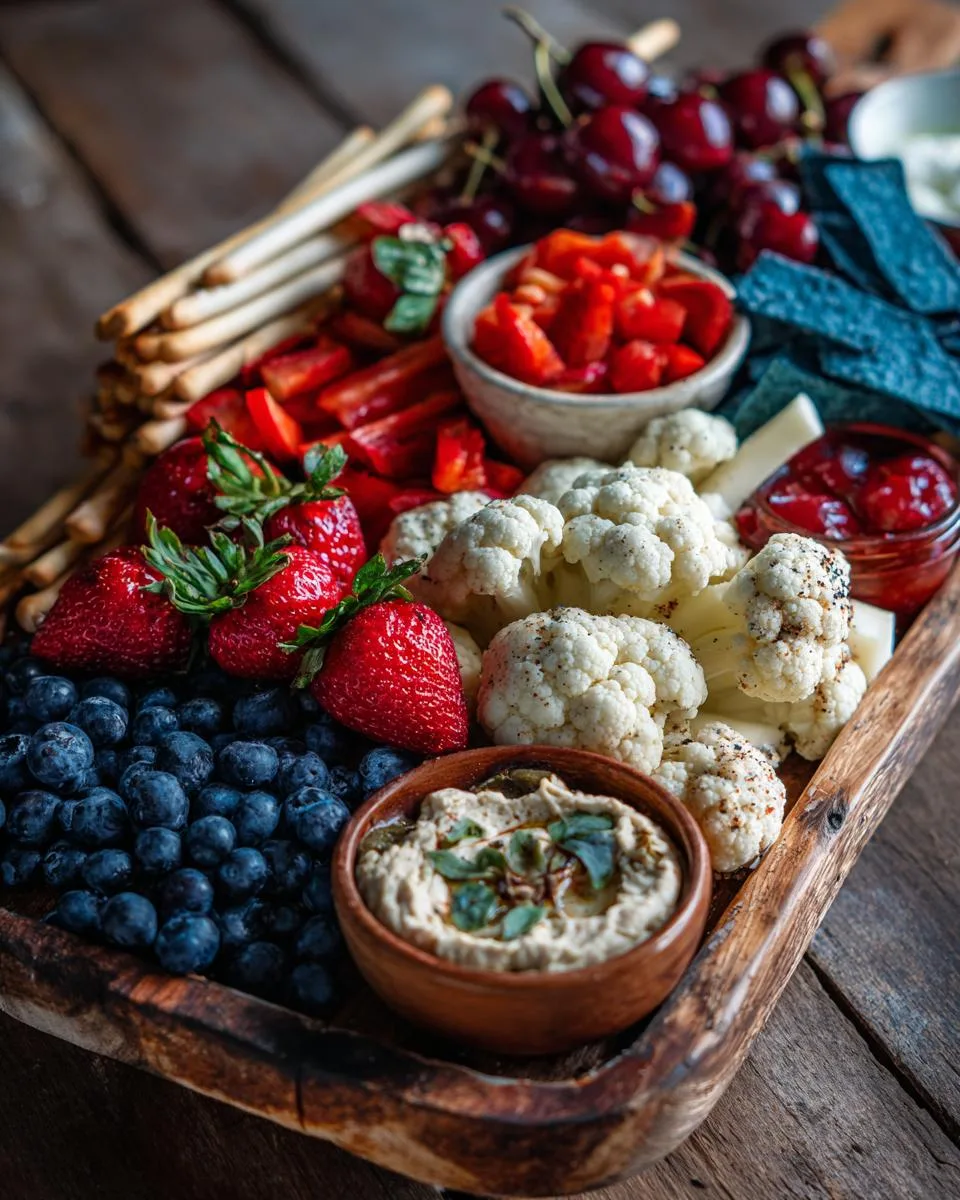
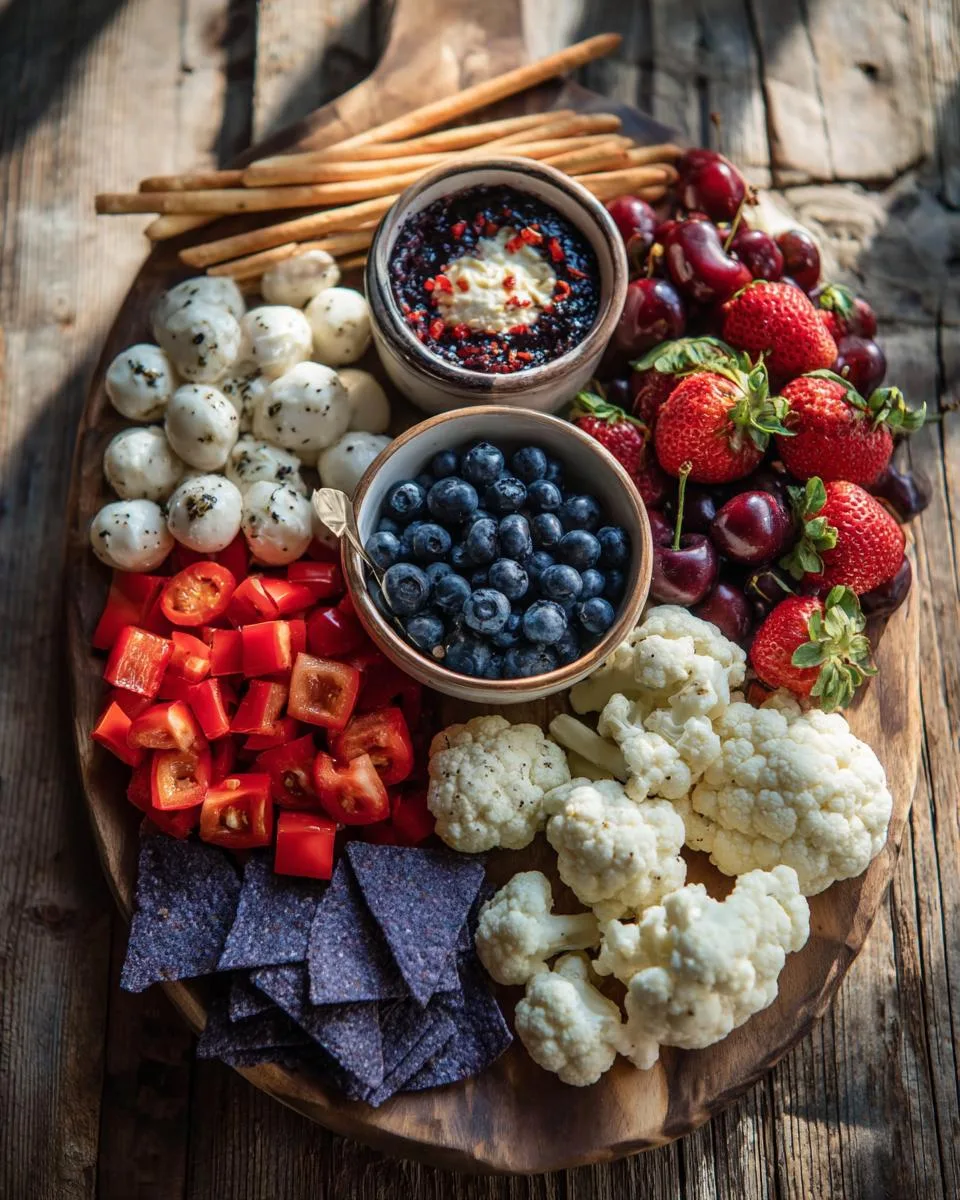
- Start with your anchors – Place your small bowls of hummus and salsa first, spacing them out evenly. These are like your board’s “islands” that everything else will flow around.
- Build your color sections – Working one color at a time, arrange ingredients in little clusters. For red, I love fanning strawberry halves around the bowl and making a pepper “ribbon.” Blueberries look gorgeous piled near the chips like they’re spilling out.
- Slice and dice strategically – Cut mozzarella balls in half so their creamy centers show (so pretty against the reds!). Cube the cheddar for easy grabbing. Keep some radishes whole and slice others for texture.
- Fill in the gaps – Tuck breadsticks between sections, scatter yogurt pretzels like edible confetti, and let a few blueberries “escape” into other color zones for a natural look.
- Chill until showtime – Pop the whole board in the fridge for 10 minutes before serving (cover lightly with plastic wrap). Cold dips stay firmer, and cheeses won’t sweat.
- Final flourishes – Right before serving, add any delicate herbs or a light sprinkle of sea salt over the cheeses. I sometimes drizzle honey over the goat cheese for extra wow factor!
Transport tip: If taking this to a party, assemble on a baking sheet, then slide parchment paper under any messy items (like berries) for easy cleanup later. And pack chips separately in a bag to maintain their crunch!
Pro Tips for the Perfect Brunch Board
- Dry those berries! A salad spinner works wonders for blueberries – wet fruit makes everything soggy fast.
- Prep last-minute – Chop veggies and cheese no more than an hour before serving for peak freshness.
- Parchment is your friend – Line your board first for effortless cleanup (learned this after scrubbing berry stains for days).
- Odd numbers please the eye – Group items in 3s or 5s for a more professional look.
- Keep backups handy – Have extra berries and chips ready to refresh the board as it gets nibbled.
20-Minute Red White Blue Brunch Board That Wows
- Prep Time: 20 minutes
- Cook Time: 0 minutes
- Total Time: 20 minutes
- Yield: 8 servings 1x
- Category: Brunch
- Method: No-Cook
- Cuisine: American
- Diet: Vegetarian
Description
A vibrant and colorful brunch board featuring red, white, and blue ingredients for a festive presentation.
Ingredients
- 1 bunch radishes
- 1 red pepper
- 12 oz. cauliflower florets
- 16 oz. strawberries
- 16 oz. cherries
- 1 pint blueberries (12 oz.)
- pico de gallo (or salsa)
- prepared hummus (sprinkle with feta if desired)
- marinated mozzarella cheese balls
- white cheddar or goat cheese
- Italian breadsticks
- blue corn tortilla chips
- yogurt/chocolate covered pretzels
Instructions
- Prepare ingredients: Wash and trim fruit and veggies.
- Put dips/spreads into small dishes or bowls.
- Cube cheese.
- Place ingredients on a big cutting board or baking sheet. (Baking sheets make it easier to transport if you’re taking it outside!).
Notes
- Use fresh ingredients for best flavor.
- Adjust quantities based on the number of guests.
- Keep dips chilled until serving.
Nutrition
- Serving Size: 1 serving
- Calories: 250
- Sugar: 15g
- Sodium: 200mg
- Fat: 10g
- Saturated Fat: 4g
- Unsaturated Fat: 5g
- Trans Fat: 0g
- Carbohydrates: 35g
- Fiber: 5g
- Protein: 8g
- Cholesterol: 15mg
Ingredient Substitutions & Variations
The beauty of this brunch board is how easily you can swap ingredients based on what’s in season or what your crew prefers. Here are my favorite ways to mix it up while keeping that gorgeous patriotic color scheme:
- Red alternatives: Can’t find good cherries? Raspberry clusters work wonderfully. Watermelon cubes add juicy sweetness, and grape tomatoes bring a nice pop if you want more savory options.
- White swaps: Not a hummus fan? Try whipped feta dip or ranch in a pinch. For cheese, bocconcini makes a lovely mozzarella substitute, and brie wedges feel extra fancy (just remove the rind for pure white appeal).
- Blue tweaks: If blueberries aren’t available, blackberries have a similar deep hue. Blue cheese crumbles add a sophisticated kick for adult gatherings.
- Dietary adaptations: Going vegan? Swap regular cheese for plant-based alternatives (I love almond-based mozzarella). Gluten-free? Skip the breadsticks and add more crunchy veggies.
The key is maintaining that visual color balance – as long as you keep roughly equal amounts of red, white, and blue elements, your board will look stunning. Last summer I did a version with red grapes, white nectarines, and blue corn chips that disappeared in minutes!
Want to make it heartier? Add some protein with red pepper hummus, white bean dip, and blue corn crackers. The possibilities are endless – that’s why this board has become my summer staple! If you’re looking for more recipe inspiration, check out my collection of recipes.
Serving Suggestions
This red white blue brunch board practically begs to be the centerpiece of your most festive gatherings! I love serving it with pitchers of peach Bellinis (just peach puree and prosecco) for adult parties – the golden hue looks stunning against the patriotic colors. For daytime events, an iced hibiscus tea with mint makes a gorgeous non-alcoholic pairing that complements the fruity elements.
The board shines brightest at Fourth of July barbecues (obviously!), but don’t limit yourself – I’ve served variations for:
- Memorial Day brunches (with patriotic cupcakes on the side)
- Baby showers when the theme colors match
- Graduation parties with school colors
- Summer bridal showers (so much prettier than plain sandwiches!)
My favorite trick? Set up a “build your own mimosa” bar nearby with different juices and berries. Guests can nibble from the board while customizing their drinks – it keeps the party flowing beautifully. Just be sure to provide small plates and napkins (red ones, if you’re extra like me) since people will be grazing lifespan the board. If you enjoy sharing your food creations online, you can find me on Facebook!
For evening events, swap the daytime drinks for a signature blueberry mojito that plays off the board’s colors. The board transitions surprisingly well to cocktail hour when you add more savory items like spicy red pepper jelly over cream cheese or blue cheese-stuffed olives.
Storage & Leftovers
Okay, confession time – I’ve never actually had leftovers from this brunch board because it always gets demolished! But on the rare occasion when you need to save some, here’s how to keep everything tasting fresh:
Refrigerate properly: Carefully transfer any remaining ingredients to airtight containers (separate containers for each type – nobody wants berry-flavored cheese!). The dips, cheeses, and prepped veggies will keep for about 2 days max. Pro tip: pat everything dry with paper towels before storing to prevent sogginess.
Chips stay crunchy: Those beautiful blue corn chips? Store them separately in a paper bag at room temperature – the fridge turns them into sad, soggy messes. I usually just pack extra chips in a ziploc rather than saving the ones from the board.
Berry best practices: Washed berries tend to get mushy fast. If you must save them, spread them in a single layer on a paper towel-lined tray before refrigerating. Eat within 24 hours – they won’t keep their perfect texture much longer.
Reviving leftovers: The next day, arrange everything on a fresh board with new crackers or breadsticks. A quick spritz of water on veggies perks them right up. Cheese can come to room temperature for better flavor.
Honestly though? This spread is best enjoyed fresh – which is why I always encourage guests to “take some home!” with disposable containers. Watching people happily pack up little care packages of the leftovers is almost as fun as seeing them enjoy the board!
Frequently Asked Questions
Can I prepare any parts of the brunch board ahead of time?
Absolutely! The secret is prepping components separately, then assembling last-minute. Wash and dry berries the night before (store in paper towel-lined containers). Slice cheeses and veggies up to 3 hours ahead – just keep them wrapped tightly in the fridge. Dips can be made 1-2 days prior. The only thing you’ll wantEWORD to do right before serving is arrange everything beautifully!
What other blue foods can I use besides blueberries?
Blue corn tortilla chips are my go-to – their color pops against the other ingredients! For fancier gatherings, try blue cheese crumbles or butterfly pea flower-infused hummus (it turns the prettiest light blue). In a pinch, blackberries work too, though their color is deeper purple-blue. I’ve even used blue potato chips when I couldn’t find corn ones!
How do I keep everything fresh if serving outdoors?
Oh honey, I’ve learned this the hard way! Nestle small bowls of ice under the dips (just tuck them discreetly beneath the board). Keep a pretty kitchen towel damp with cold water to drape over cheese sections between servings. And definitely set up in shade – direct summer sun turns berries into jam faster than you can say “stars and stripes”!
Can I make this brunch board gluten-free?
Easily! Swap the breadsticks for gluten-free crackers or rice cakes. Double payments check%A0your blue corn chips – some brands contain wheat. And of course, load up on naturally gluten-free fruits and veggies. My gluten-sensitive friends always appreciate when I put little GF signs near safe items!
What’s the best way to transport this to a party?
Baking sheet to the rescue! Assemble on a rimmed sheet (lined with parchment) so nothing slides during transport. Pack chips separately in a ziploc to maintain crunch. Keep dips in their own containers with lids – assemble those parts on-site. Pro tip: bring extra berries and napkins for quick touch-ups upon arrival!
Nutritional Information
Now, I’m no dietitian, but I do like to have a general idea of what I’m feeding my friends and family! Keep in mind these numbers can swing pretty wildly based on how much of each item your guests pile onto their plates (my cousin Brad seems to think the cheese section is a personal challenge).
Here’s the rough breakdown per serving if you’re sharing this board among 8 people:
- Calories: Around 250 (but who’s counting at a party?)
- Fat: 10g (thank you, delicious cheeses!)
- Carbs: 35g (all those gorgeous fruits and chips add up)
- Protein: 8g (cheese and hummus to the rescue)
- Sugar: 15g (nature’s candy from those sweet berries)
These estimates are based on standard supermarket brands – if you splurge on artisanal cheeses or organic dips, your numbers might differ. And obviously, if someone goes heavy on the chips or light on the veggies, their personal count will vary. That’s the beauty of a grazing board – everyone gets to customize their perfect plate! If you are looking for other easy breakfast ideas, check out my breakfast category.
Tag me in your creations @BrunchBoardQueen – I live for seeing your colorful variations!